

App Submission User Guide
The Submission section guides you through the process of publishing your mobile app after your design is ready. This flow starts after you have created at…
Overview
Overview
The Submission section guides you through the process of publishing your mobile app after your design is ready. This flow starts after you have created at least one App Design and are ready to move forward with store submission.
Depending on your app status and the type of changes made, the submission process may include:
- First-time submission for a new app
- Updating content or configuration on an existing app
- Re-submitting the app when store approval is required again
This guide explains each flow and when to use it.
1. First-Time Submission Flow
When to Use This Flow
Use the first-time submission flow when:
- You have completed your first app design
- Your app has not been published to the Apple App Store or Google Play yet
- You are ready to submit your mobile app for the first time
Entry Point
The submission flow starts from App Design, after the user has successfully created and saved at least one app design.
Typical flow:
App Design → Submission → App Listing Information → Submission Account Selection → Review & Submit
Step 1: Complete Your App Design
Before starting submission, make sure your app design is ready.
You should already have:
- A completed app design
- Branding configured
- Navigation configured
- Required screens and content reviewed
- Preview checked
Once the design is ready, continue to the Submission step.
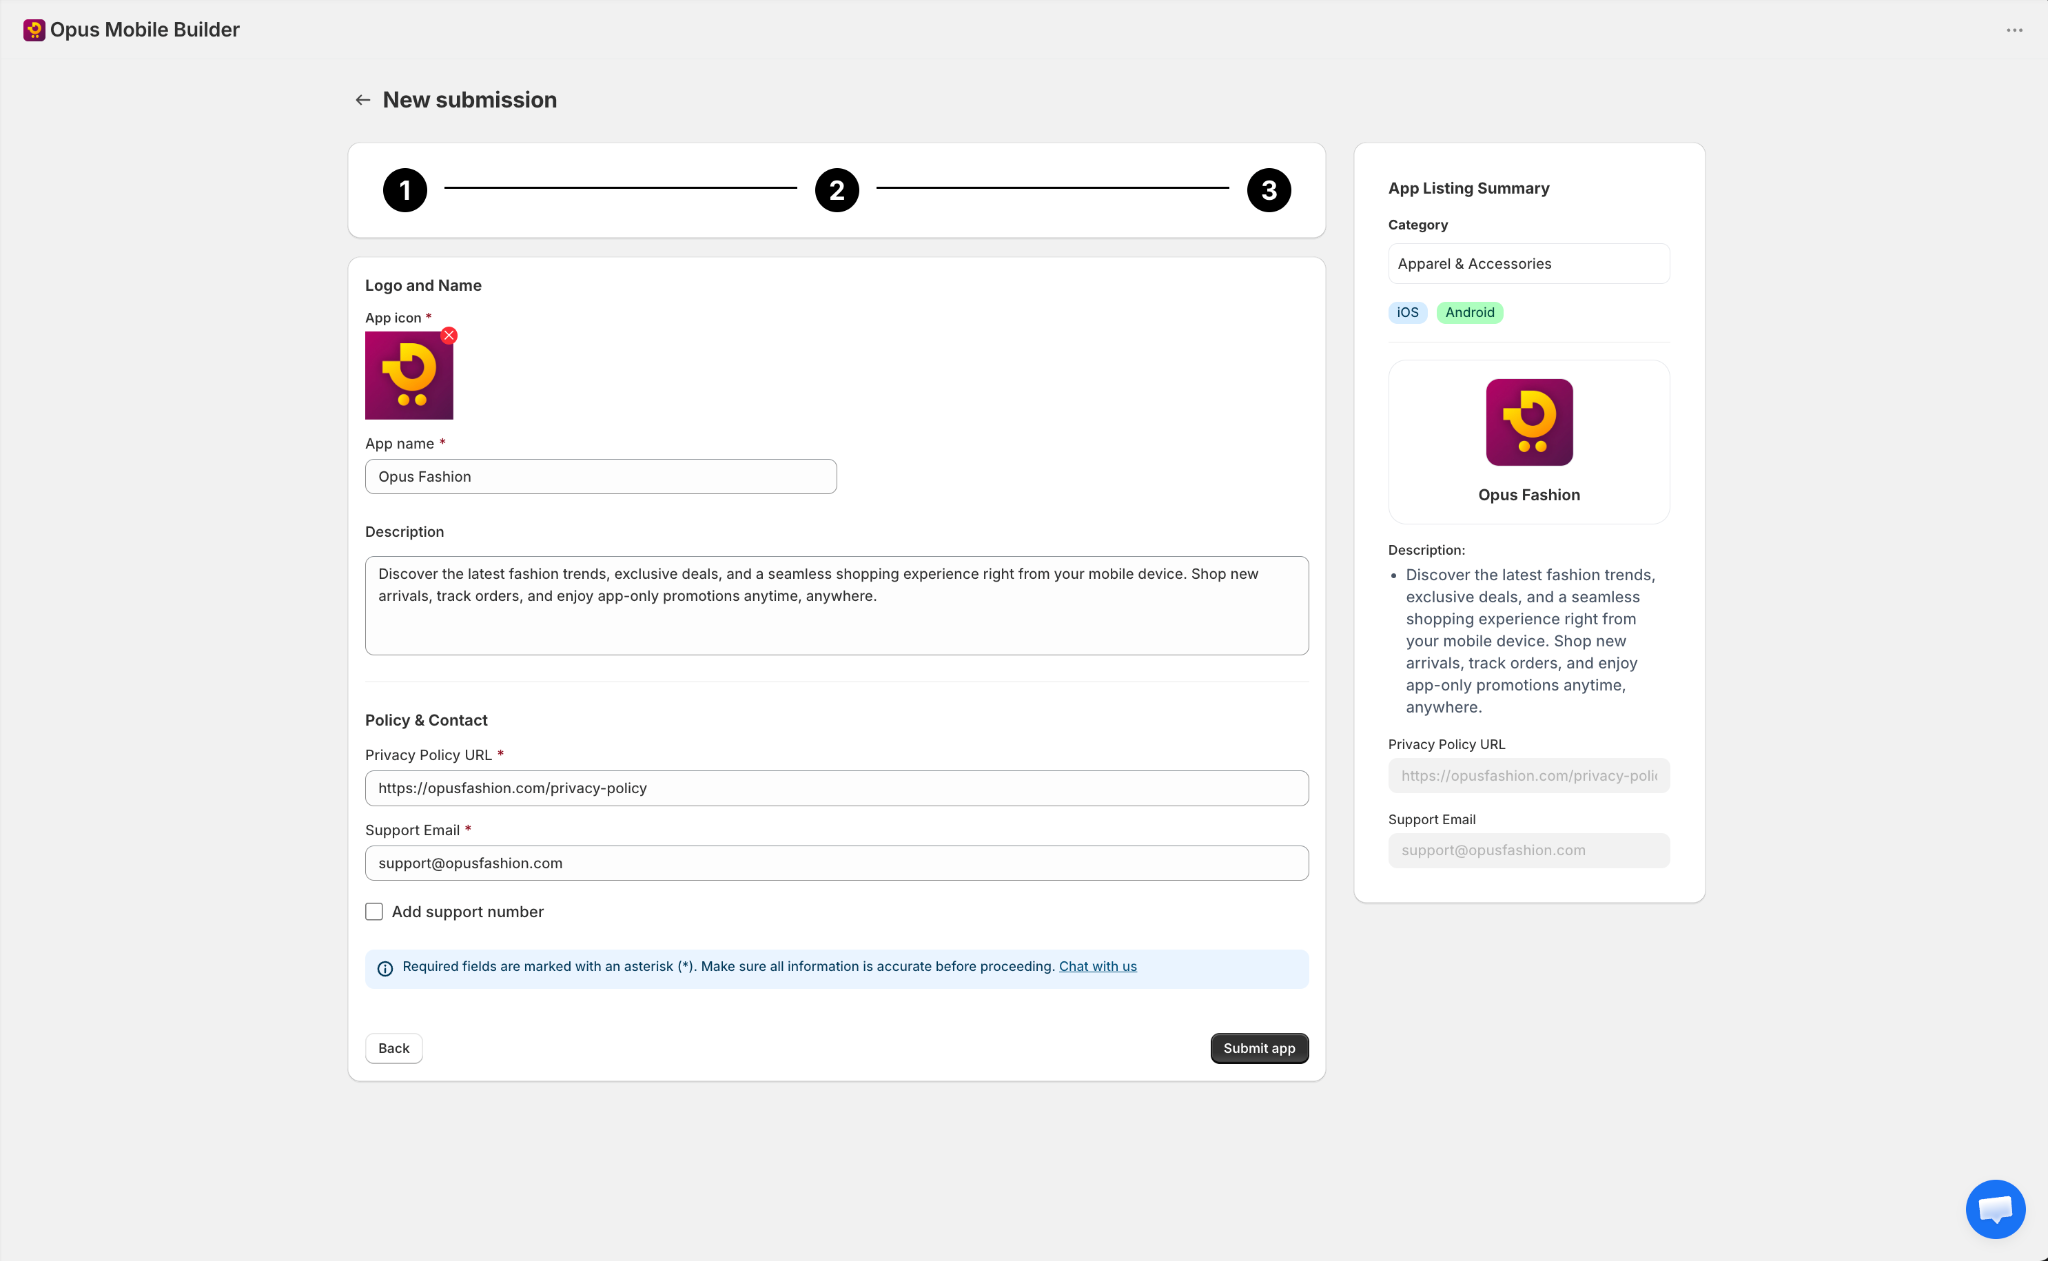
Step 2: Enter App Listing Information
In this step, you provide the store listing details required for publishing to:
- Apple App Store
- Google Play
These details are used for your app’s public store page.
Typical App Listing Information
You may need to provide:
- App name
- App subtitle or short description
- Full app description
- App icon
- Screenshots
- Promotional images if required
- Category
- Support URL
- Privacy Policy URL
- Contact information
- Version notes if applicable
Because Apple and Google may require different metadata, the system may separate the listing setup into:
- Apple Listing
- Google Listing
Best Practices
- Use clear, customer-friendly store descriptions
- Ensure your screenshots match the current app design
- Keep branding consistent across icon, screenshots, and descriptions
- Double-check spelling, formatting, and URLs
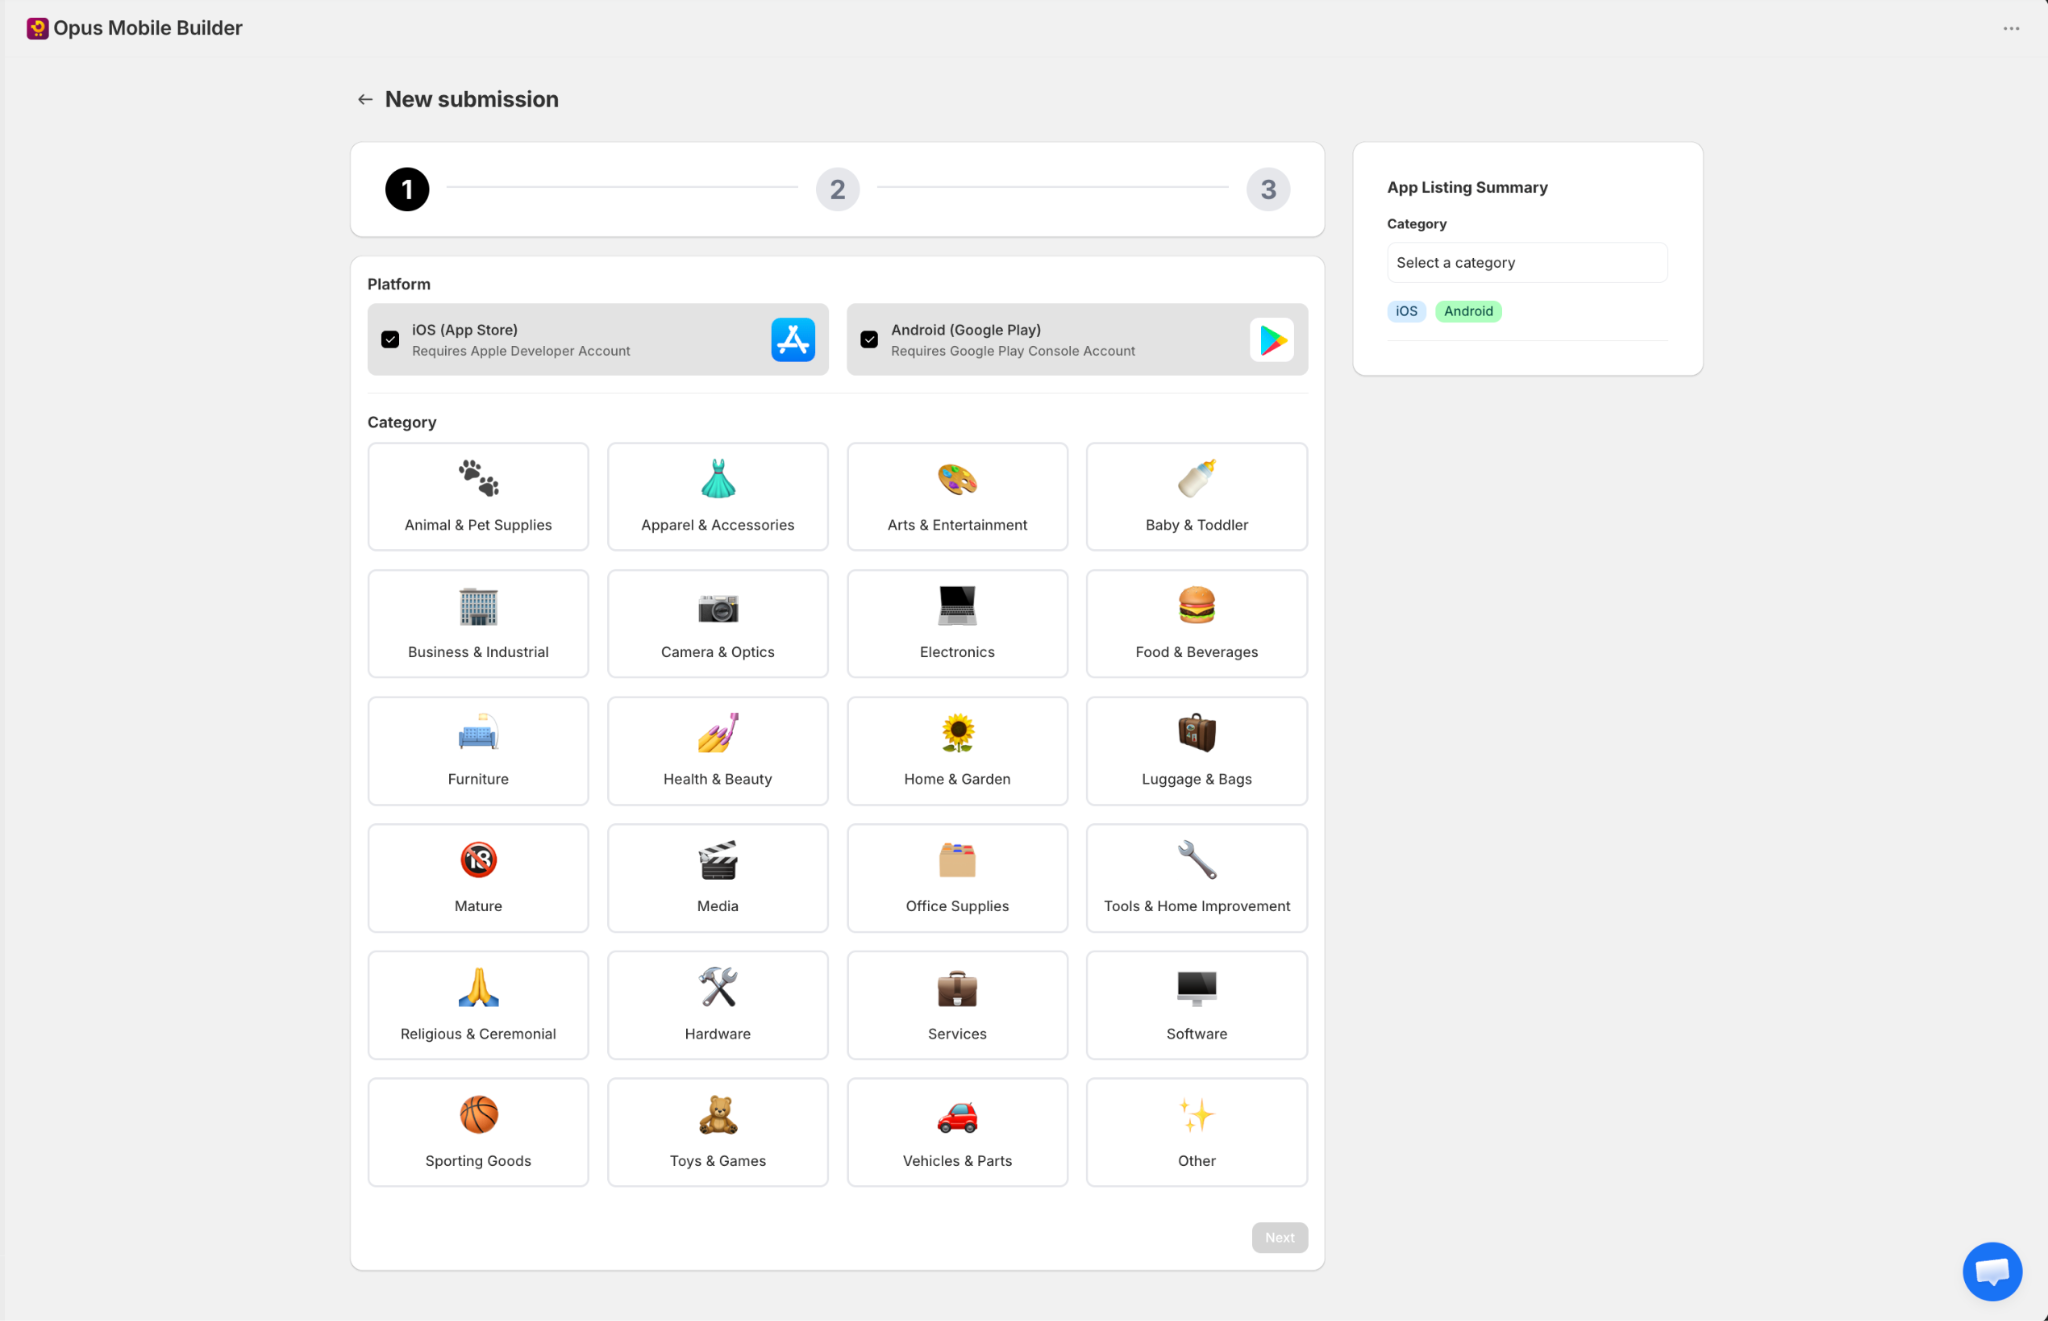
Step 3: Choose the Submission Account Type
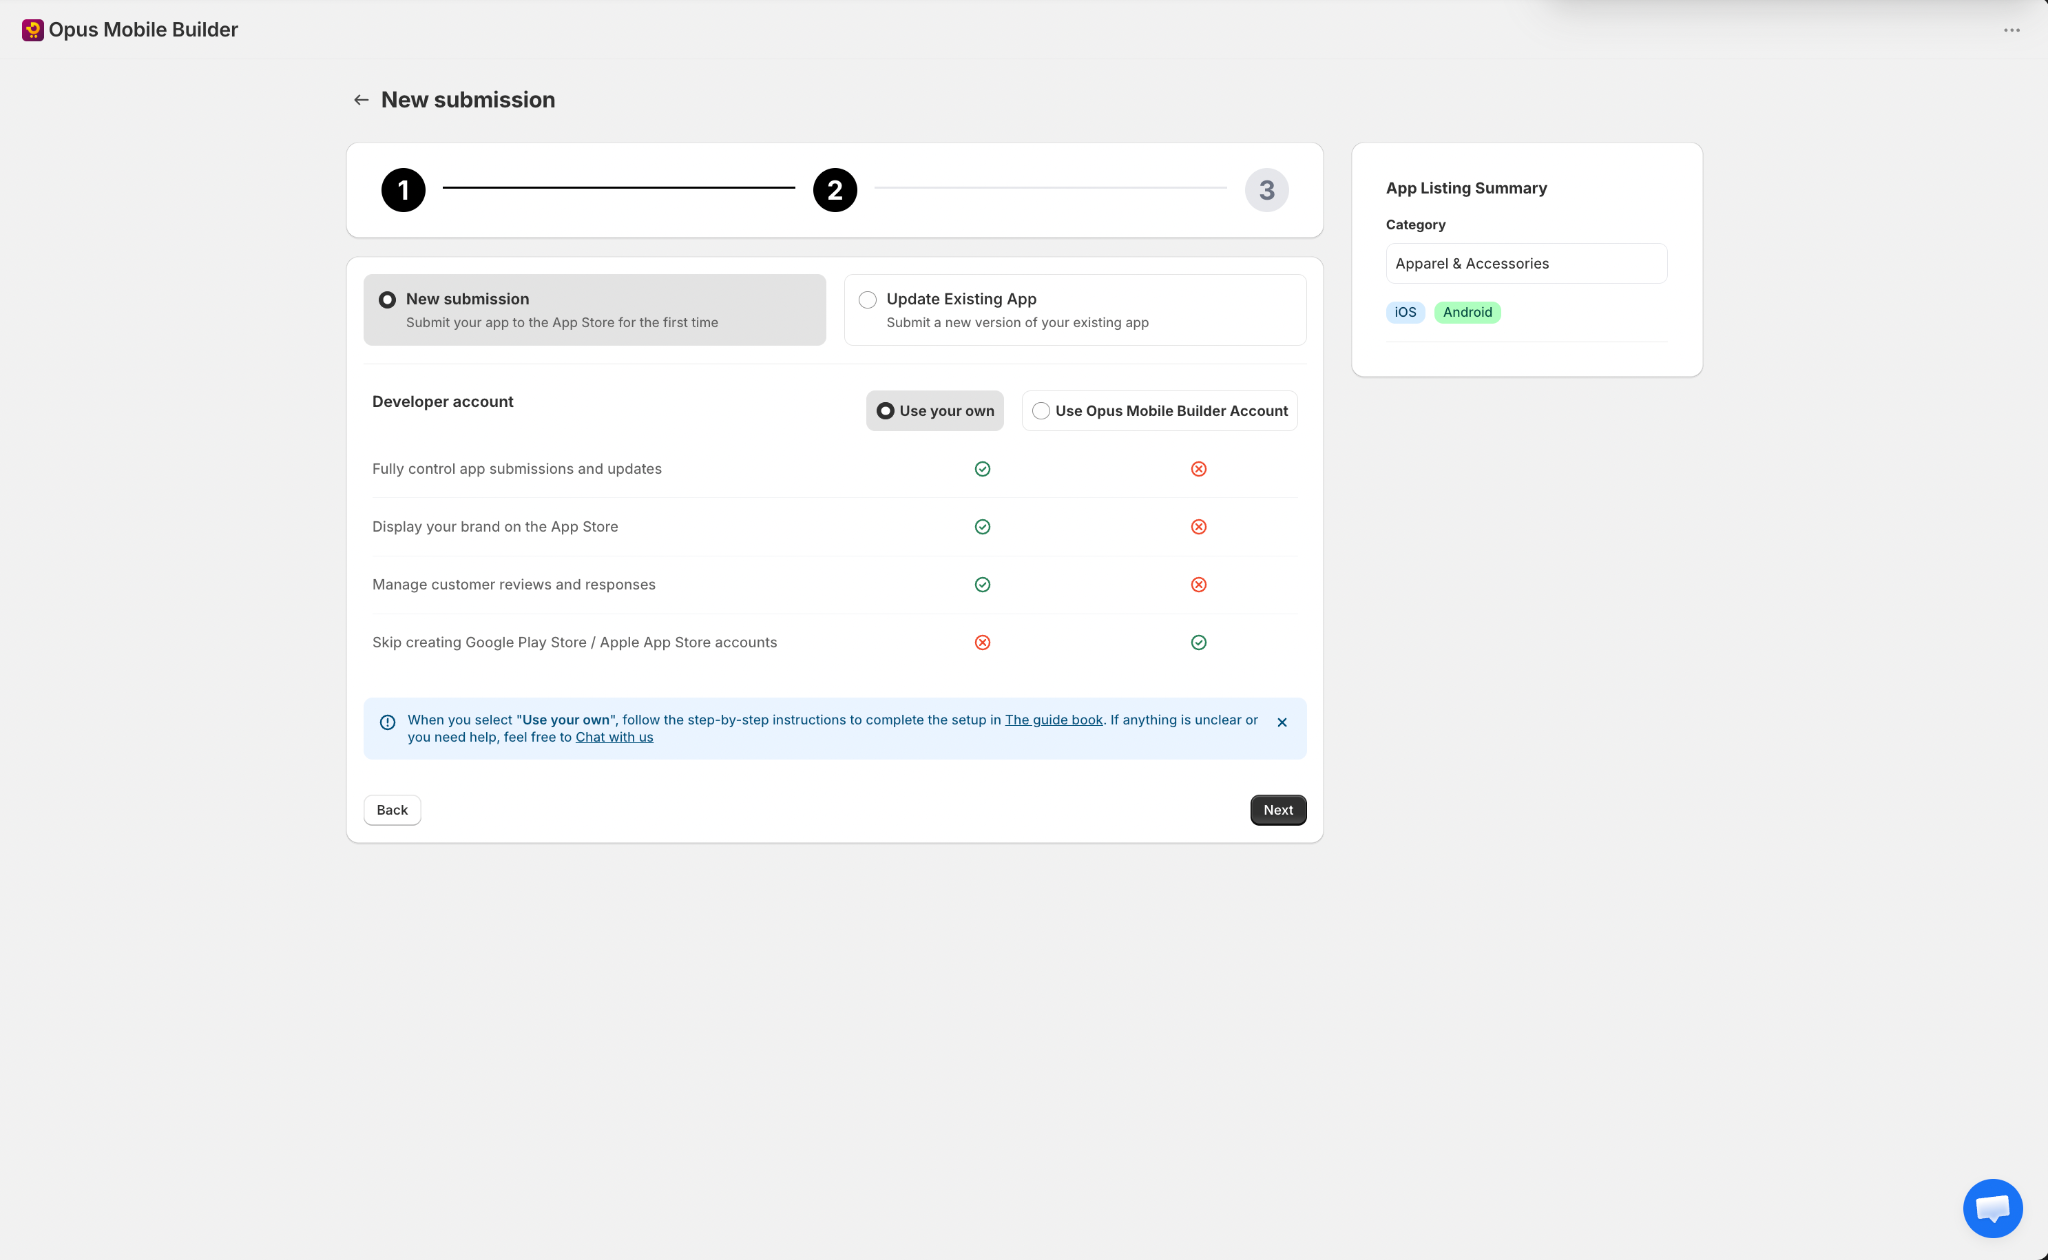
After entering the app listing information, you will choose how the app should be submitted.
There are typically two submission options:
Option A: Submit Using the User’s Own Developer Account
Choose this option when the merchant or app owner wants the app to be published under their own:
- Apple Developer account
- Google Play Developer account
Common Reasons to Use This Option
- The user wants full ownership of the app listing
- The user wants the app published under their own brand account
- The user wants direct control over app store access, billing, and release management
What May Be Required
- Developer account access or invitation
- Store credentials or permissions
- Required legal or business information already prepared in those accounts
Option B: Submit Using the Ego Mobile Builder Account
Choose this option when the app will be submitted using the platform’s managed submission account.
Common Reasons to Use This Option
- The user does not have their own developer account
- The user wants a faster or simpler publishing workflow
- Submission and publishing are managed by the Ego Mobile Builder platform
Important Note
In this setup, the submission process, ownership structure, and access model may depend on the platform’s publishing policy. Users should clearly understand which parts are managed by the platform and which parts remain editable by the user.
Step 4: Review Submission Details
Before final submission, review all information carefully.
This usually includes:
- App design selected for submission
- Listing details for Apple and Google
- Developer account method
- Branding assets
- Screenshots and icon
- Required legal links and contact details
Review Checklist
Before clicking submit, confirm that:
- The app design is finalized
- All listing information is complete
- Screenshots are correct and up to date
- The correct account option is selected
- Privacy Policy and support links are valid
- All required fields are filled in
Step 5: Submit the App
Once the review is complete, submit the app.
After submission:
- The app enters the publishing workflow
- The status may change to something like In Review, Submitted, or Processing
- Additional action may still be required depending on the selected account type and store requirements
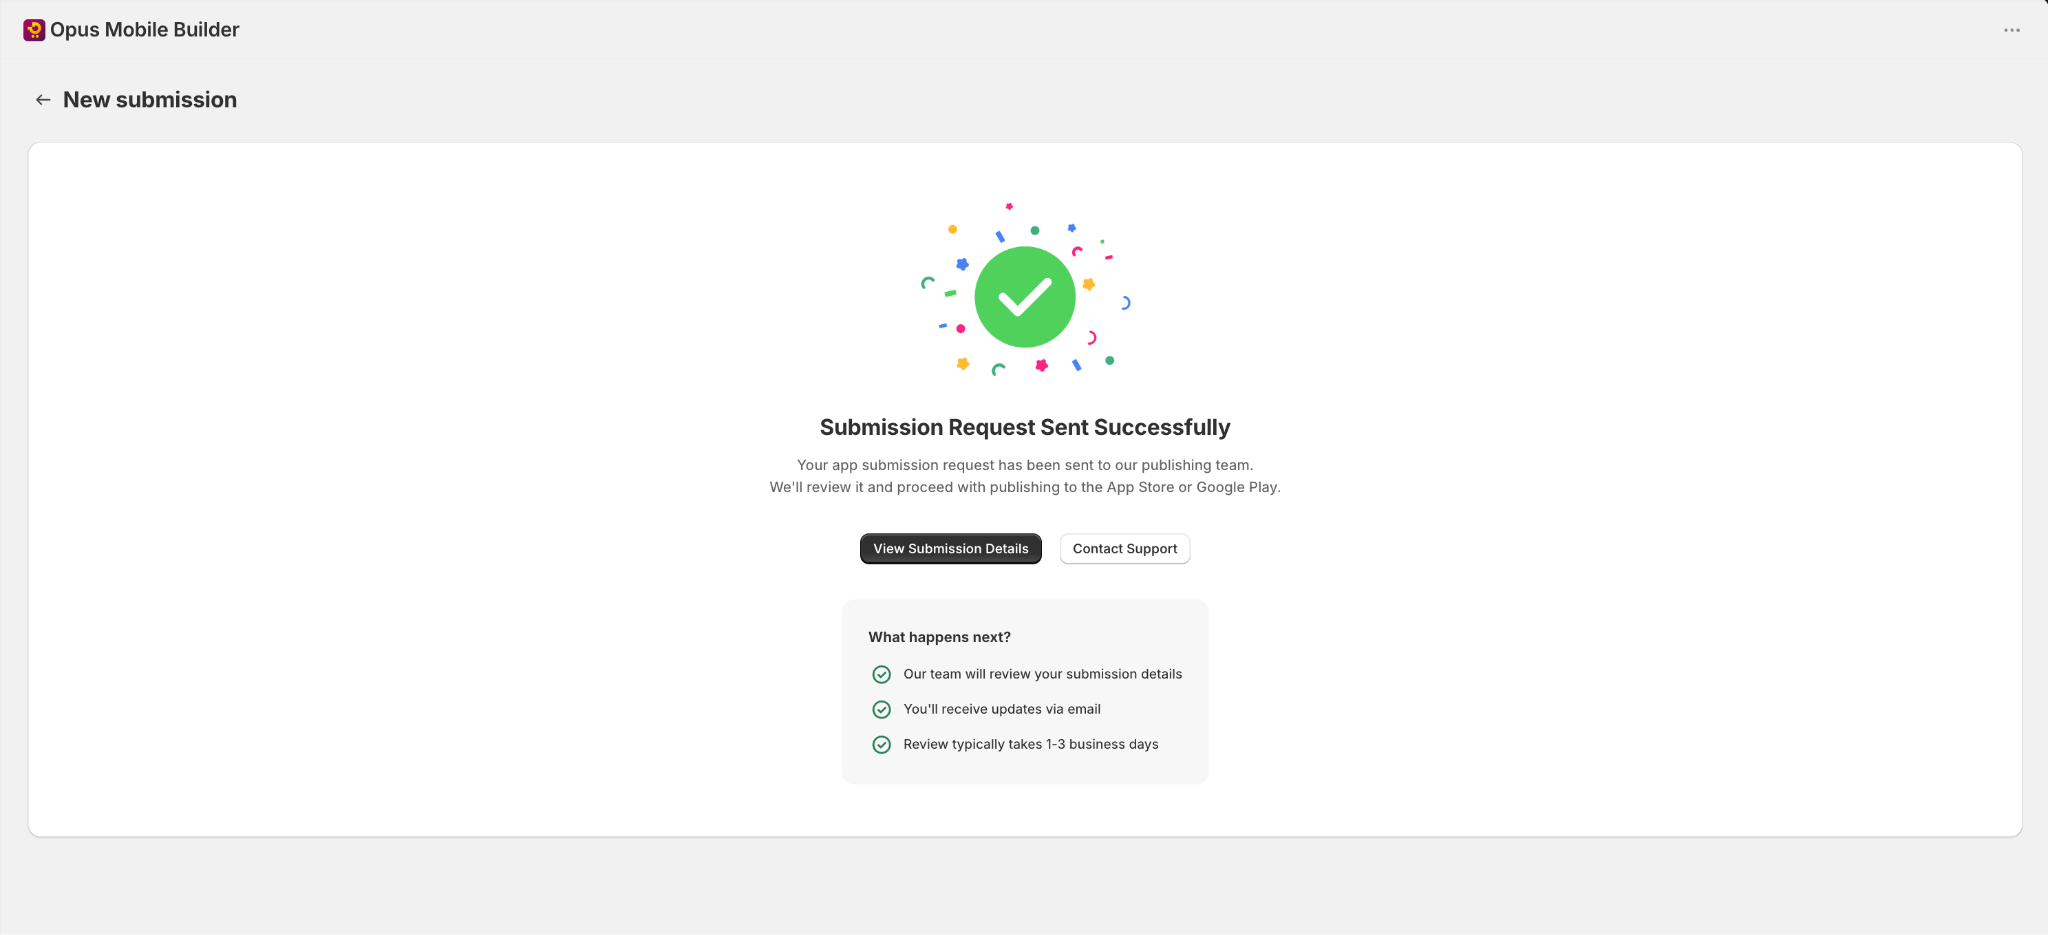
Expected Outcome
After the first submission:
- The app is prepared and sent for store submission
- Apple App Store and Google Play review processes begin
- The user can track the submission status from the platform
2. Update Changes on the Ego Mobile Builder
When to Use This Flow
Use the update flow when your app is already published and you want to make changes to the live app.
Examples include:
- Updating app design content
- Changing banners or branding assets
- Updating navigation structure
- Adjusting app listing content
- Releasing feature improvements or fixes
Not all updates require a full re-submission to the app stores. Some changes may be applied directly, while others may require a new review.
Typical Update Flow
Existing Published App → Make Changes → Review Change Type → Apply Update or Submit New Version
Step 1: Make Your Changes
The user updates one or more parts of the app, such as:
- App Design
- Branding
- Navigation
- Notification-related display content
- App listing information
- App configuration
Step 2: Determine Whether the Change Requires Submission
After changes are made, the platform will typically determine whether the update can be:
- Published directly without store re-submission, or
- Sent through a new submission flow
Changes That May Not Require Re-Submission
These often include content or configuration changes managed remotely, depending on platform architecture.
Examples may include:
- Home screen content updates
- Promotional banners
- Collection arrangement
- Some text or image changes
- Certain navigation or layout adjustments
Changes That May Require Re-Submission
These usually involve app package changes, store metadata changes, permissions, or native app-level updates.
Examples may include:
- Native feature changes
- App binary update
- Permission changes
- App icon changes
- Splash screen changes in some cases
- Store listing fields that require new store review
- SDK or integration updates
Step 3: Apply the Update
If the change does not require re-submission:
- Save and publish the update
- The updated content may appear in the app without a new store release, depending on app architecture
If the change does require re-submission:
- Continue to the re-submission flow described below
Best Practices for Updates
- Review the type of change before publishing
- Keep screenshots and listing metadata aligned with the app’s current design
- Test updates in preview before release
- Avoid making multiple major changes at once unless necessary
3. Re-Submission Flow for Changes That Require a New Submission
When to Use This Flow
Use the re-submission flow when changes made to the app require a new store submission and approval.
This usually happens when the update affects areas that Apple or Google need to review again.
Examples may include:
- Updating the app binary
- Changing app-level permissions
- Modifying core native functionality
- Updating important store listing assets
- Releasing a new app version
Typical Re-Submission Flow
Published App → Make Changes → System Detects Submission Required → Review Updated Information → Submit New Version
Step 1: Identify Submission-Required Changes
After editing the app, the system may mark the update as requiring re-submission.
The user should see that the current update cannot go live immediately and must go through the submission process again.
Step 2: Review the Updated Submission Information
Before re-submitting, review all affected details.
This may include:
- Updated design assets
- Updated screenshots
- Updated descriptions or release notes
- New app version information
- Account and publishing details
If the change affects only one store, the system may still require confirmation for both store configurations depending on the publishing setup.
Step 3: Confirm Submission Method
The submission method may remain the same as the original setup:
- User’s own developer account
- Ego Mobile Builder account
Make sure the selected account is still valid and properly connected before re-submitting.
Step 4: Submit the Updated Version
Once everything is reviewed, submit the updated version.
After submission:
- The new version enters store review
- The current live version usually remains available until the new version is approved and released
- Status tracking should show the latest submission stage
Possible Statuses During Re-Submission
Depending on the platform, statuses may include:
- Draft
- Ready for Submission
- Submitted
- In Review
- Approved
- Rejected
- Requires Changes
- Published
Recommended Submission Workflow
A recommended workflow is:
- Finalize App Design
- Complete Branding and Navigation
- Test using Ego Live Preview
- Enter Apple and Google listing information
- Choose the submission account type
- Submit the app
- For future changes, check whether the update needs:
- direct publishing, or
- re-submission
This helps reduce publishing errors and keeps the submission process organized.
Common Scenarios
Scenario 1: First Launch of a New App
- User creates first app design
- User enters store listing details
- User chooses developer account type
- User submits the app for the first time
Scenario 2: Updating Banner Content Only
- User edits home screen banner or promotional section
- System checks update type
- If allowed by architecture, update may go live without store re-submission
Scenario 3: Updating Native App Features
- User enables a feature that changes the app package or native behavior
- System requires a new submission
- User reviews updated metadata and submits a new version
Best Practices for Submission
- Complete and review app design before starting submission
- Prepare Apple and Google listing assets in advance
- Use accurate, polished store descriptions
- Keep screenshots updated after major UI changes
- Understand which submission account type you are using
- Review whether a change is content-only or version-impacting before publishing
Common Issues and What to Check
Submission cannot proceed
Check whether:
- At least one app design has been created
- Required listing fields are completed
- Required images and URLs are provided
- The selected submission account is properly connected
Update does not go live immediately
Check whether:
- The change requires store re-submission
- The current update is waiting for review
- The latest version has already been submitted
Re-submission is required unexpectedly
This may happen when the change affects:
- app package behavior
- permissions
- native components
- store-managed metadata or assets
Review the update scope and proceed through the re-submission flow.
\
Still need help?
Our support team is available 24/7. Contact support →