

Add a Kiwi Size Chart
Show the size charts you already built in Kiwi on the product screen of your mobile app. Connect the integration, drag the component onto the product screen, style the row, and publish.
Overview
The Kiwi Size Chart component shows the size charts you already built in Kiwi Size Chart & Recommender on the product screen of your mobile app.
Shoppers tap a Size chart row on the product screen and the chart Kiwi matched to that product opens — the same chart your online store uses. You do not re-enter any sizing data in Ego Mobile Builder.
Use this component for:
Apparel and footwear
Jewellery and accessories with sizes
Any catalogue where returns come from the wrong fit
Kiwi also decides when the row is useful: a product with no matching chart hides the row automatically, so you do not maintain a second set of rules here.
Before you start
Check all four, in this order. Most "the button never appears" cases are one of them.
Kiwi Size Chart & Recommender is installed in your Shopify store.
Your charts are published in Kiwi. A draft chart is not served to the app.
Each chart is assigned to the products that need it. Kiwi matches a chart by collection, tag, vendor or product type — assignment by collection is the default.
Those collections are published to your mobile app's sales channel. The app reads a product's collections through the sales channel it is published on; a collection that is not published there is invisible to the app, so Kiwi never finds a match — even though the chart shows correctly on your online store.
Kiwi Size Chart is available on the Growth plan and above.
Step 1: Connect Kiwi in Ego Mobile Builder
From Shopify Admin, open Ego Mobile Builder.
Go to Integrations.
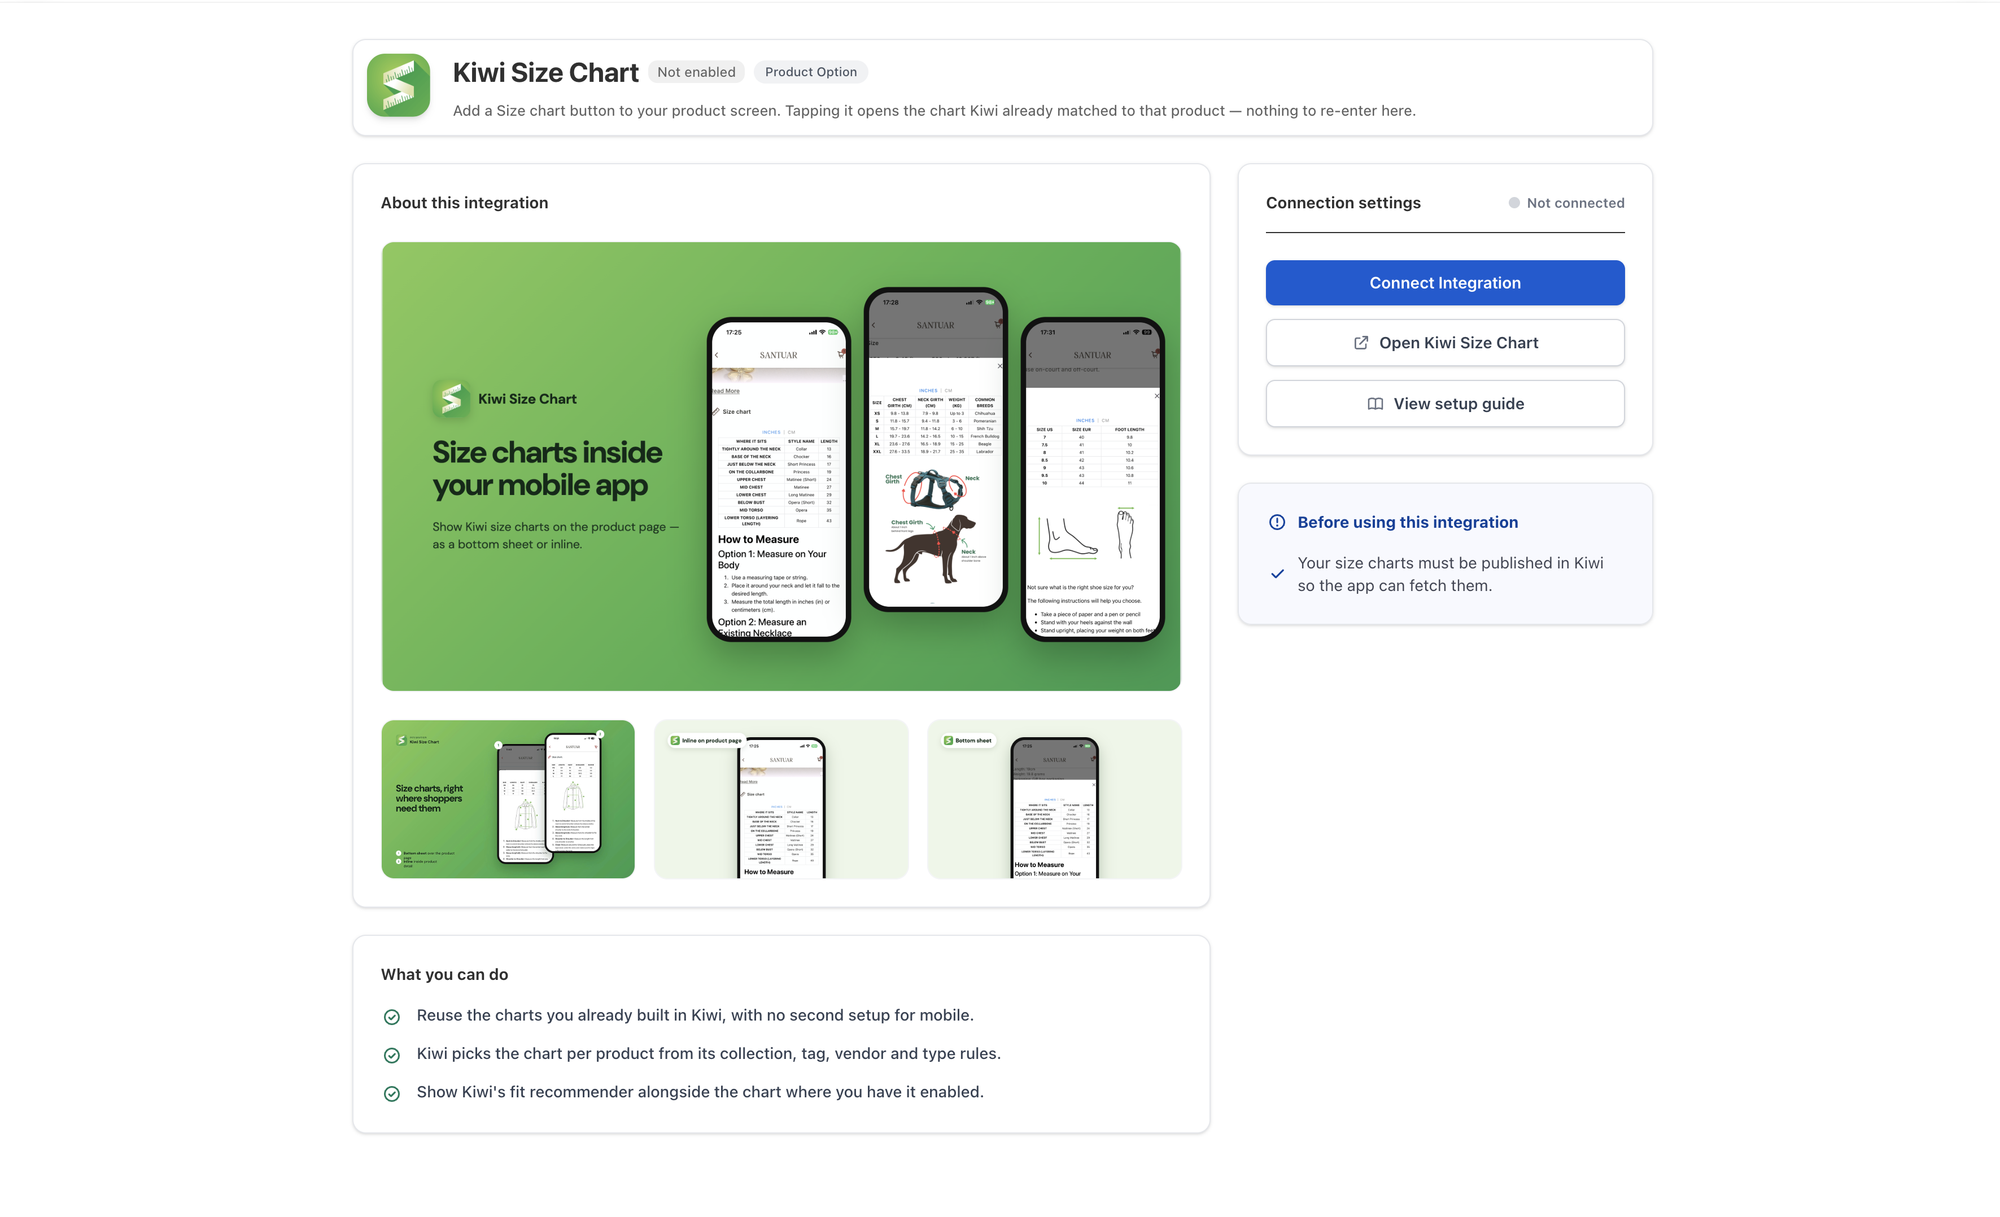
Open Kiwi Size Chart.
Click Connect Integration.
There is no API key to paste. Kiwi does not issue per-store tokens — connecting is the whole setup, and it is what tells the app it may serve your charts.
The Open Kiwi Size Chart button next to it takes you to the Kiwi app, where you install it, build your charts and assign them to collections.
Step 2: Add the component
Go to App Design and open the design you want to edit.
Select the Product Detail screen. Kiwi Size Chart is only available there.
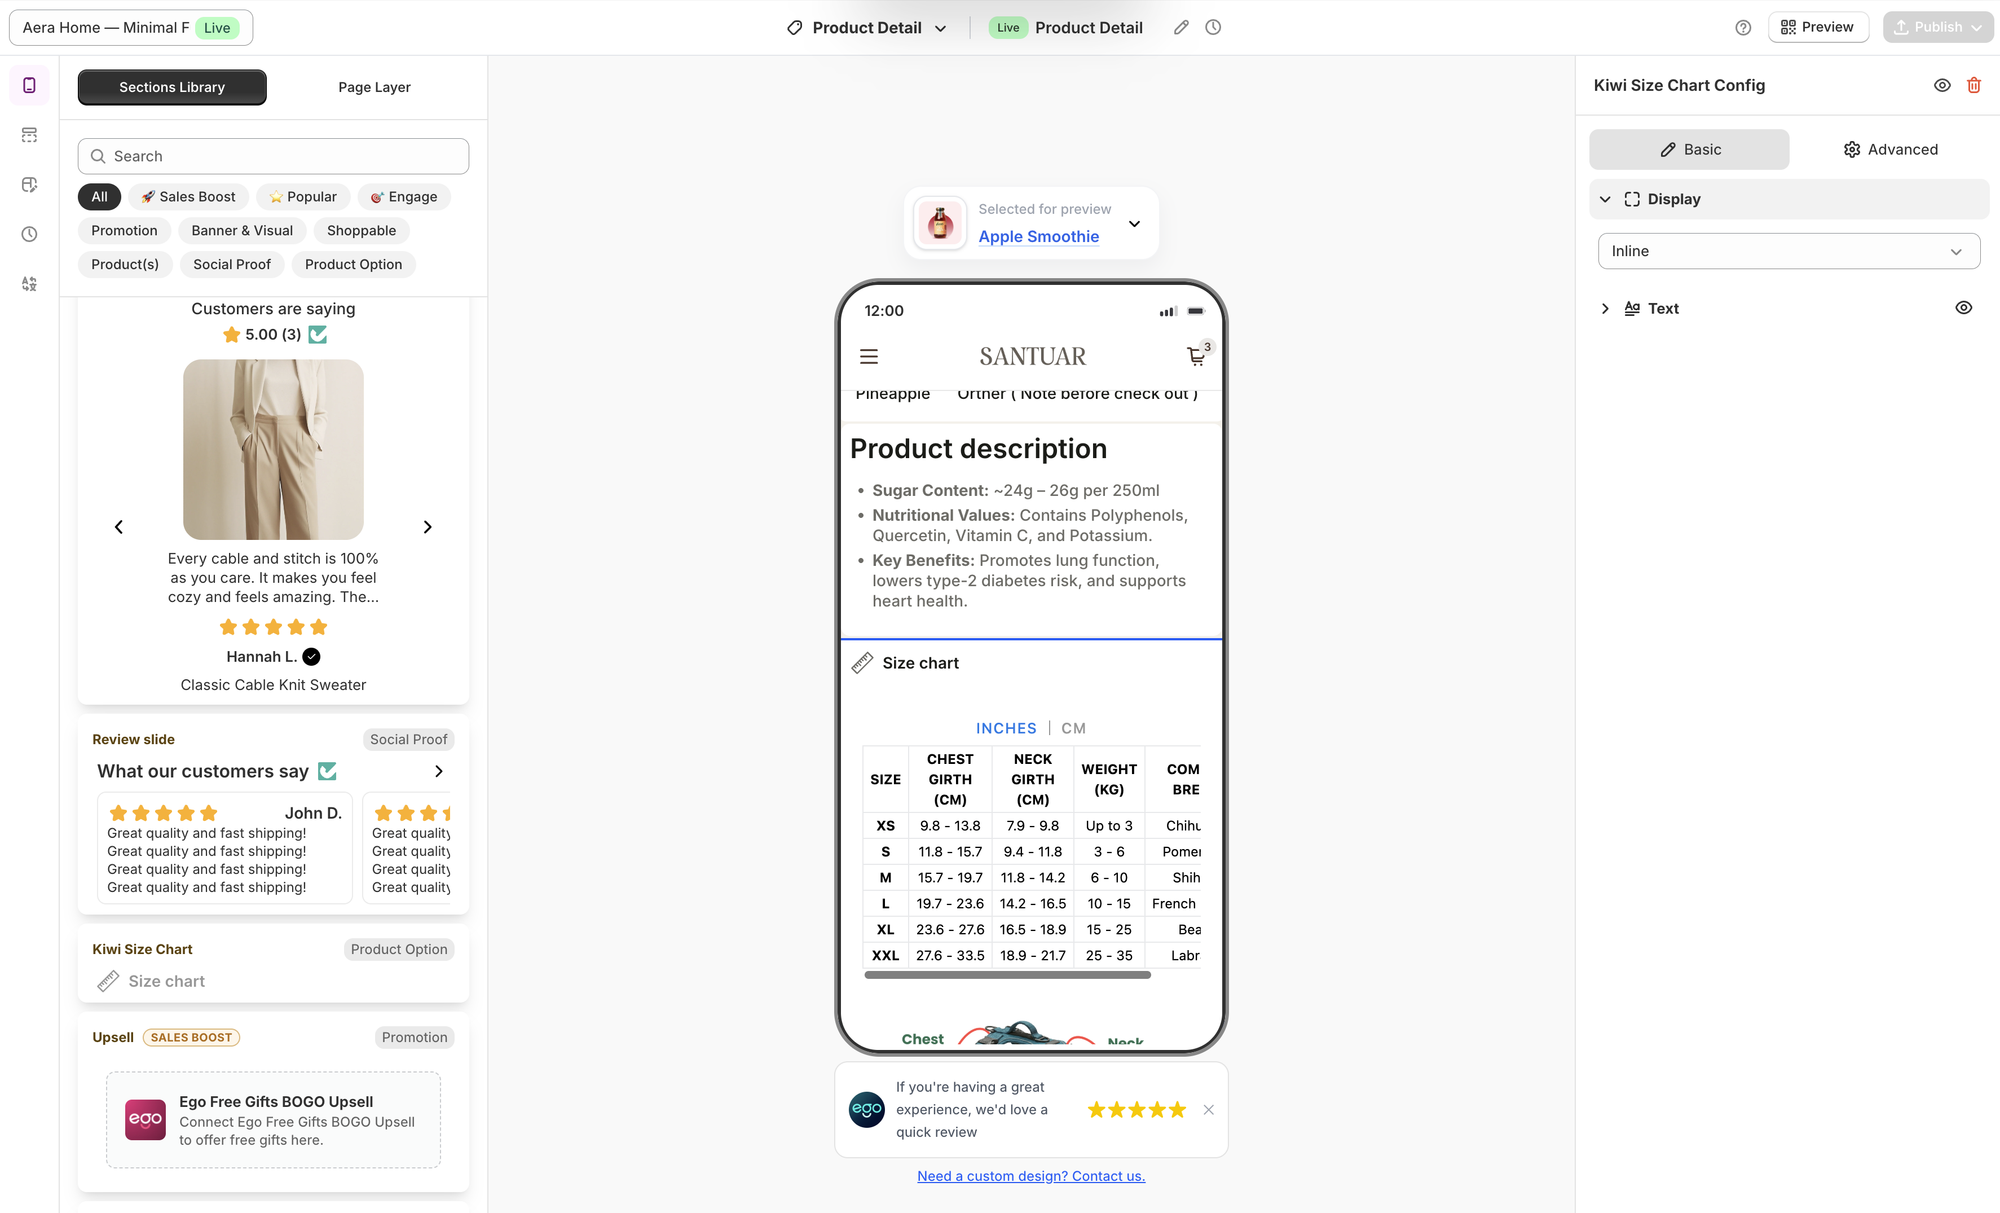
Open Sections Library.
Search for Kiwi Size Chart, or filter by the Product Option tag.
Drag the component to the preferred position.
Most stores place it directly under the variant selector, above Add to cart — that is where shoppers look for it before they commit to a size.
You can add one Kiwi Size Chart per product screen. A second one would open the same chart, so the library locks the component once the screen already has it.
Step 3: Choose how the chart opens
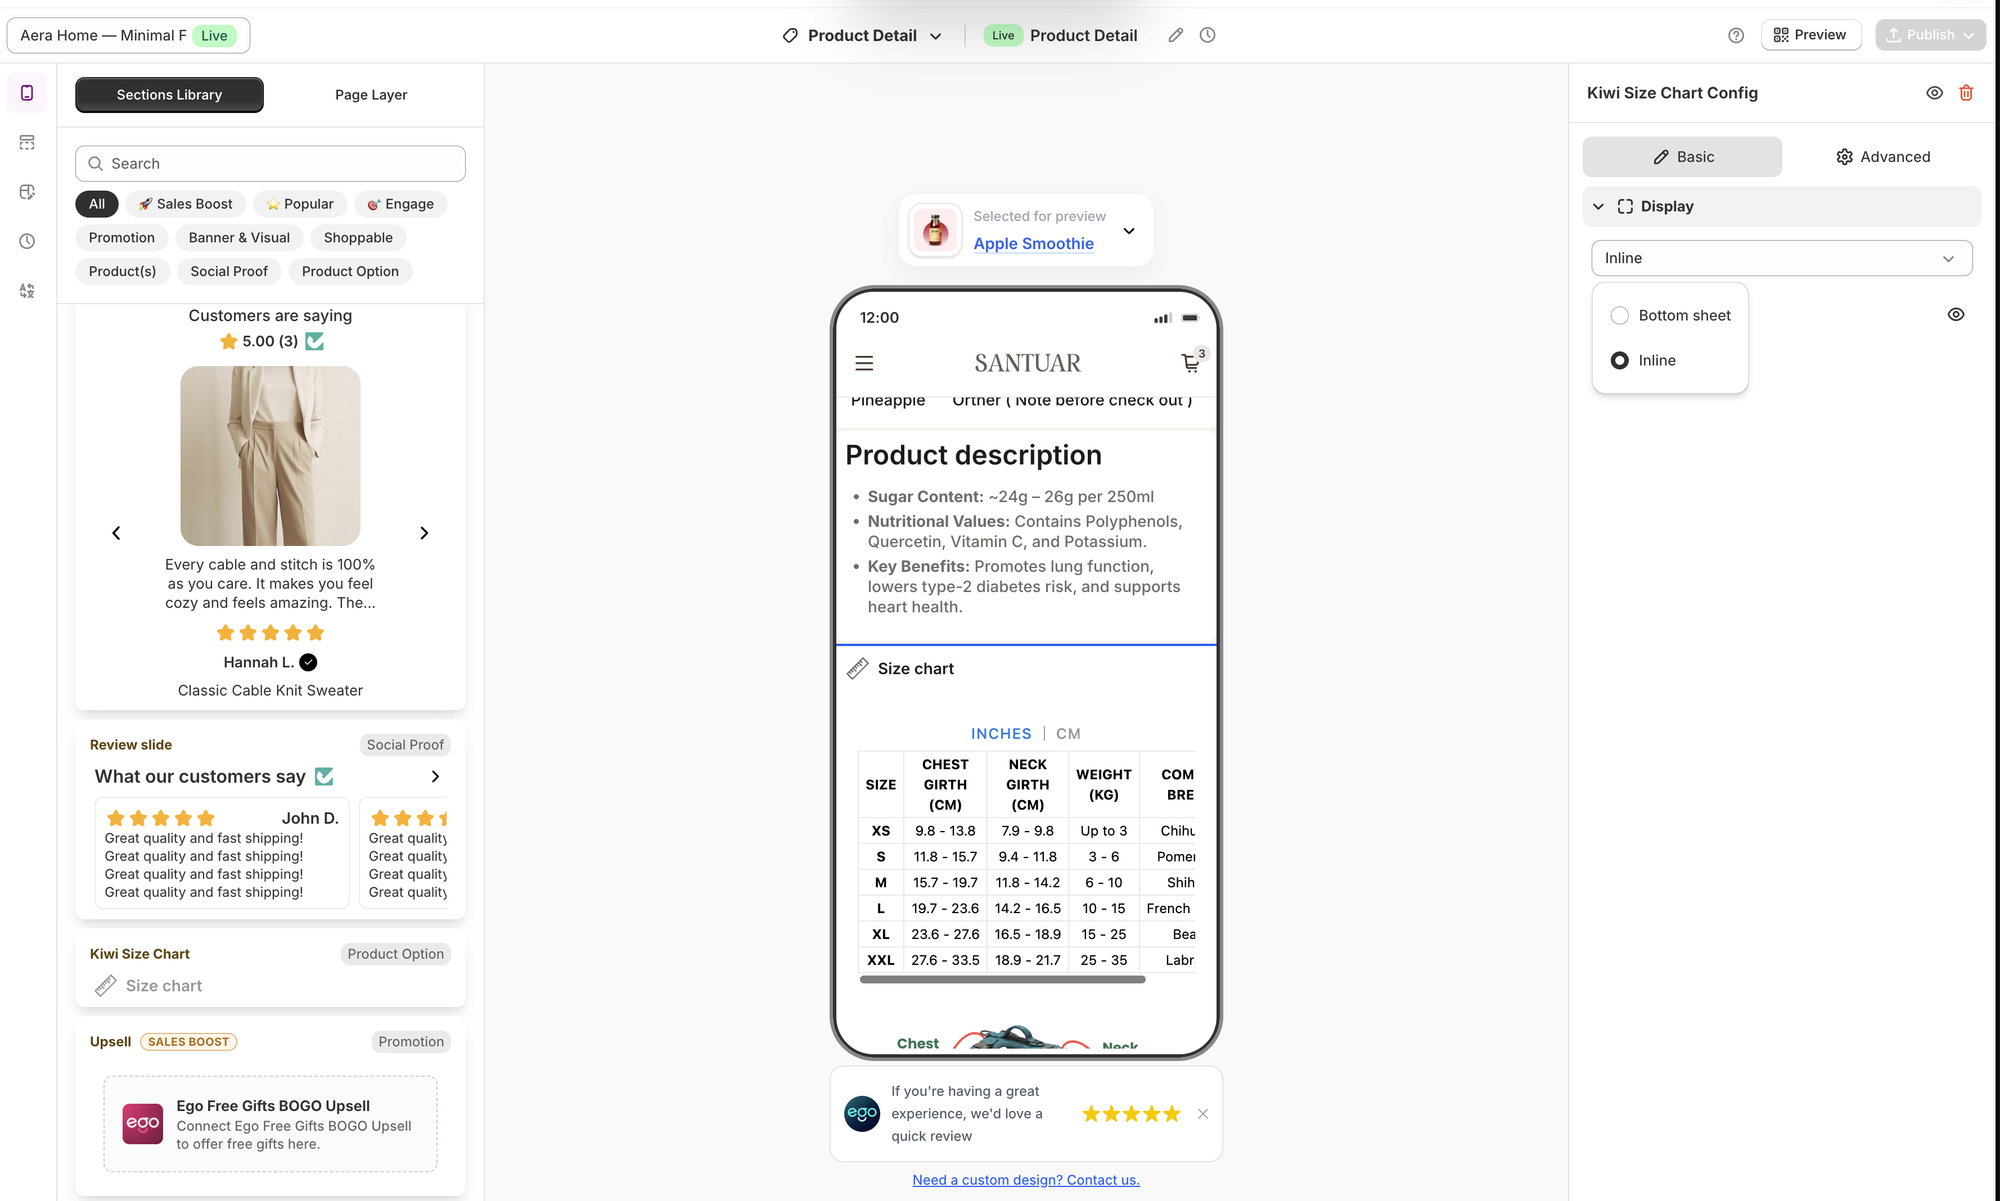
Select the component to open its configuration panel, then set Layout under Display.
Bottom sheet (default) — the product screen shows a compact row, and the chart slides up over it when tapped. Recommended: Kiwi charts are full pages, and this keeps Add to cart in reach.
Inline — the chart is rendered in the page itself. Use it only for short charts; a long one pushes everything below it far down the screen.
Whichever you pick, the editor preview always lays the chart out flat under the row, so you can check Kiwi matched the right one without opening anything.
Step 4: Customize the row
Everything you can style here belongs to the row, not the chart. The chart itself is rendered by Kiwi and follows what you set up in the Kiwi app.
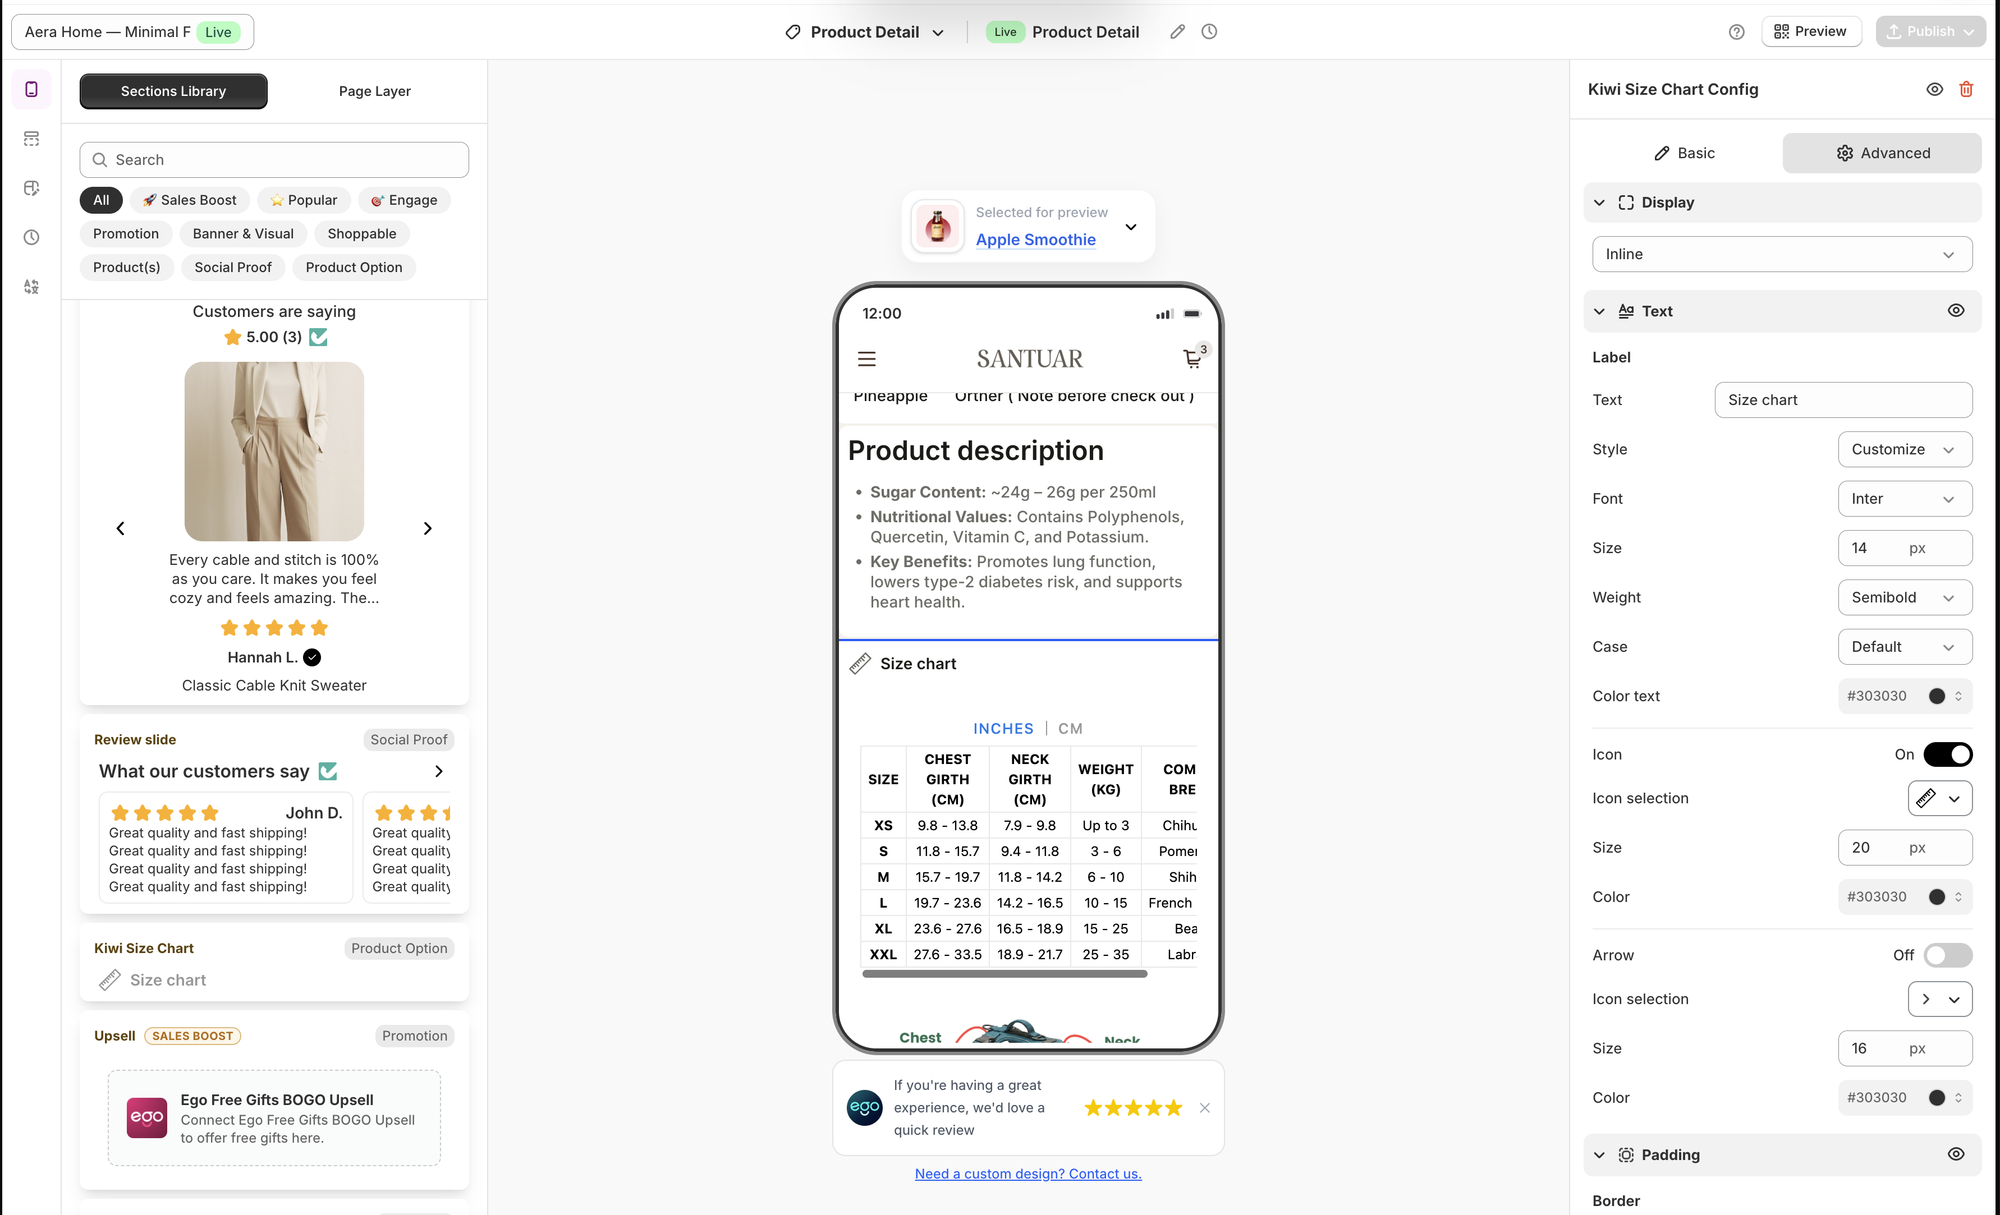
On the Basic tab, under Text:
Label — the wording on the row. "Size chart" by default.
Icon — the ruler icon, its colour and size. Turn it off for a text-only row.
Arrow — off by default. Turn it on to signal that the row opens something.
The Advanced tab adds font, text size, weight and letter case, plus a Padding section for the background colour, corner radius, borders and spacing around the row.
The row is left-aligned by design: the label sits on the left and the arrow stays pinned to the right edge, so alignment is not configurable.
Step 5: Preview and publish
Changes appear immediately in the mobile preview while you configure the component, and the preview loads the real Kiwi chart for whichever product is set in Selected for preview above the phone. Switch that product to check the matching on several of them before you publish.
If Kiwi has nothing for the selected product, the preview says Kiwi has no size chart for this product instead of showing a chart. That is the fastest way to tell a matching problem from a styling one.
Before publishing, check:
The row is readable against the product screen background.
Its position relative to the variant selector and Add to cart.
The label wording matches the rest of your app.
A product that should have a chart, and one that should not.
When ready:
Click Save.
Test on a device with Ego Live Preview, where the chart opens the way shoppers will see it.
Click Publish to make the changes available in your app.
Troubleshooting
The component is greyed out in the editor
Kiwi is not connected. Open Integrations → Kiwi Size Chart and click Connect. You can still place the component while disconnected — it stays inactive until you connect.
The row does not appear in the app on any product
Confirm the design was saved and published, and that the component is on the Product Detail screen rather than another screen.
The row does not appear on one specific product
Kiwi found no chart for it. Set that product under Selected for preview in the editor — the preview will say so — then check in Kiwi which collection, tag, vendor or type the chart is assigned to, and that the product matches.
The chart works on my online store but not in the app
This is almost always an unpublished collection. The chart is assigned to a collection that is not published to your mobile app's sales channel, so the app cannot see the product is in it. Publish the collection to that channel and check again.
I cannot find Kiwi Size Chart under Integrations
It is available on the Growth plan and above. Check your plan under Pricing, or contact support.
The chart opens but is empty
The chart exists but is not published in Kiwi. Publish it there, then reopen the product in the app.
Frequently Asked Questions
1. Do I have to rebuild my size charts for the app?
No. The app opens the charts you already built in Kiwi. Editing a chart in Kiwi updates the app with no change on this side.
2. Do I need an API key?
No. Kiwi does not issue per-store keys. Clicking Connect Integration is the whole setup.
3. Can I put the size chart on another screen?
No. It is tied to the product screen, because the chart it opens depends on which product is shown.
4. Can I add more than one on a product screen?
No. Both would open the same chart, so the Sections Library locks the component once one is placed.
5. Does the Kiwi fit recommender work in the app?
Yes, where you have it enabled in Kiwi. It is part of what Kiwi renders, so it appears alongside the chart.
6. Why does the row disappear on some products?
That is intended. Kiwi hides it on products it has no chart for, so shoppers never open an empty chart.
Still need help?
Our support team is available 24/7. Contact support →