

Prepare Pixel
Learn how to create a TikTok Pixel in TikTok Events Manager. Once created, you'll use the Pixel ID to connect it with Ego TikTok Pixel and start tracking website events.
Overview
Before connecting a TikTok Pixel to Ego Pixel, you need to create a TikTok Pixel in TikTok Events Manager.
In this guide, you will:
Access TikTok Events Manager.
Create a new TikTok Pixel.
Get your Pixel ID.
Confirm that your Pixel is ready for connection.
Create Your TikTok Pixel
Step 1: Access TikTok Events Manager
Log in to your TikTok for Business account.
Open TikTok Ads Manager.
Go to Tools → Events.
Click Connect data source.
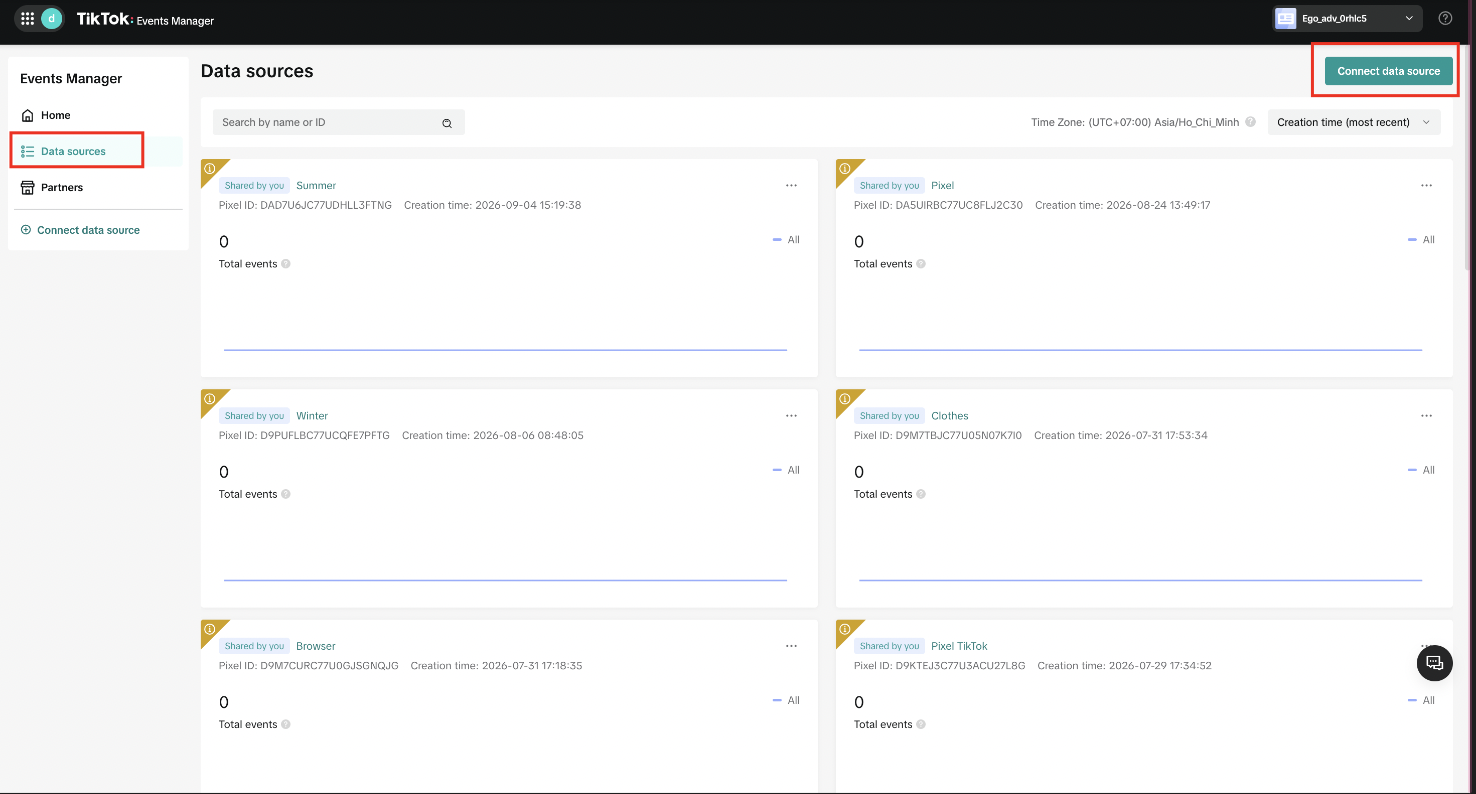
TikTok's current setup flow uses Events Manager to create and manage website data connections.
Step 2: Choose Web as Your Data Source
Select Web.
Click Next.
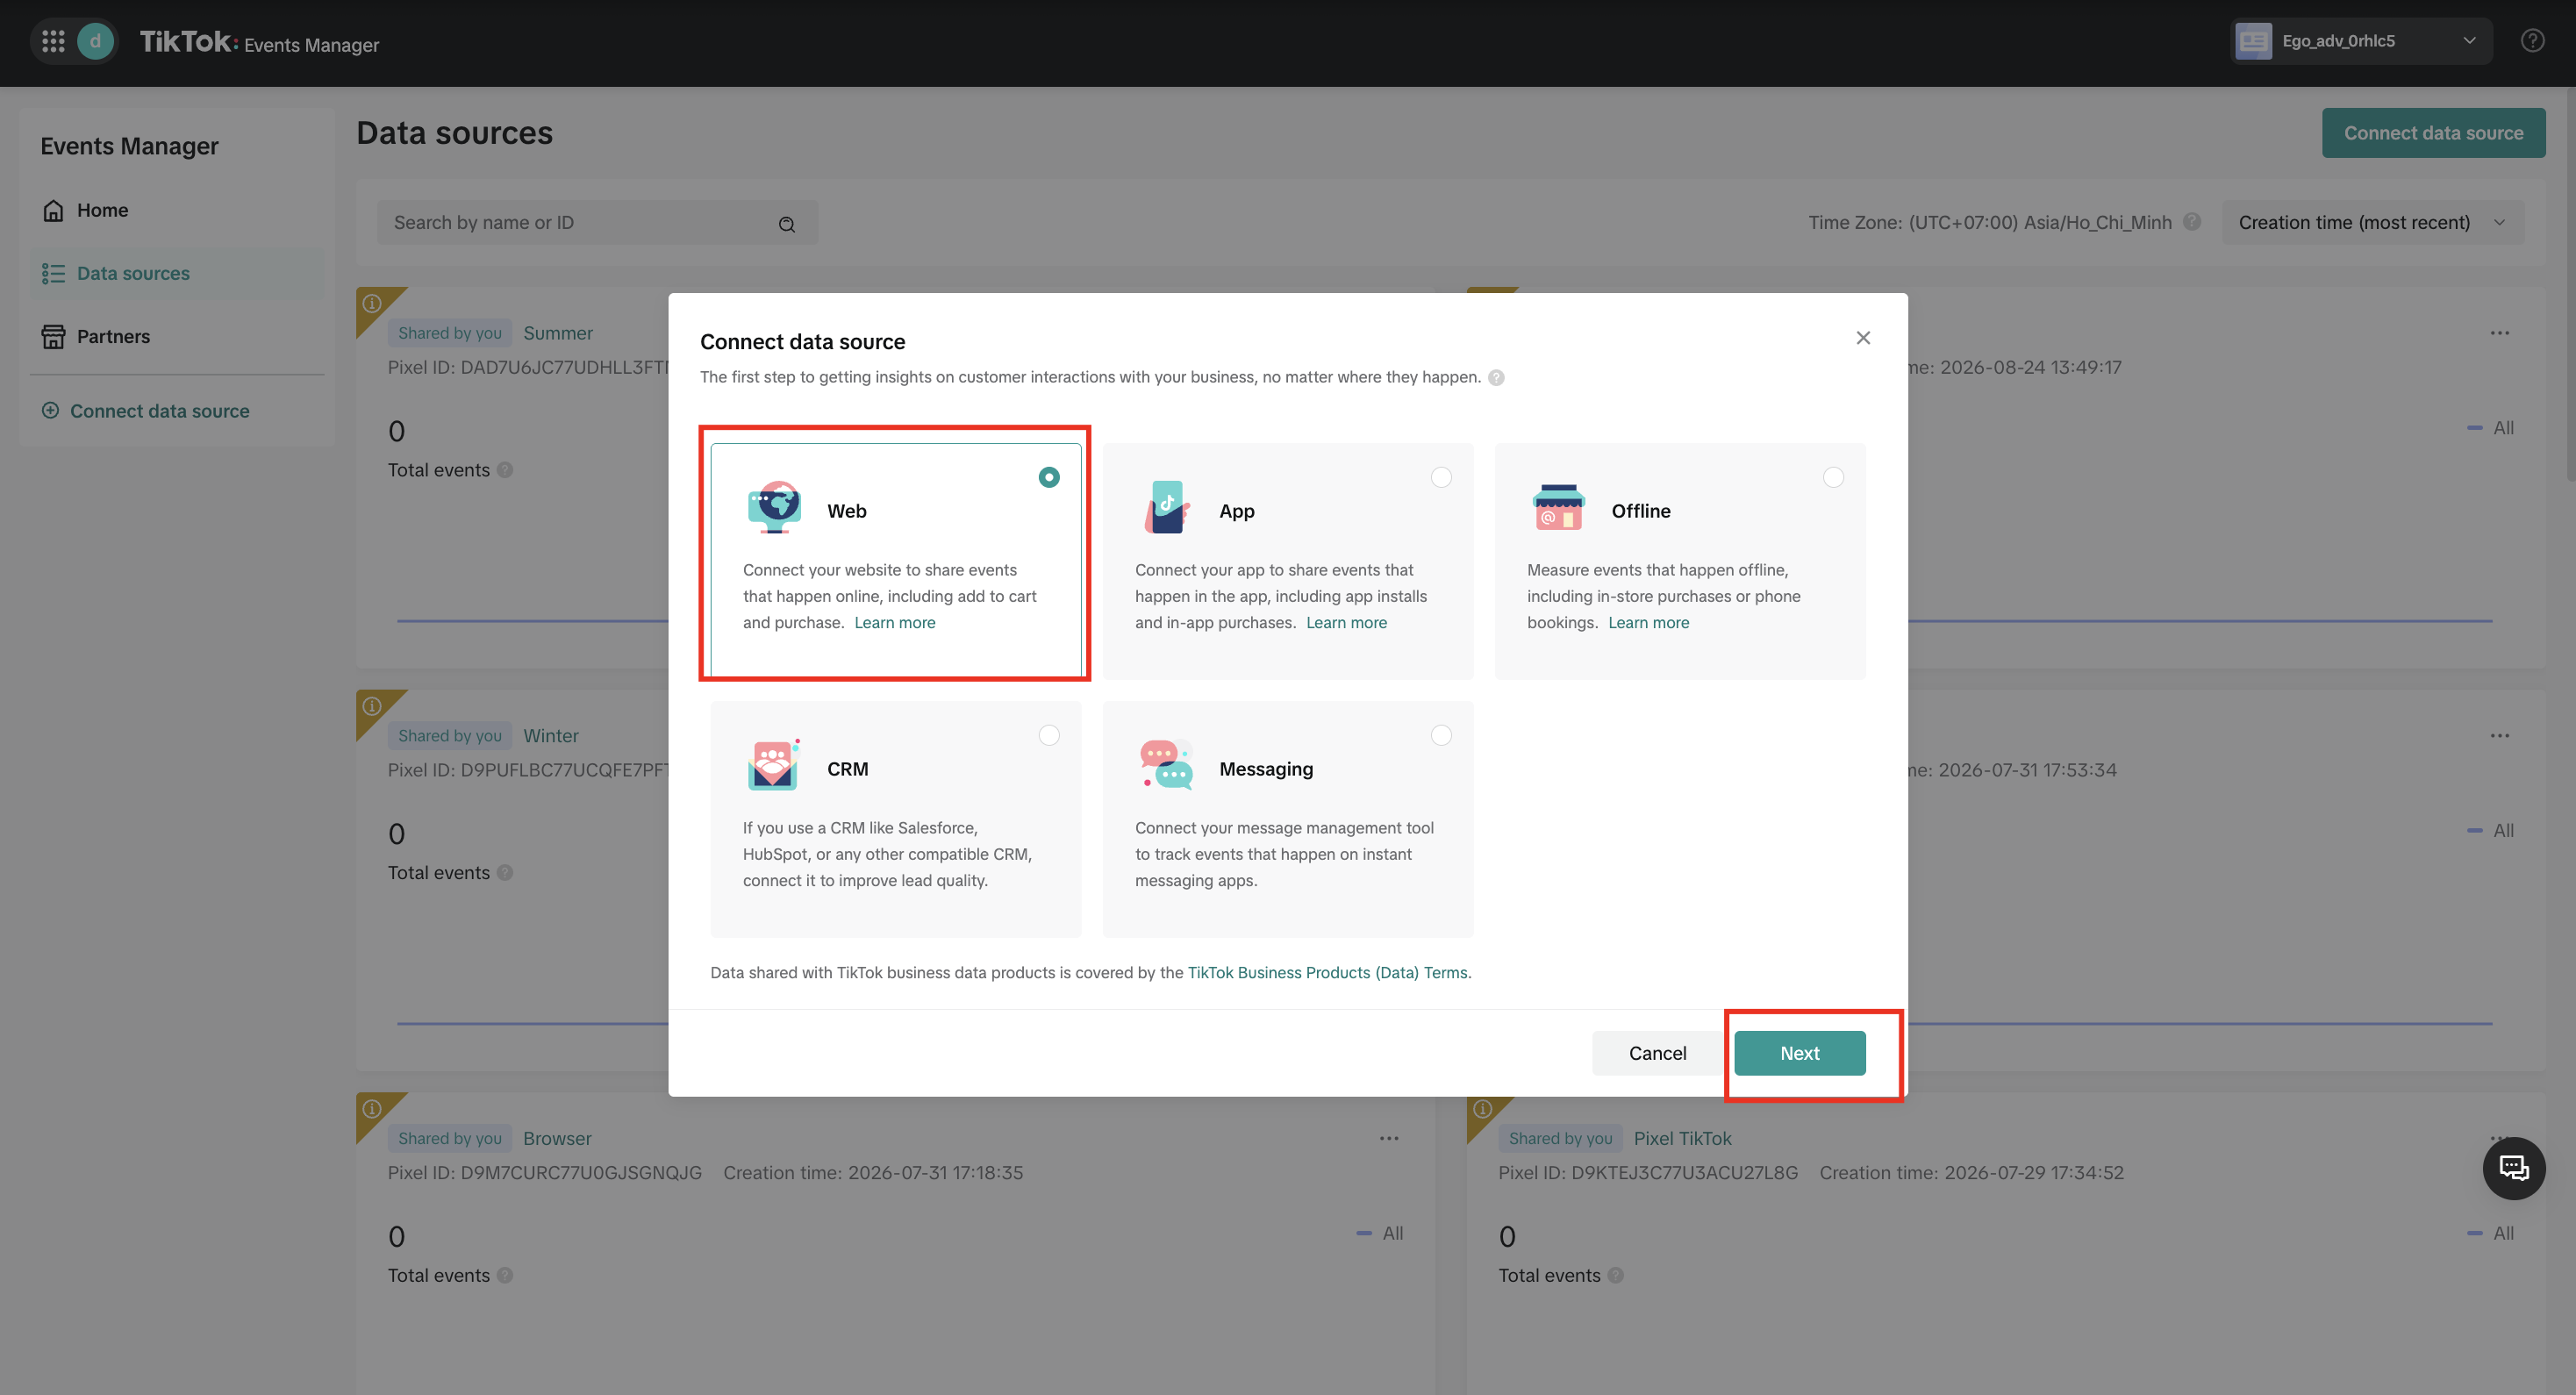
This tells TikTok that you want to track activity on your website.
Step 3: Enter Your Website
Enter your store's website URL.
Click Next.
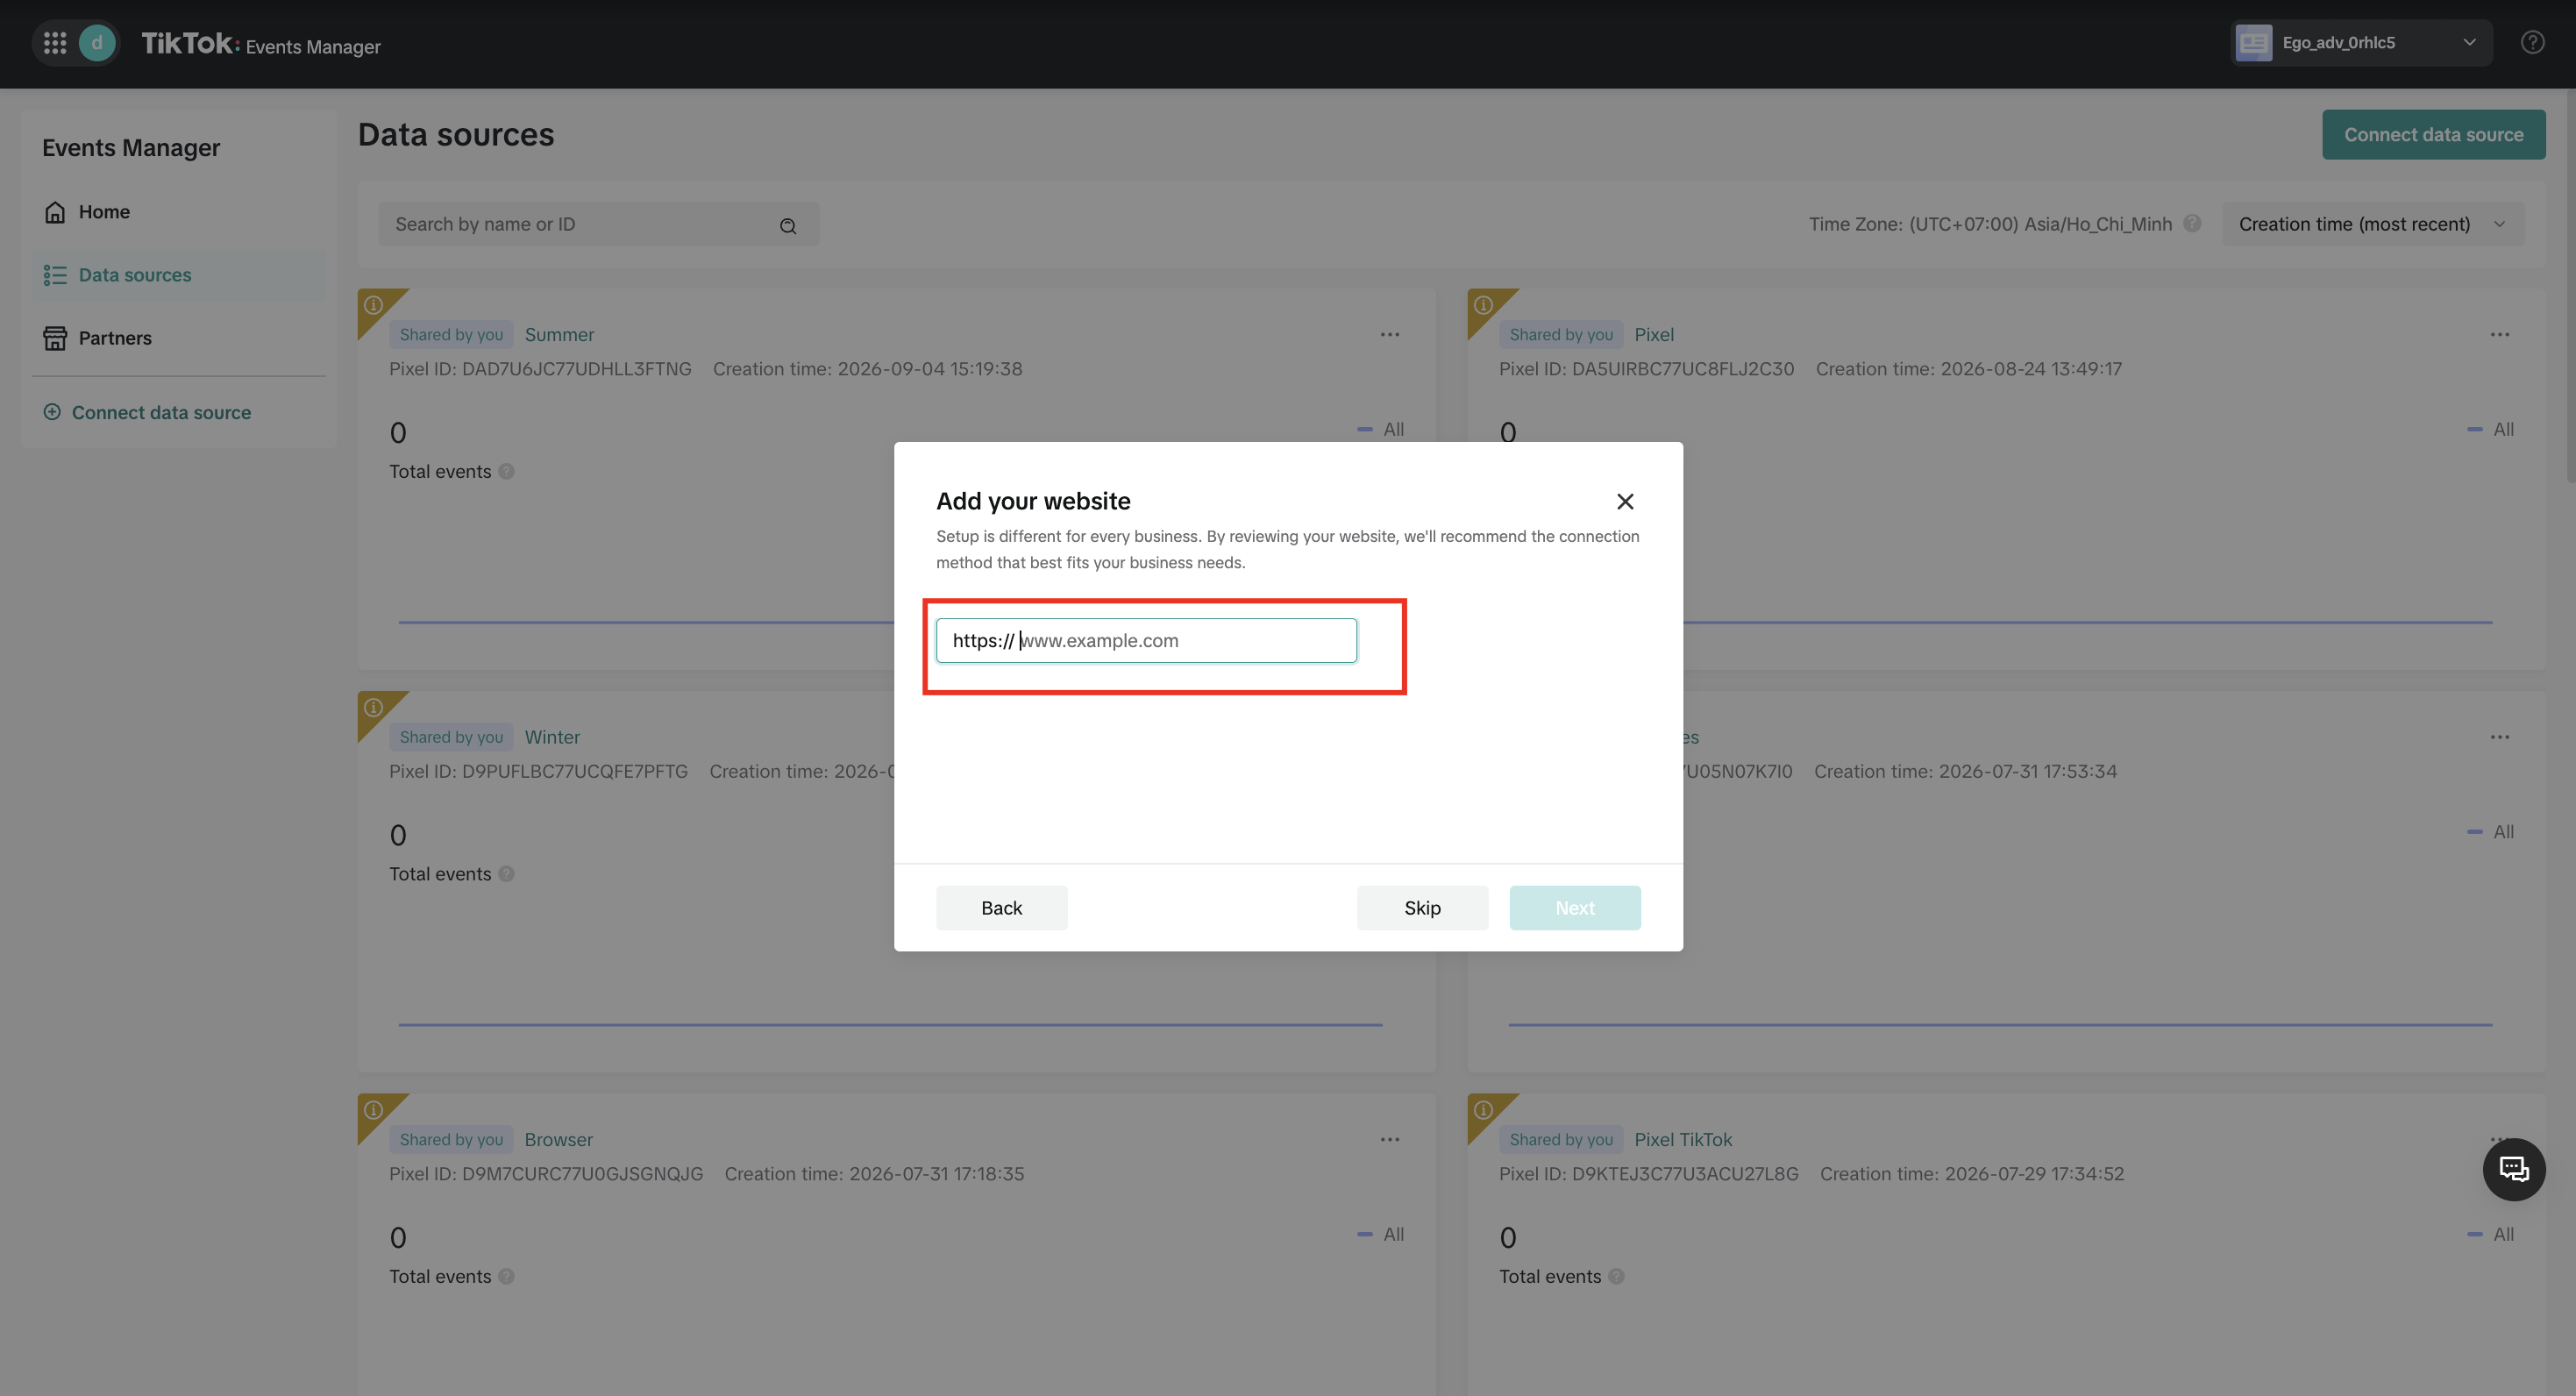
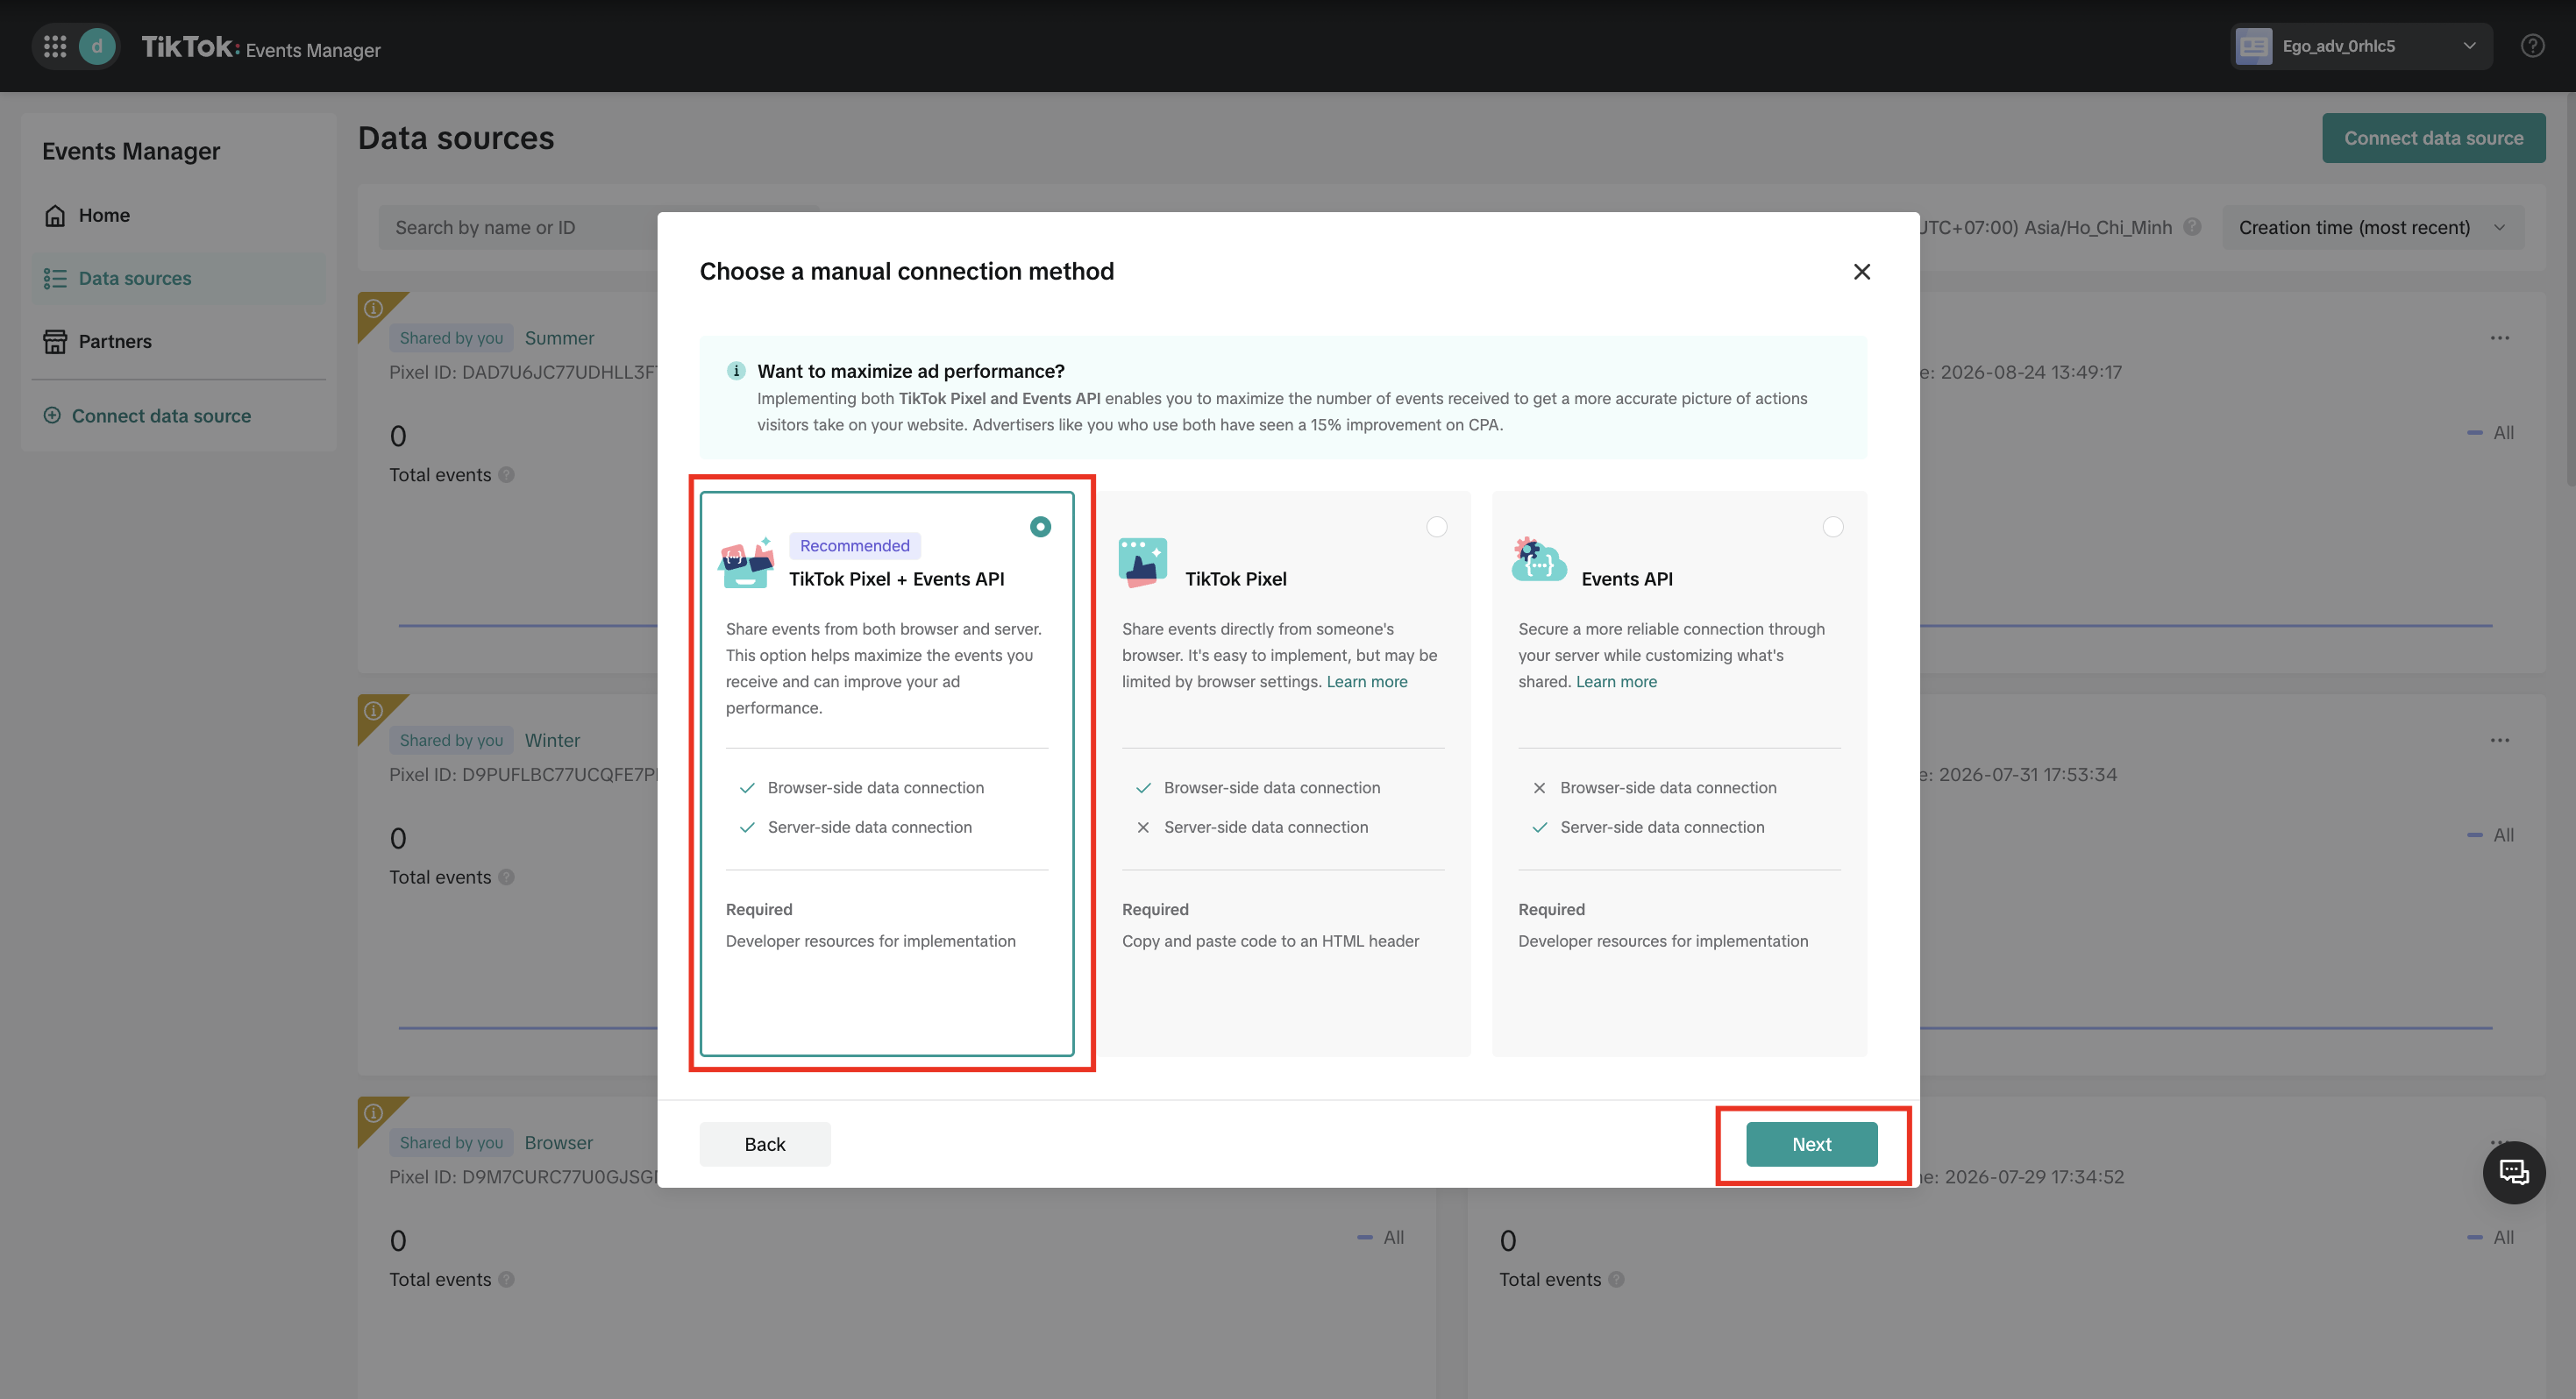
Step 4: Choose Your Setup Method
Select Manual Setup.
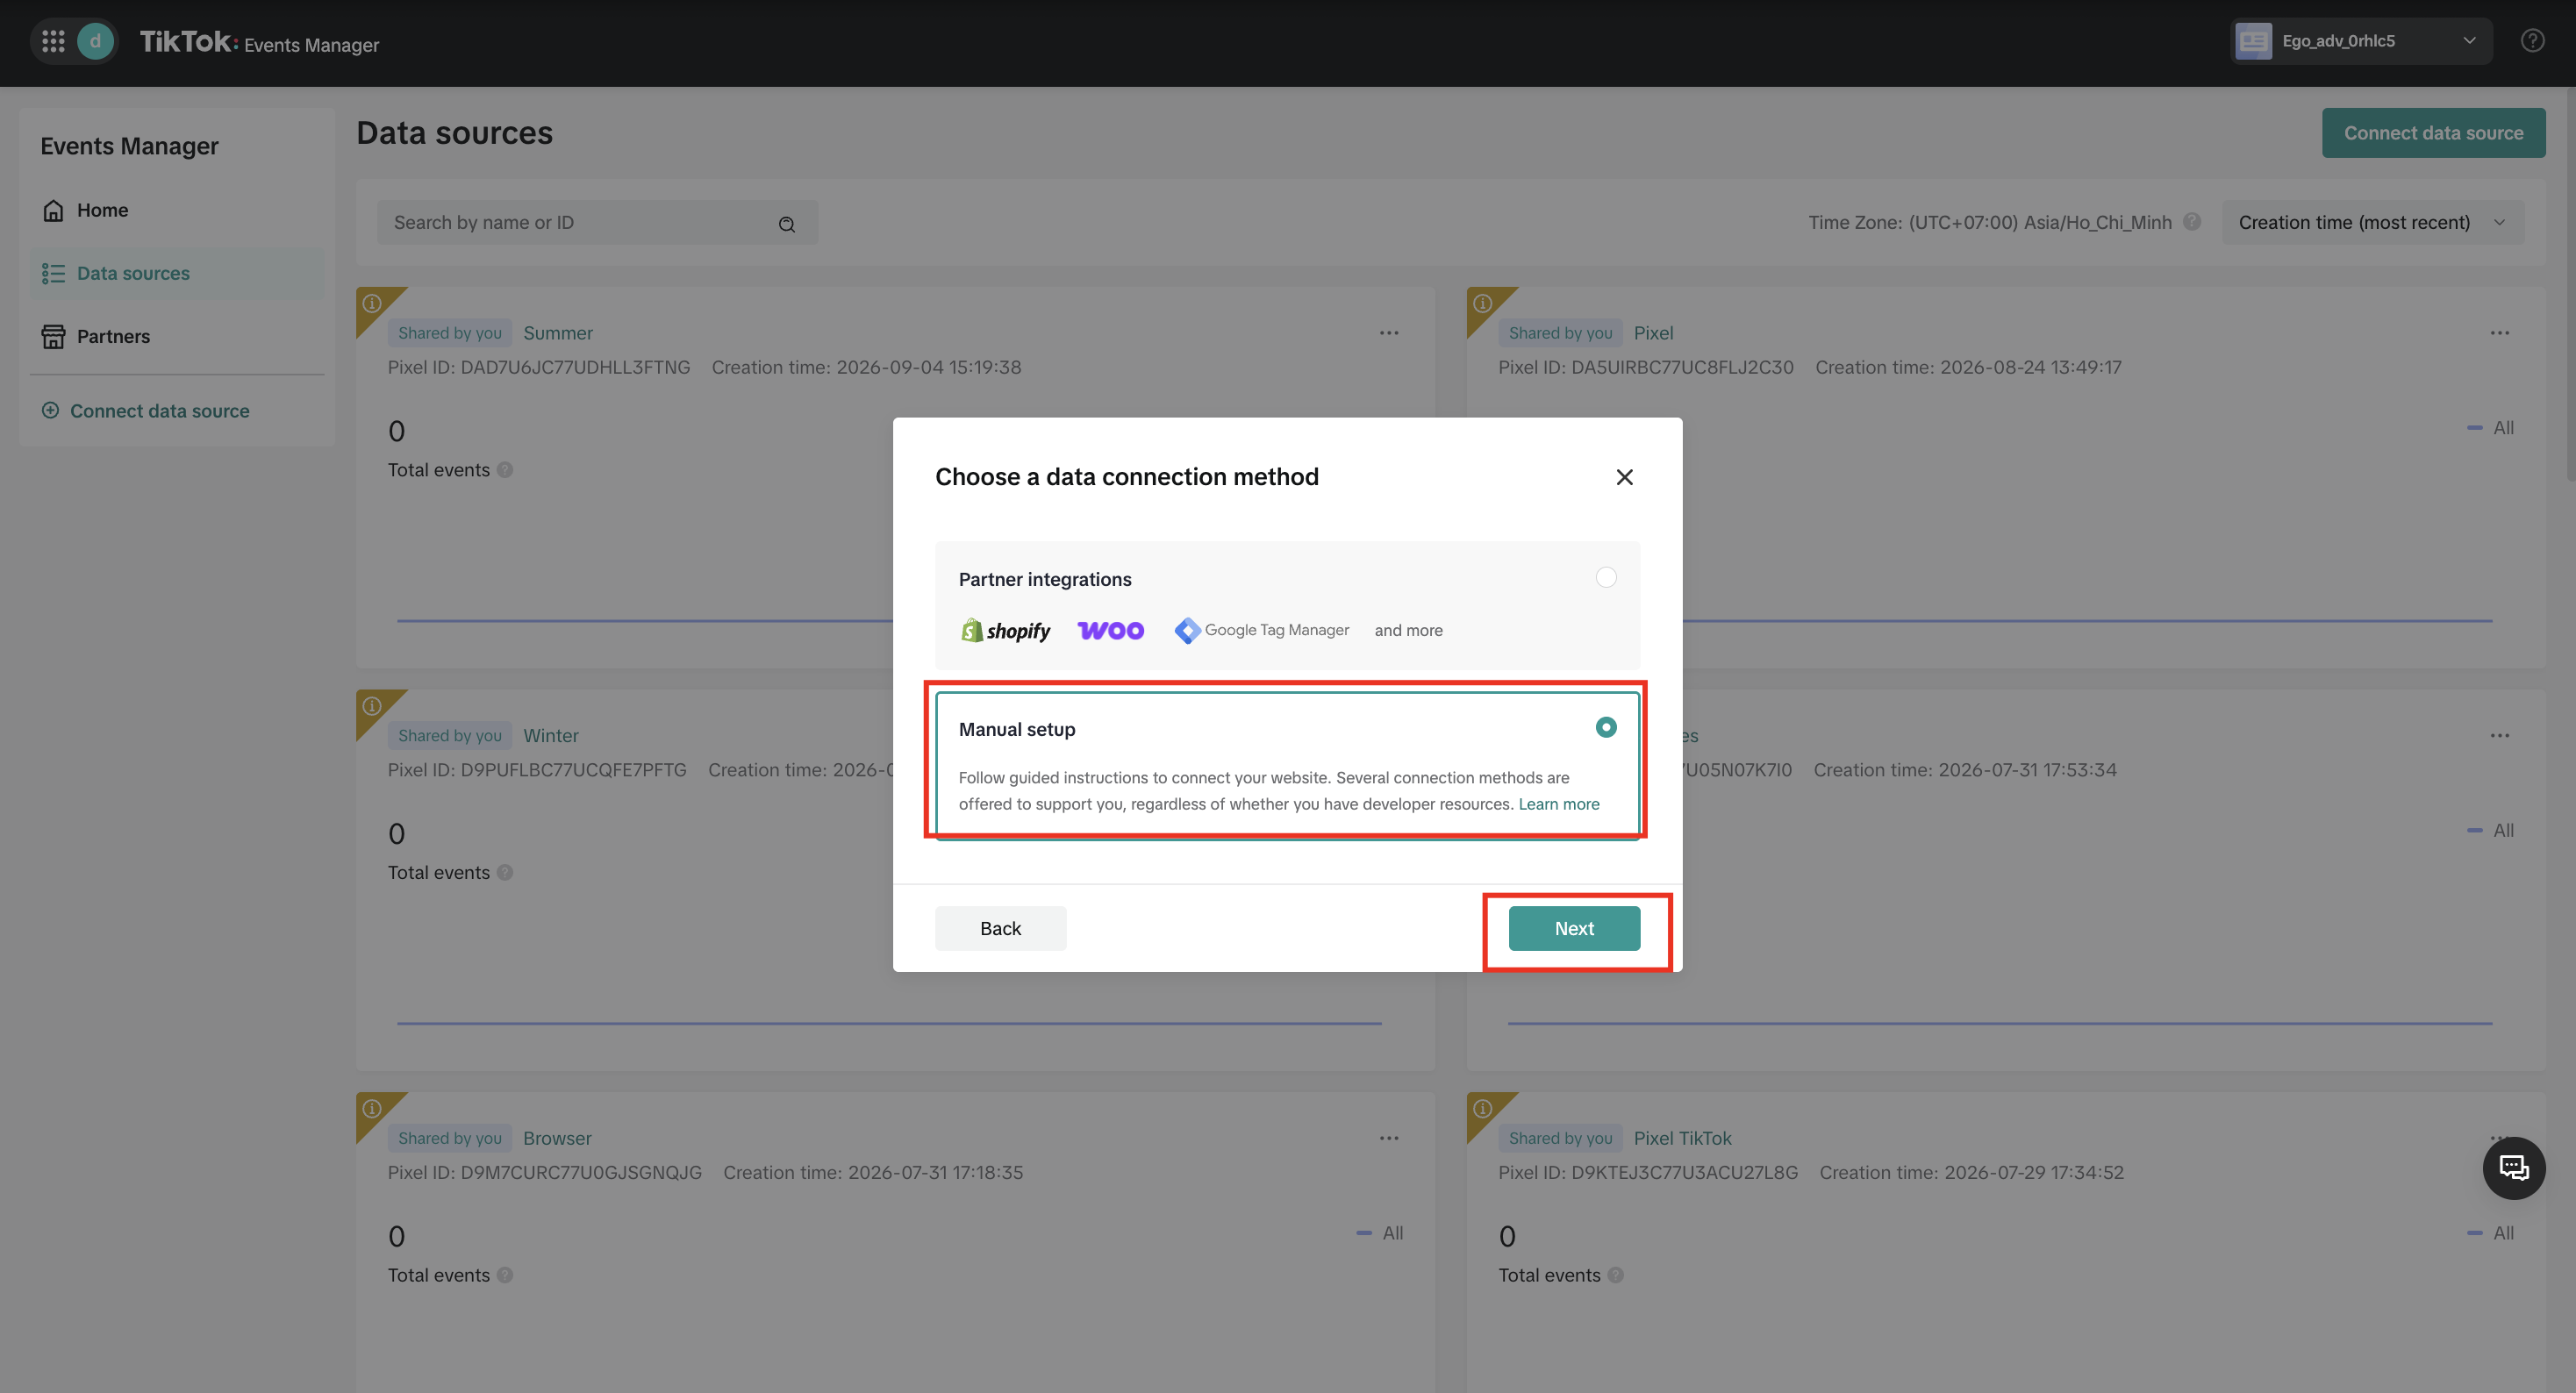
Then select the TikTok Pixel setup option provided by TikTok.
Step 5: Create Your Pixel
Enter a Pixel Name.
Click Create.
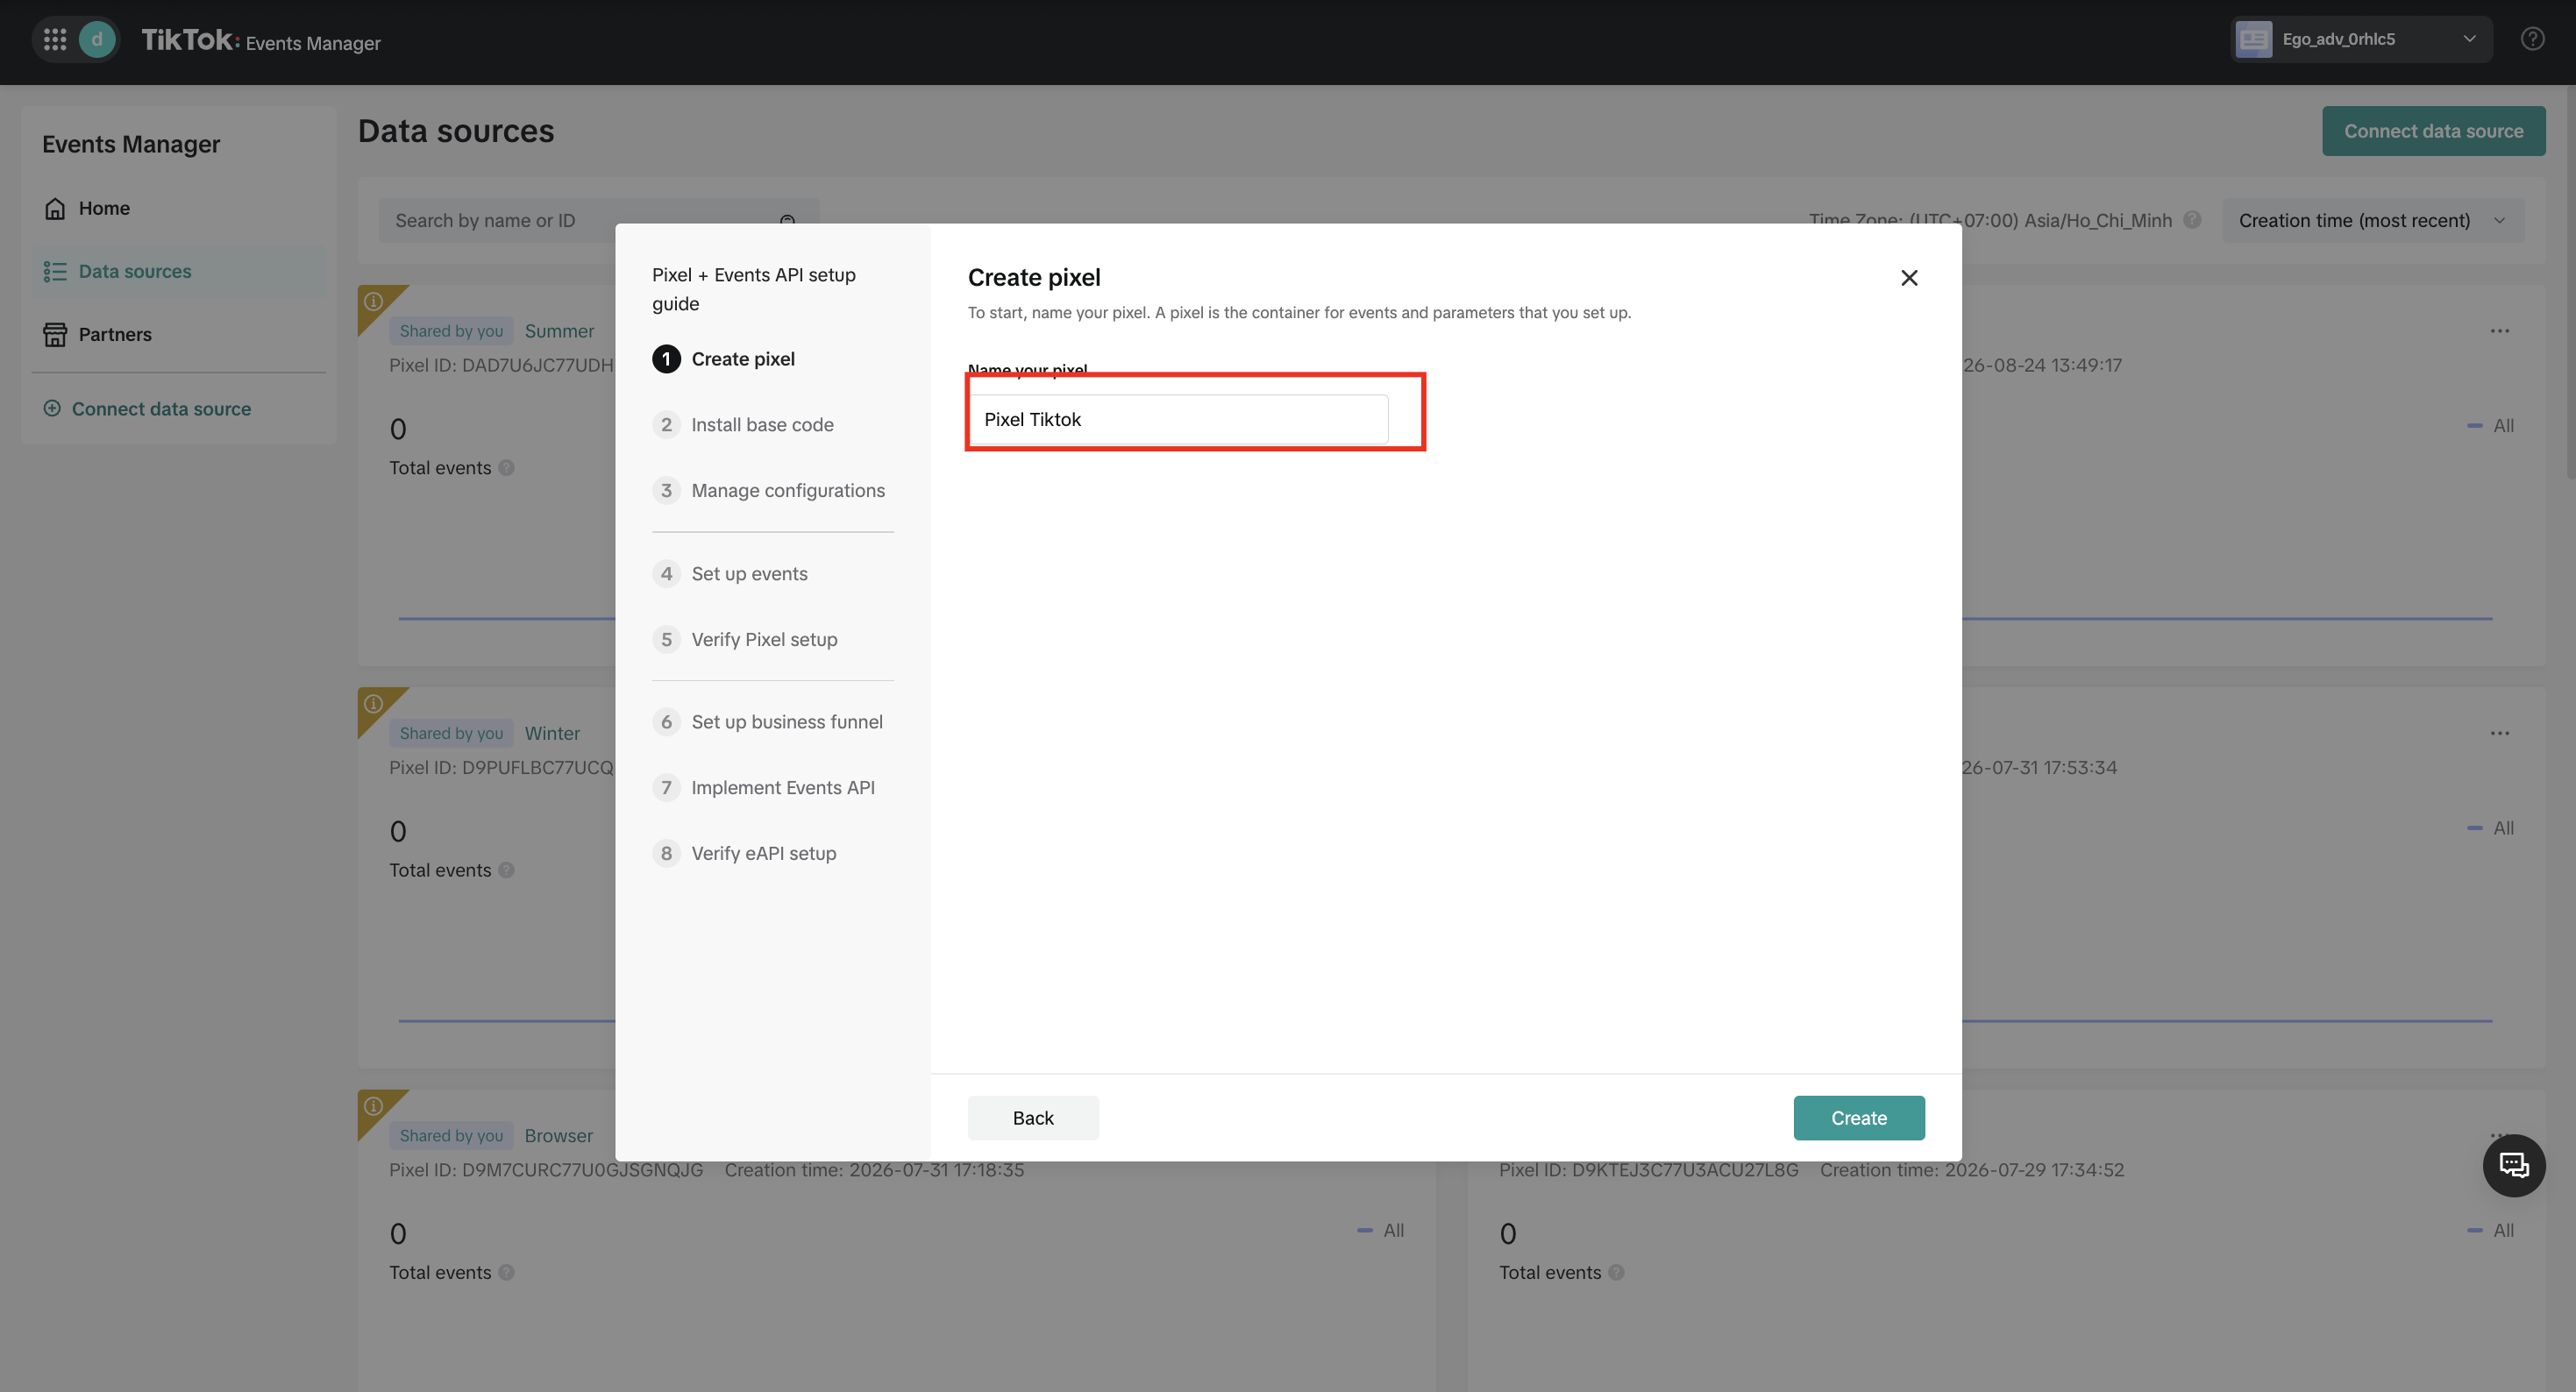
TikTok will create the Pixel and assign a unique Pixel ID.
Step 6: Get Your Pixel ID
After creating the Pixel:
Open the Pixel you just created.
Go to the Pixel details/settings.
Copy the Pixel ID.
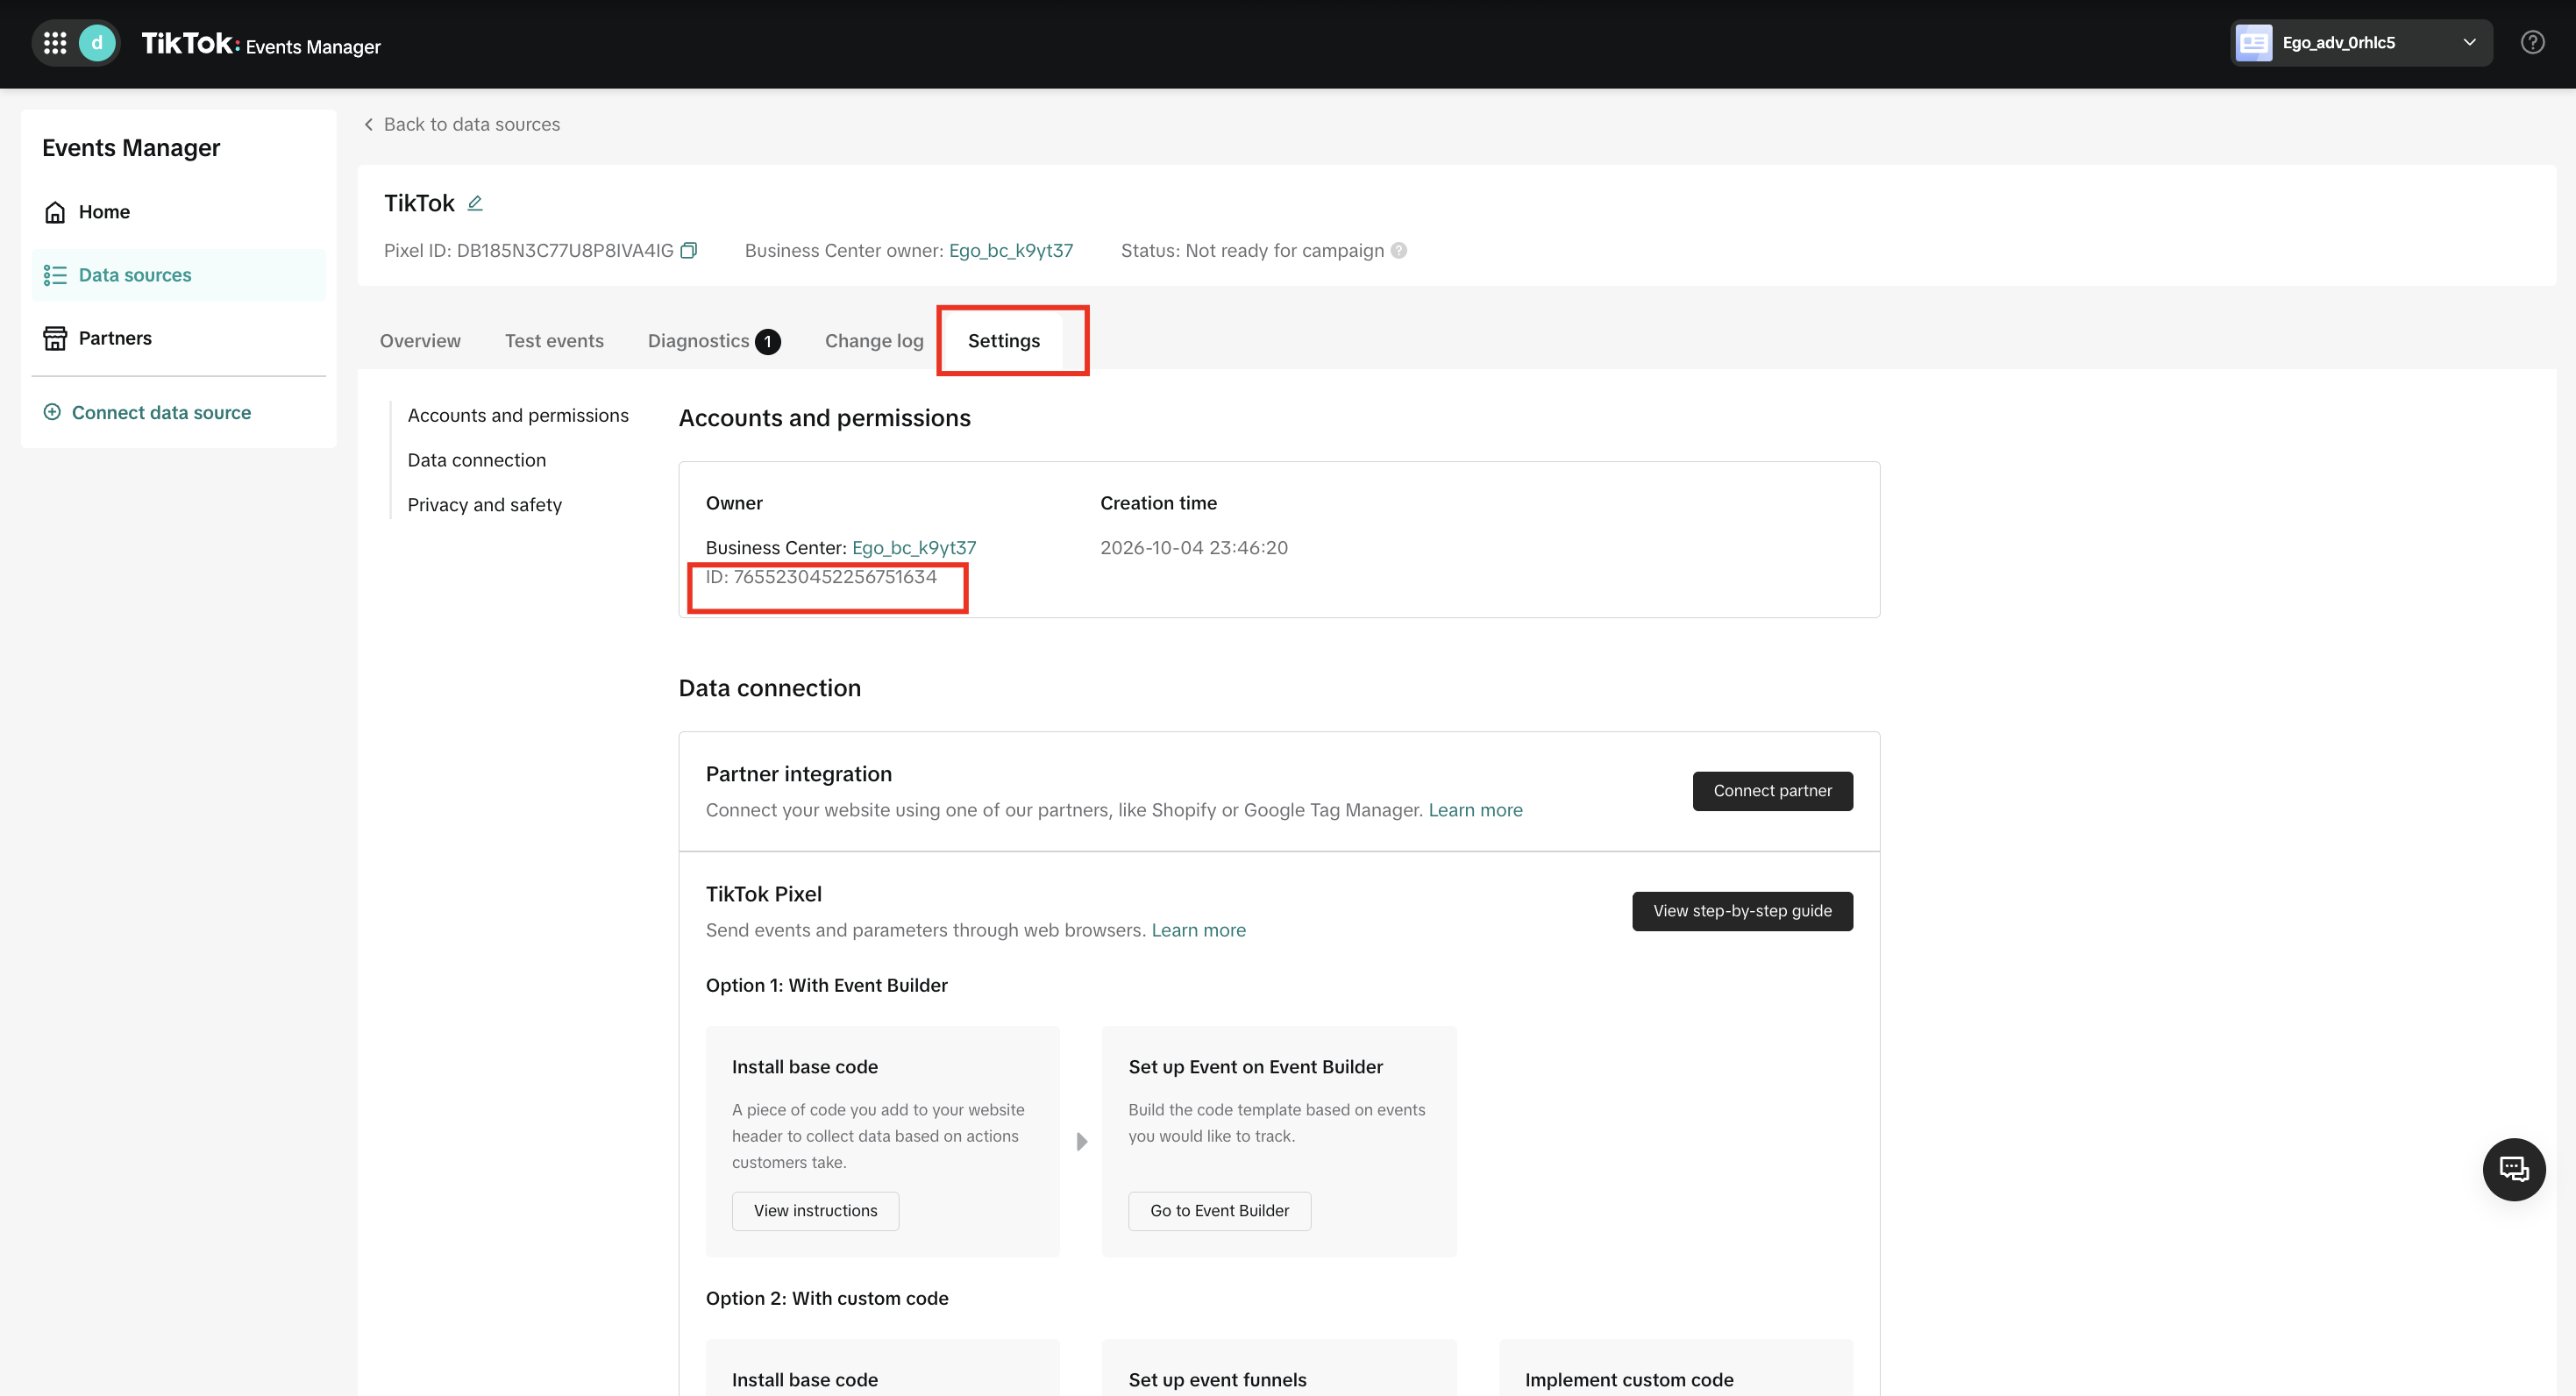
You will use this ID when connecting the Pixel to Ego TikTok Pixel.
Still need help?
Our support team is available 24/7. Contact support →