

Check Event Delivery
Verify that your TikTok Pixel and Events API events are delivered correctly using Live Diagnostic and TikTok Events Manager.
Overview
After completing the setup, you should test your events to make sure they are being sent and received correctly. This ensures your pixel tracking is working properly and that TikTok can accurately record conversions.
Test Events in the App (Live Diagnostic)
Important: To use Live Diagnostic, your Pixel must have Events API enabled.
The Live Diagnostic feature in the app allows you to monitor events in real time when users interact with your store.
Step 1:
Open the Live Diagnostic section in the app dashboard.
Select the TikTok pixel you want to test.
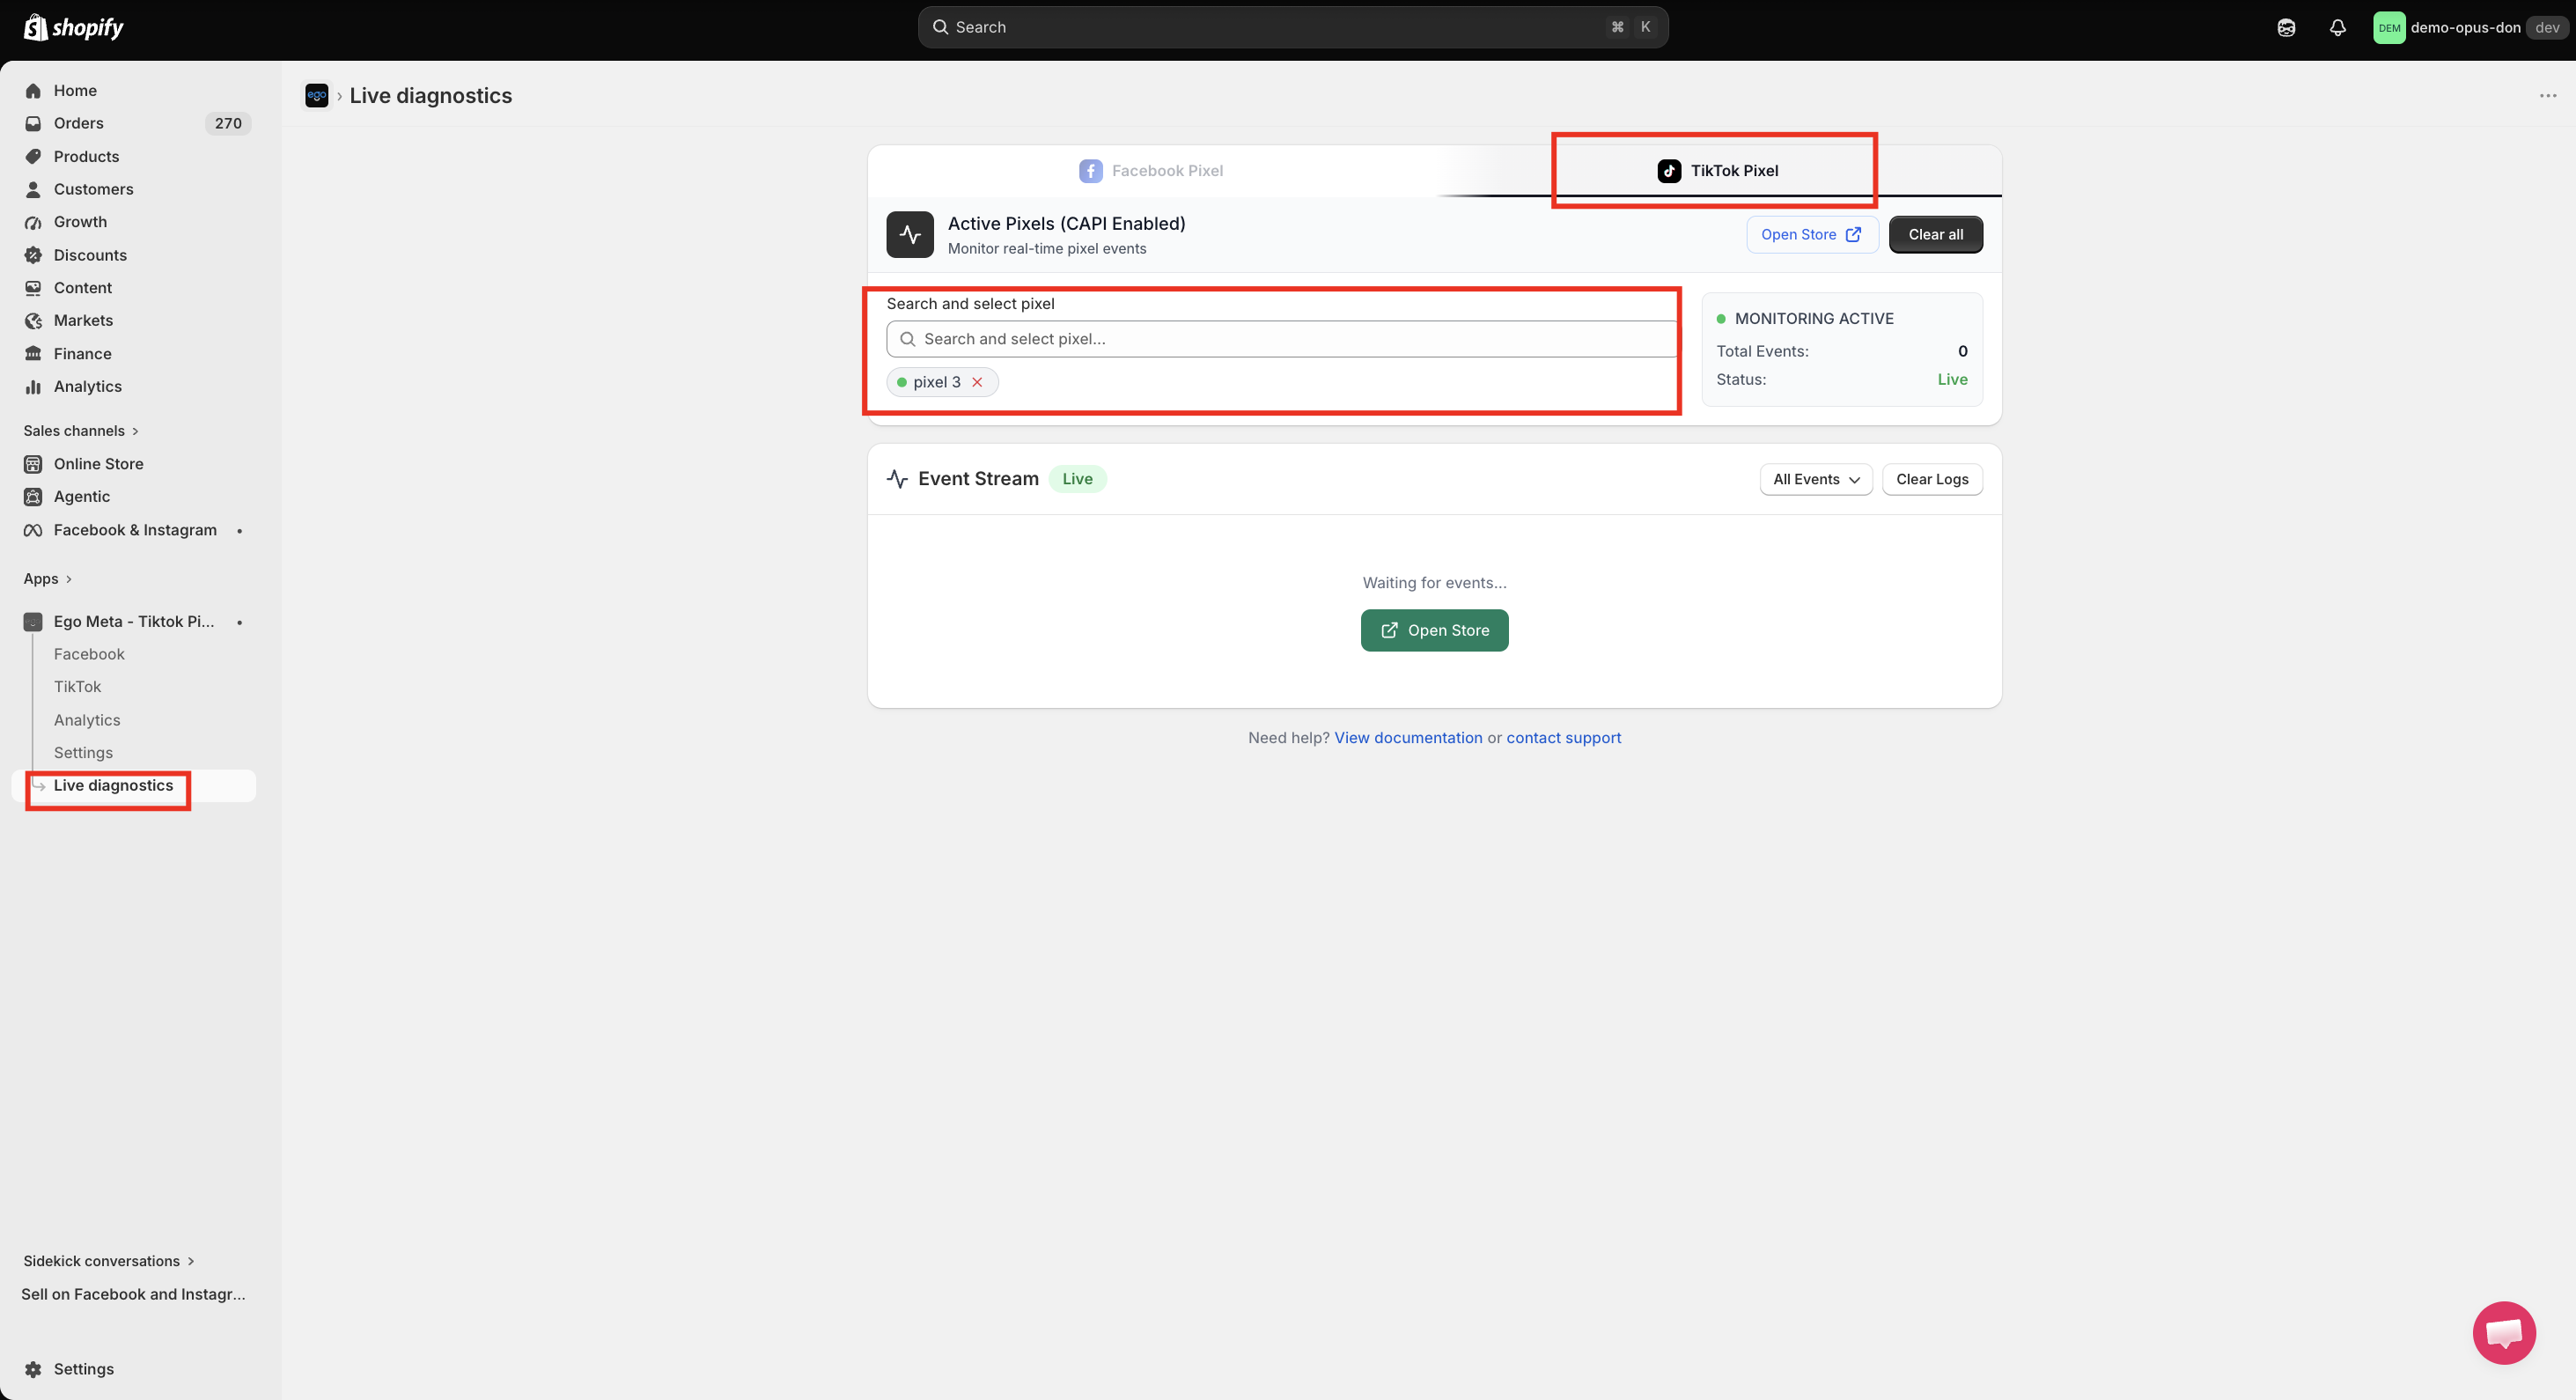
Step 2: Click "Open store" to visit your storefront and perform actions such as:
View a product
Add a product to cart
Start checkout
Complete a purchase
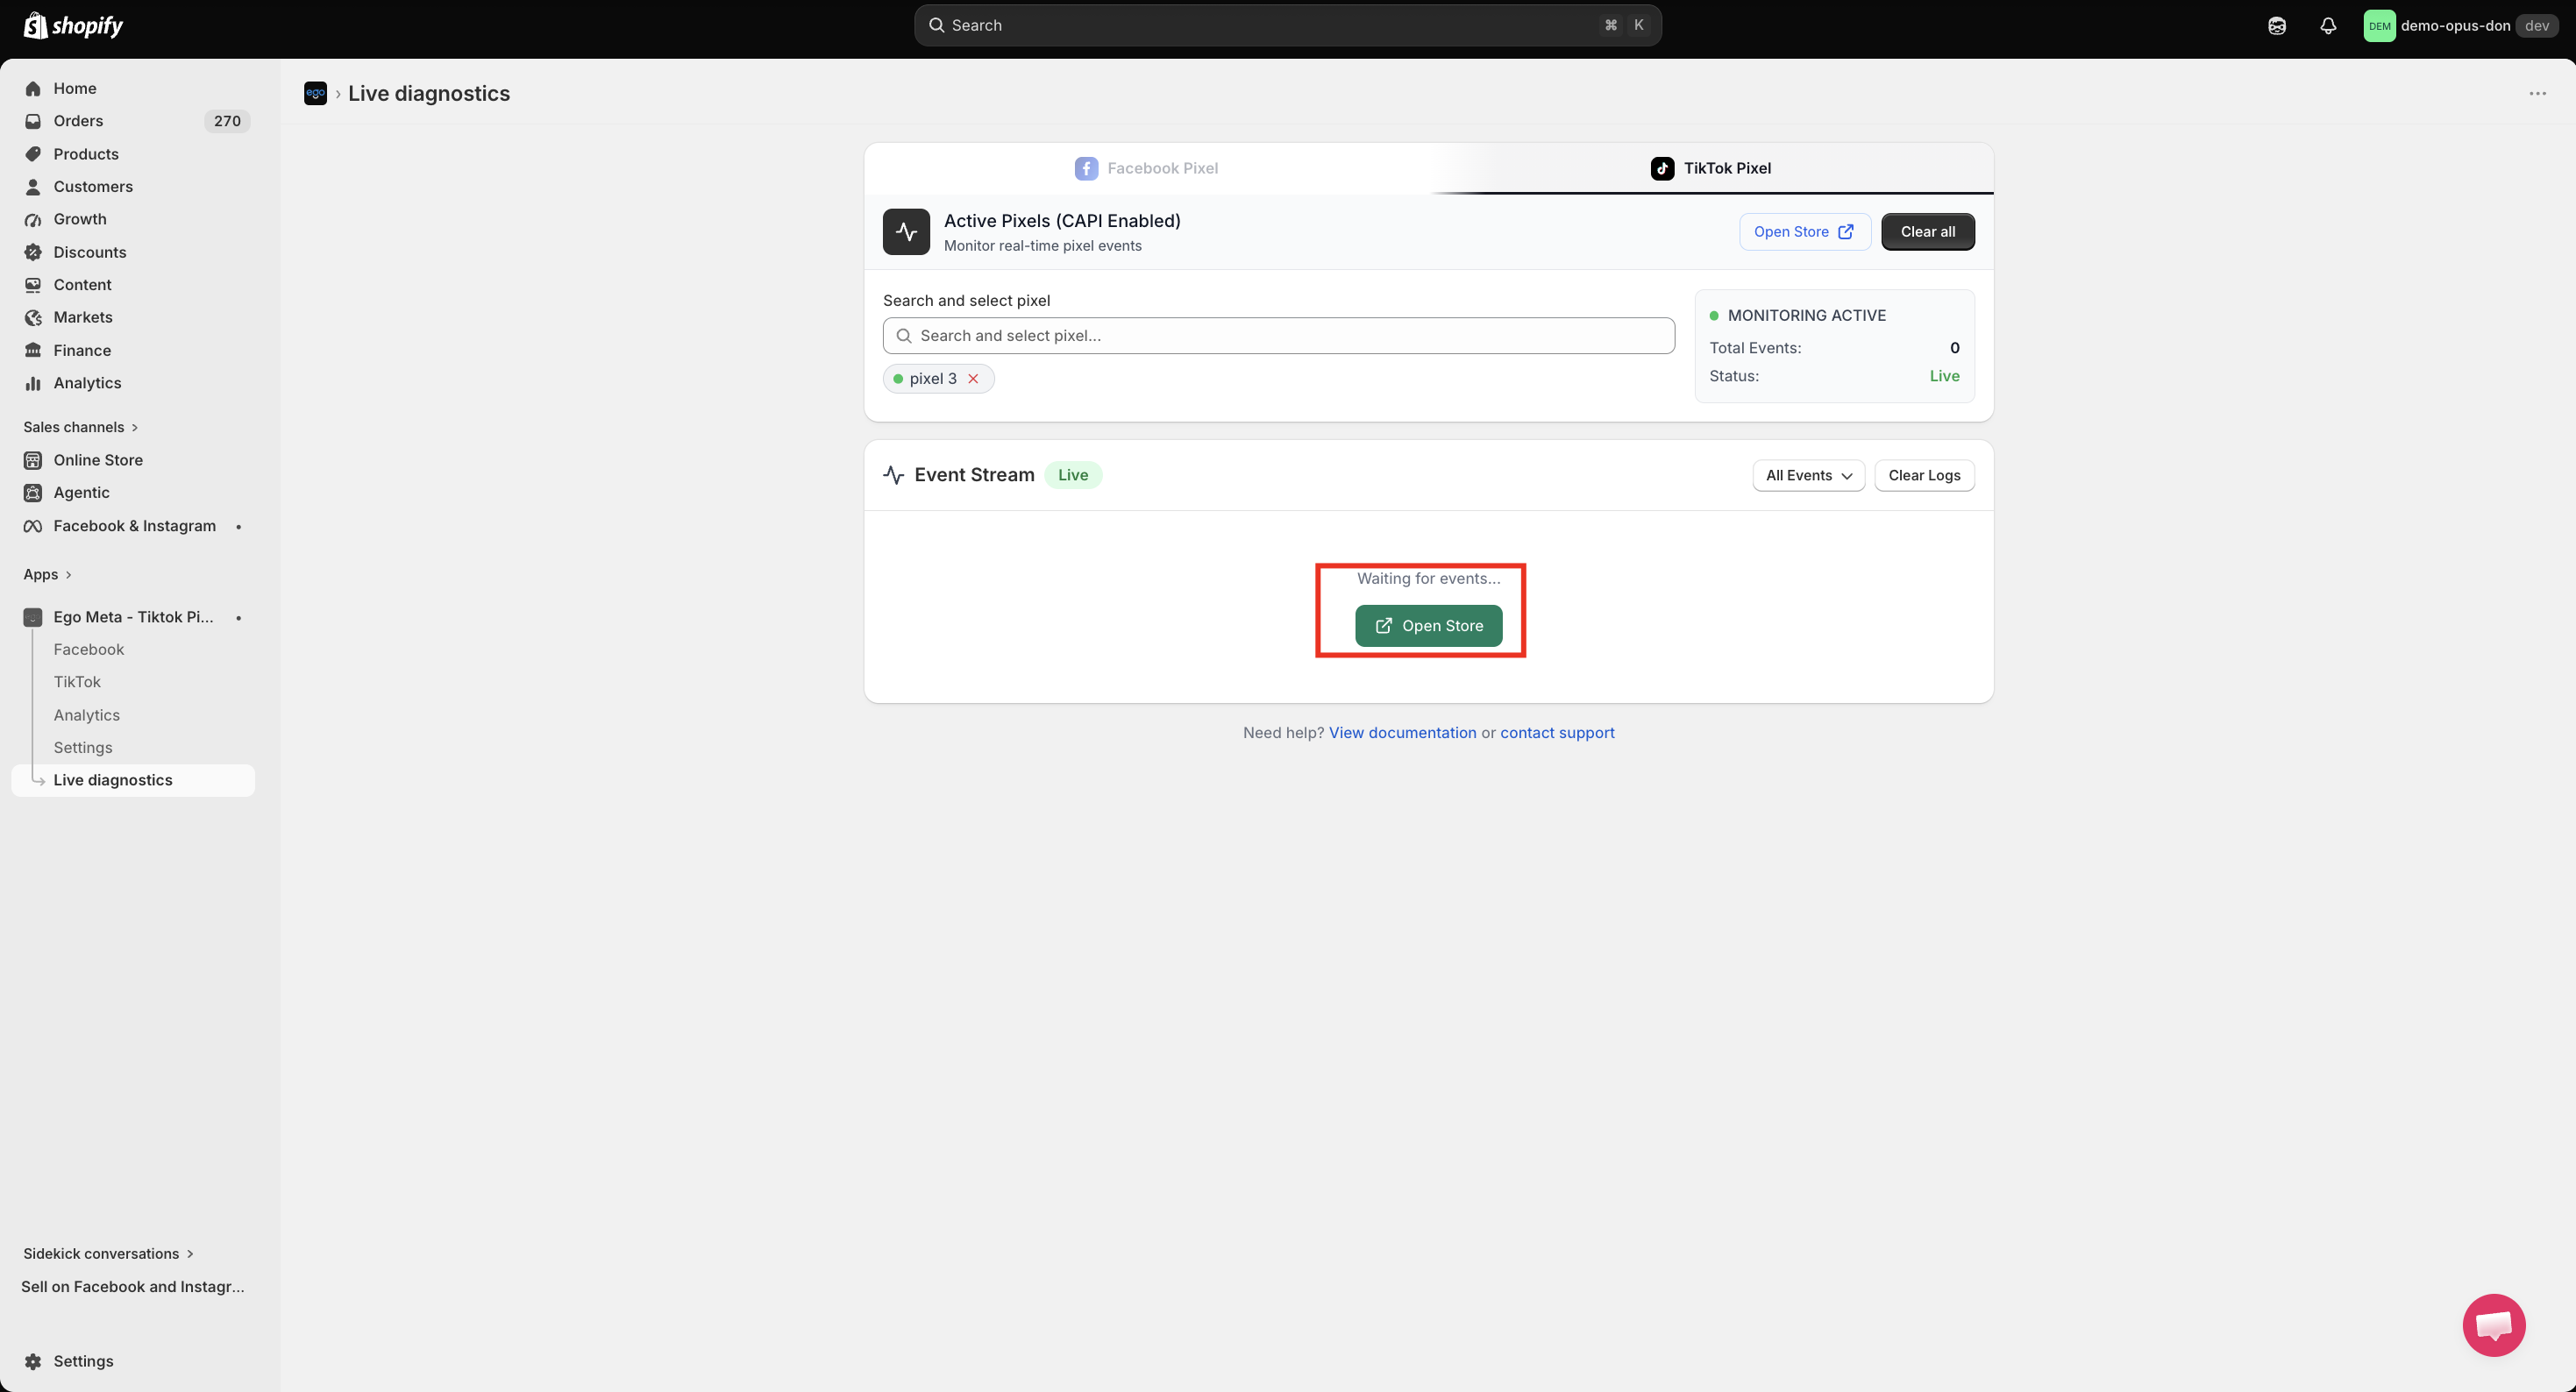
Step 3: Return to the Live Diagnostic screen to see the events captured in real time.
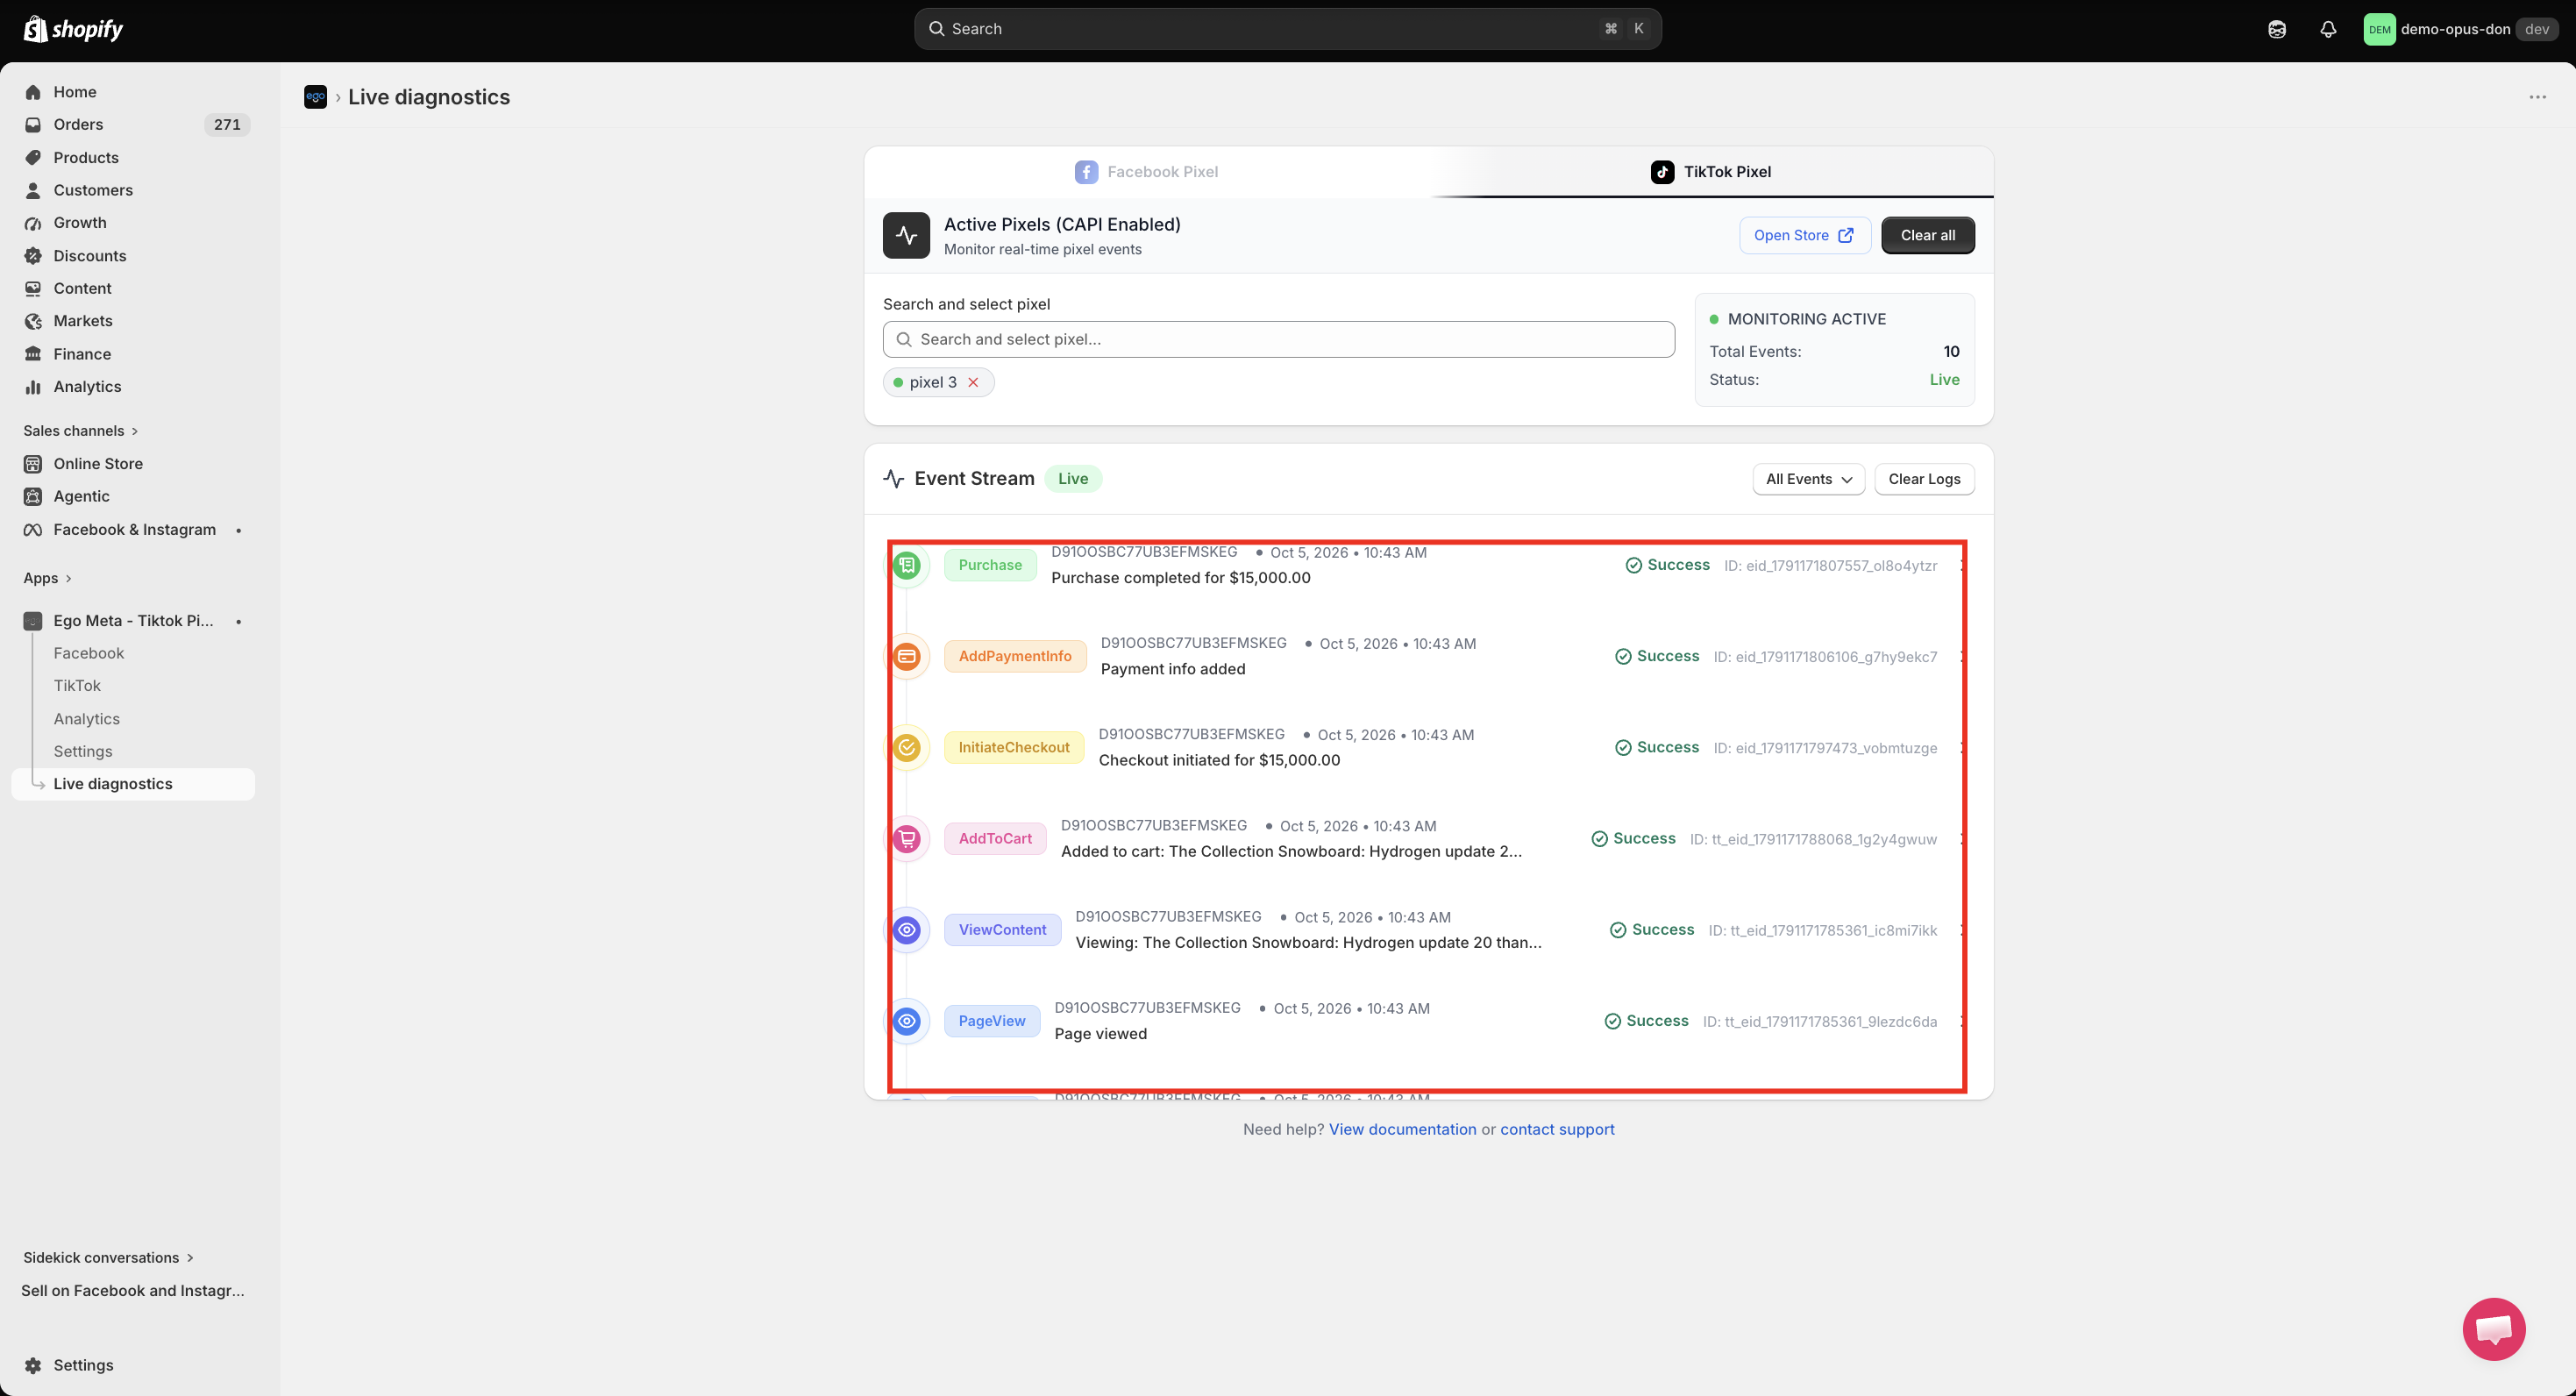
⇒ If the events appear in the list, it means the tracking is working correctly.
Test Events in TikTok Events Manager
You can also verify event delivery directly in TikTok Events Manager. To test server-side events (Events API), you need to use a Test Event Code.
Step 1: Get the Test Event Code
Log in to your TikTok Ads Manager account and open Events Manager (Assets → Events). https://ads.tiktok.com
Select the Pixel connected to your store.
Open the Test Events tab.
Copy the Test Event Code displayed under Test server events.
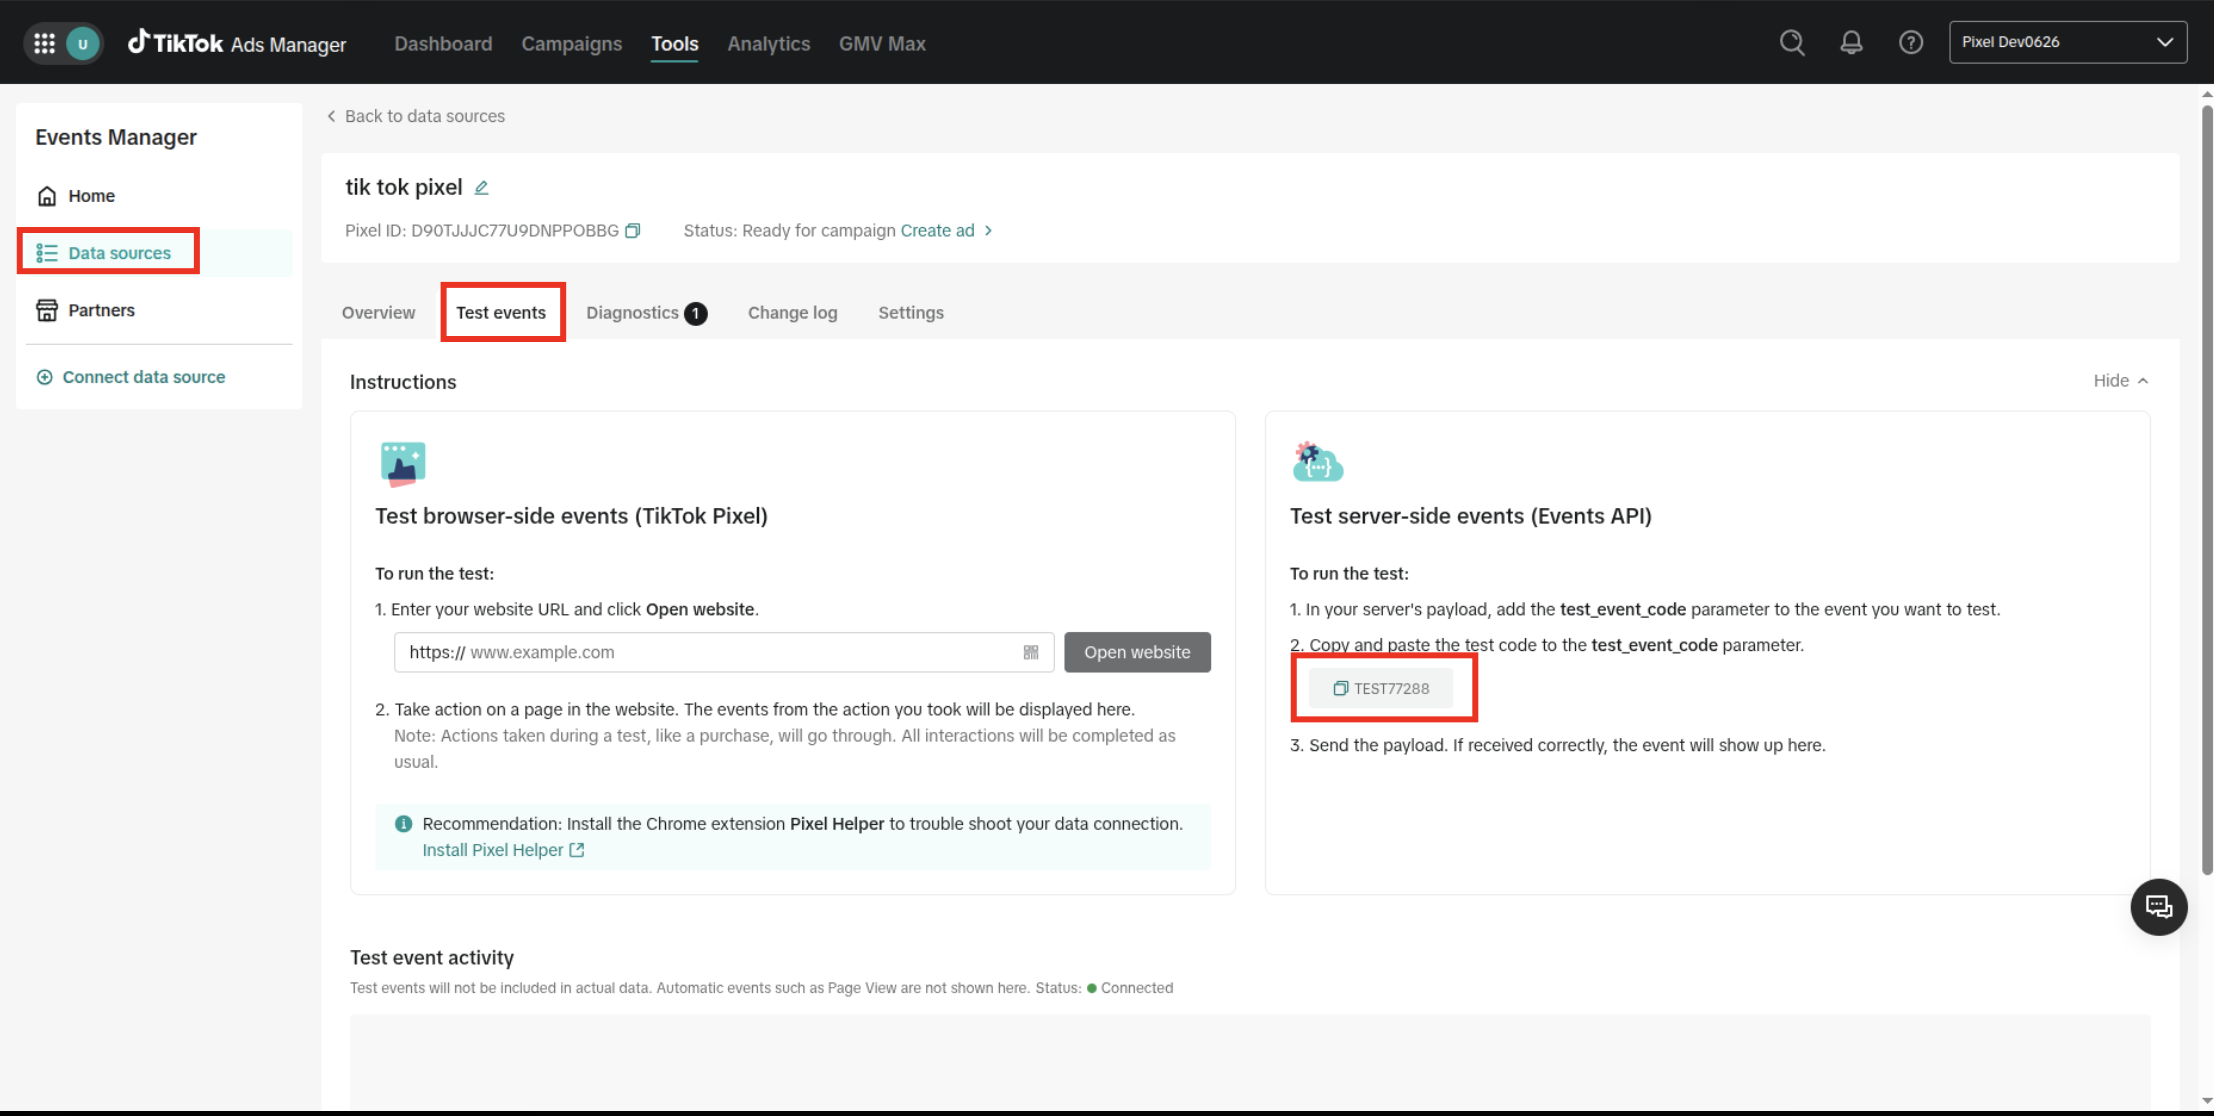
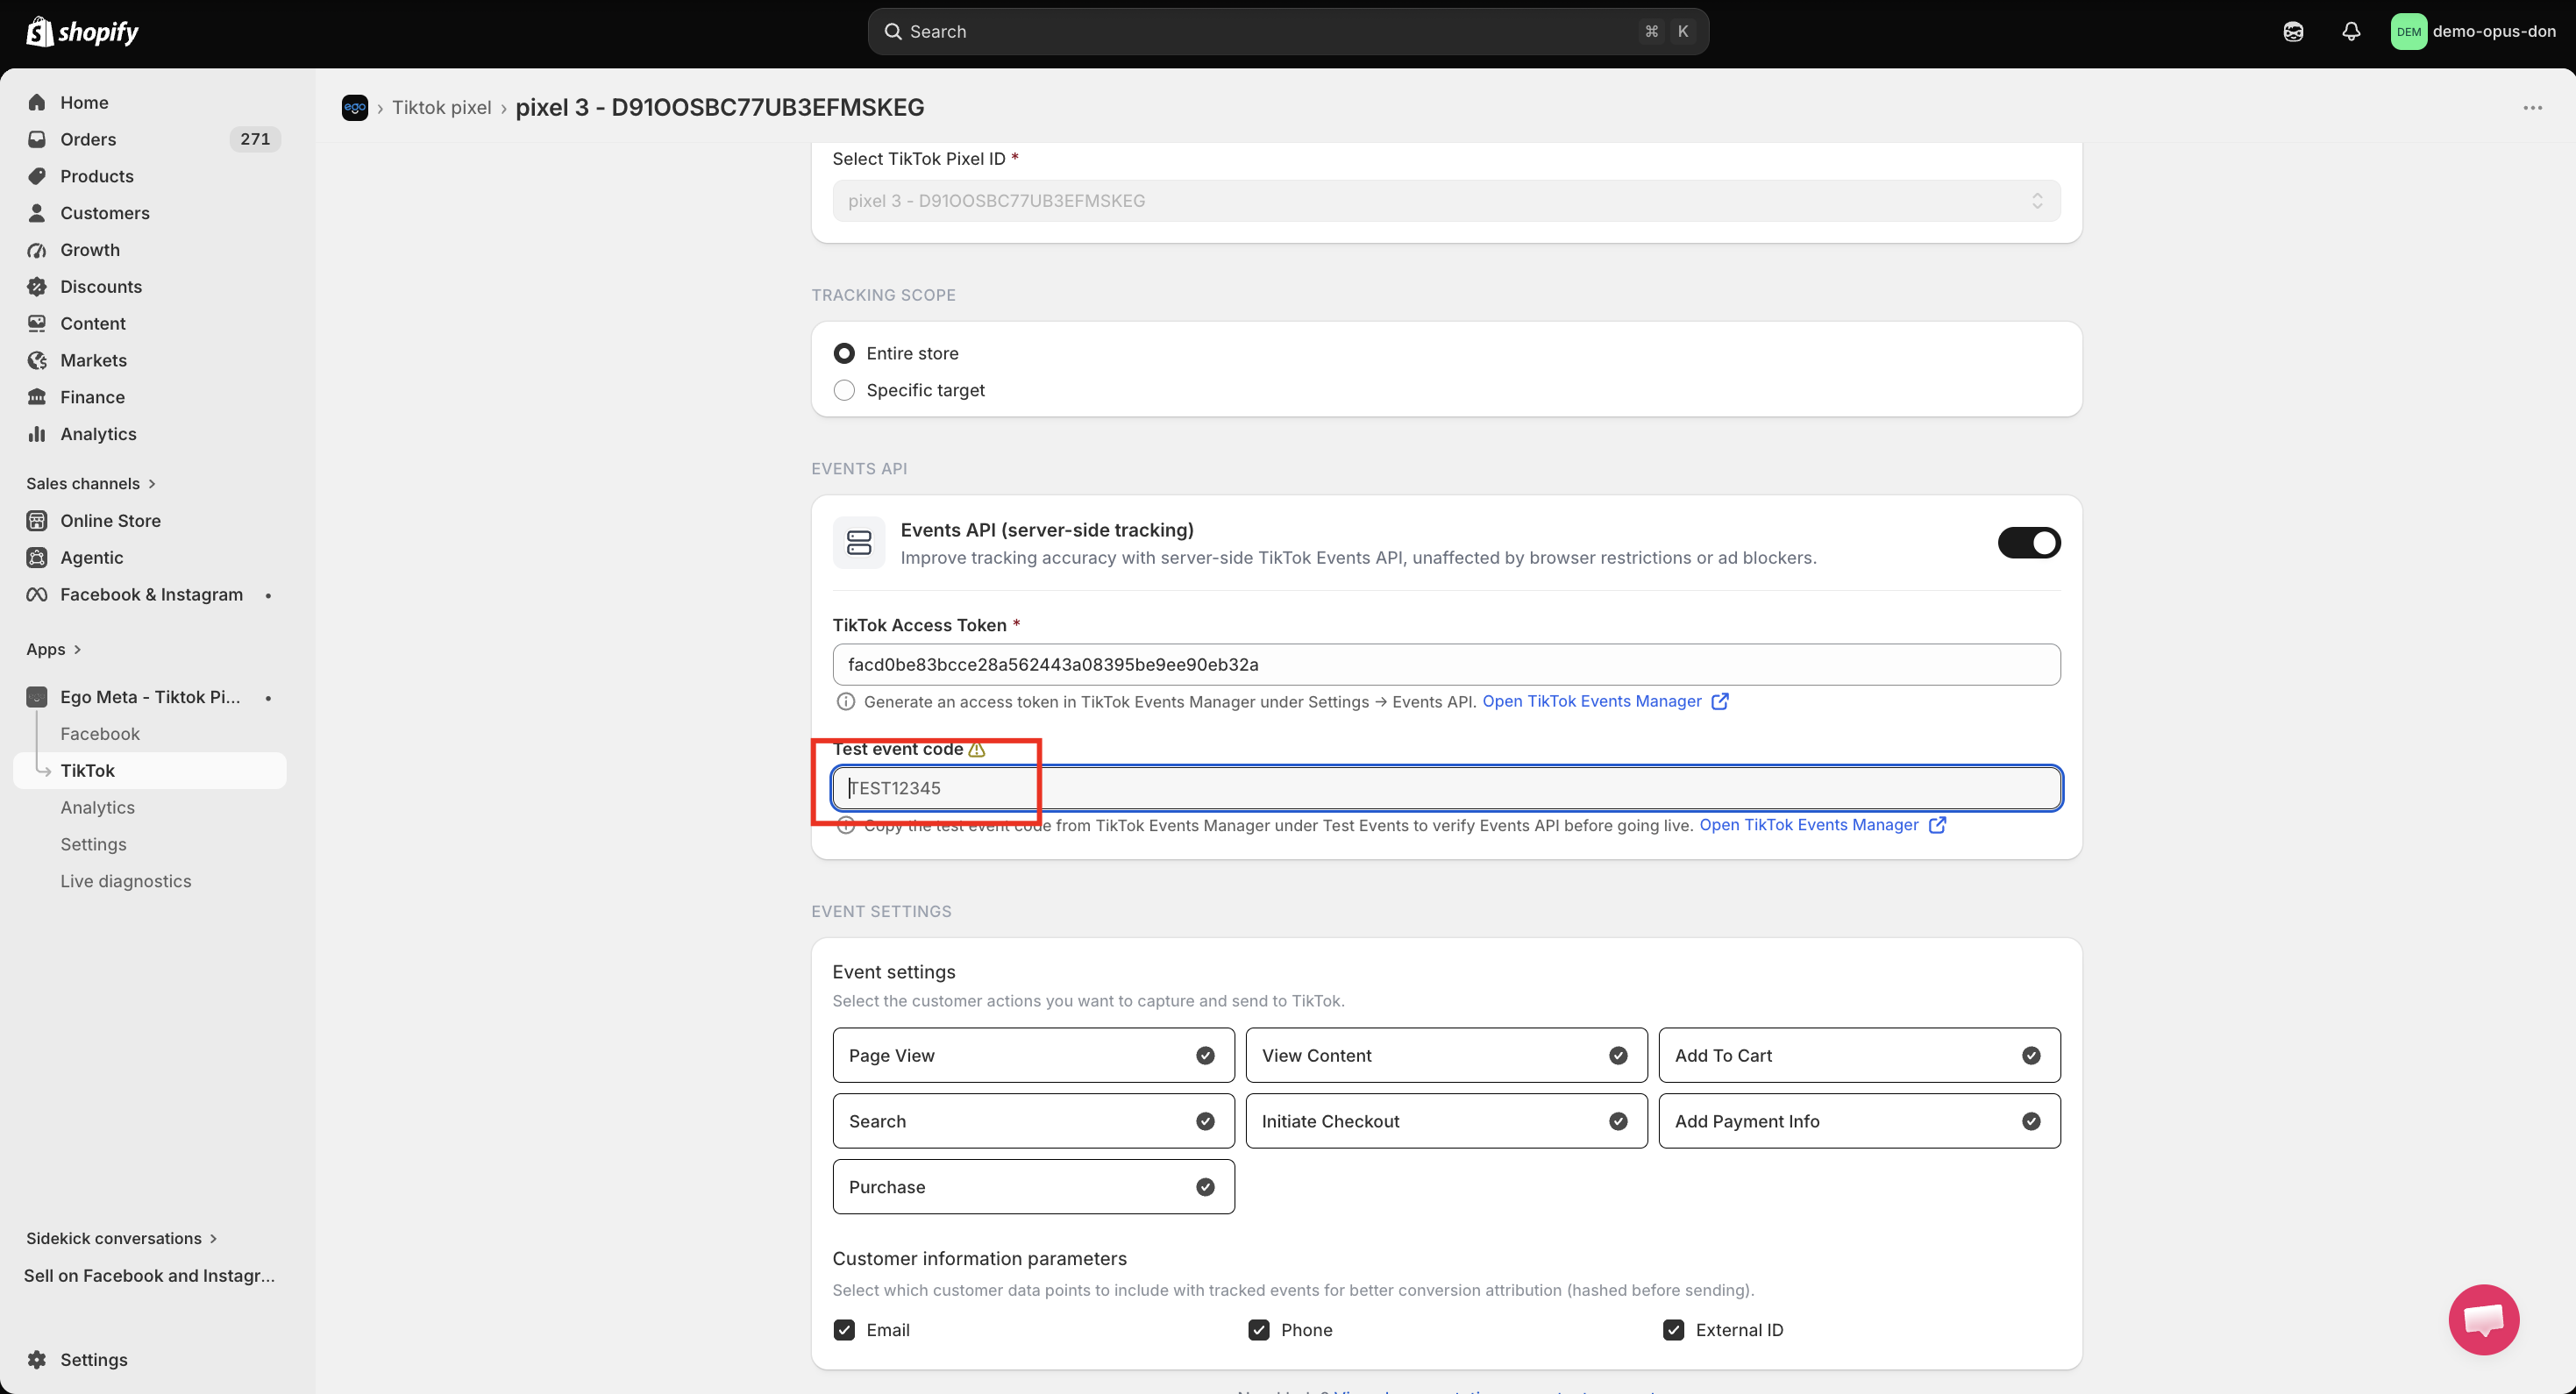
Step 2: Add the Test Event Code in the Pixel
Go to app and select Pixel
Paste the Test Event Code into the Test Event Code field.
Save the settings.
Step 3: Generate Test Events
Perform actions on your store such as:
View product
Add to cart
Initiate checkout
Purchase
Step 4: Verify Events
Return to TikTok Events Manager → Test Events and check whether the events appear in the dashboard.
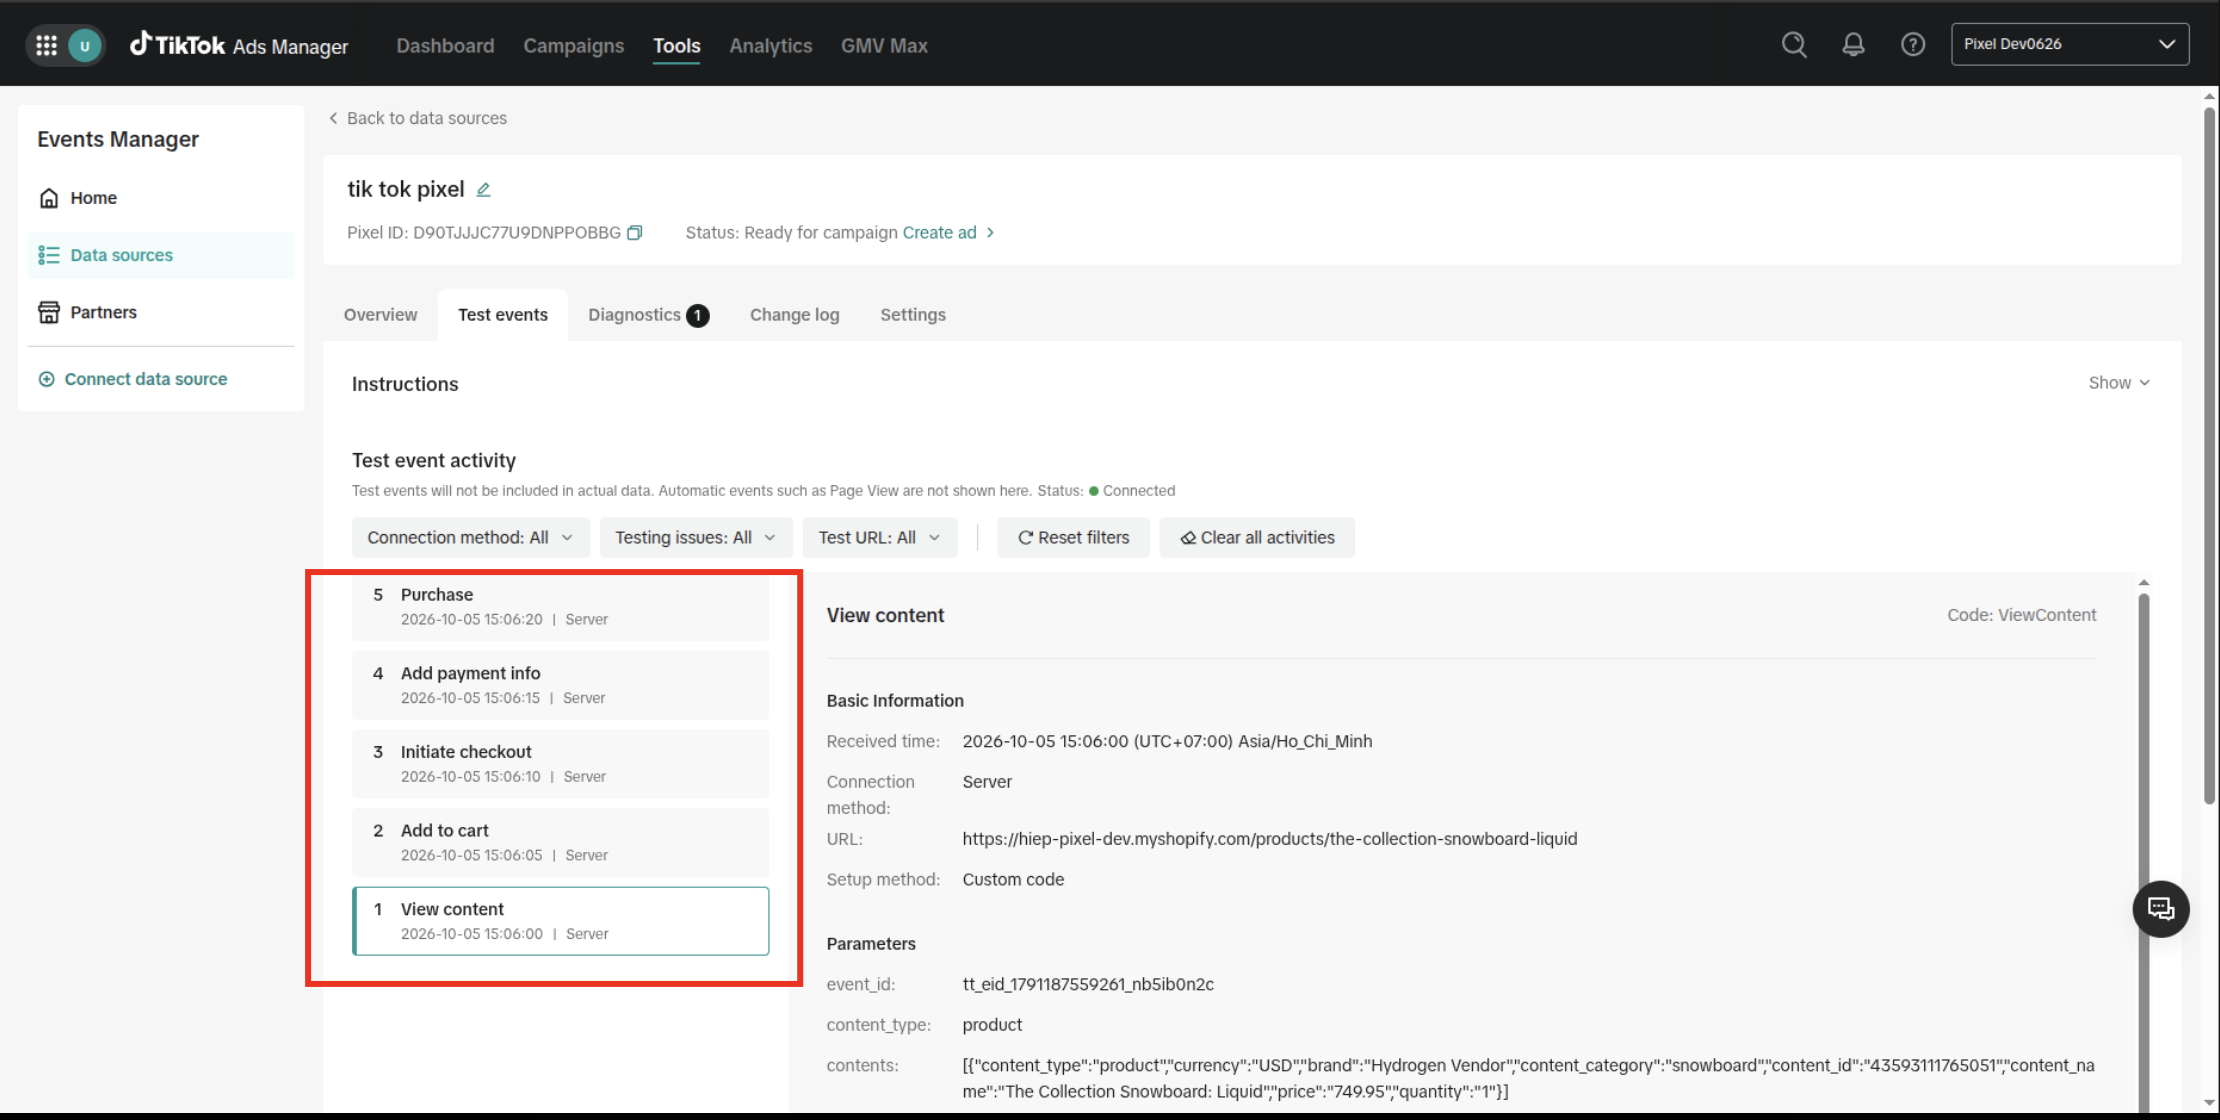
=> If the events are displayed here, it confirms that TikTok is successfully receiving your browser and server events (Pixel + Events API).
Important: After testing, remove the Test Event Code from the app. Otherwise, TikTok will treat incoming events as test events and they will not be recorded in your main event reporting.
Check Events in TikTok Events Manager Overview
After verifying that events are being sent successfully through Live Diagnostic and TikTok Test Events, you can use the Overview tab in TikTok Events Manager to confirm that your events are being received and processed correctly by TikTok.
Open TikTok Events Manager
Log in to your TikTok Ads Manager account.
Navigate to Assets → Events.
Select the Pixel connected to your store.
Open the Overview tab.
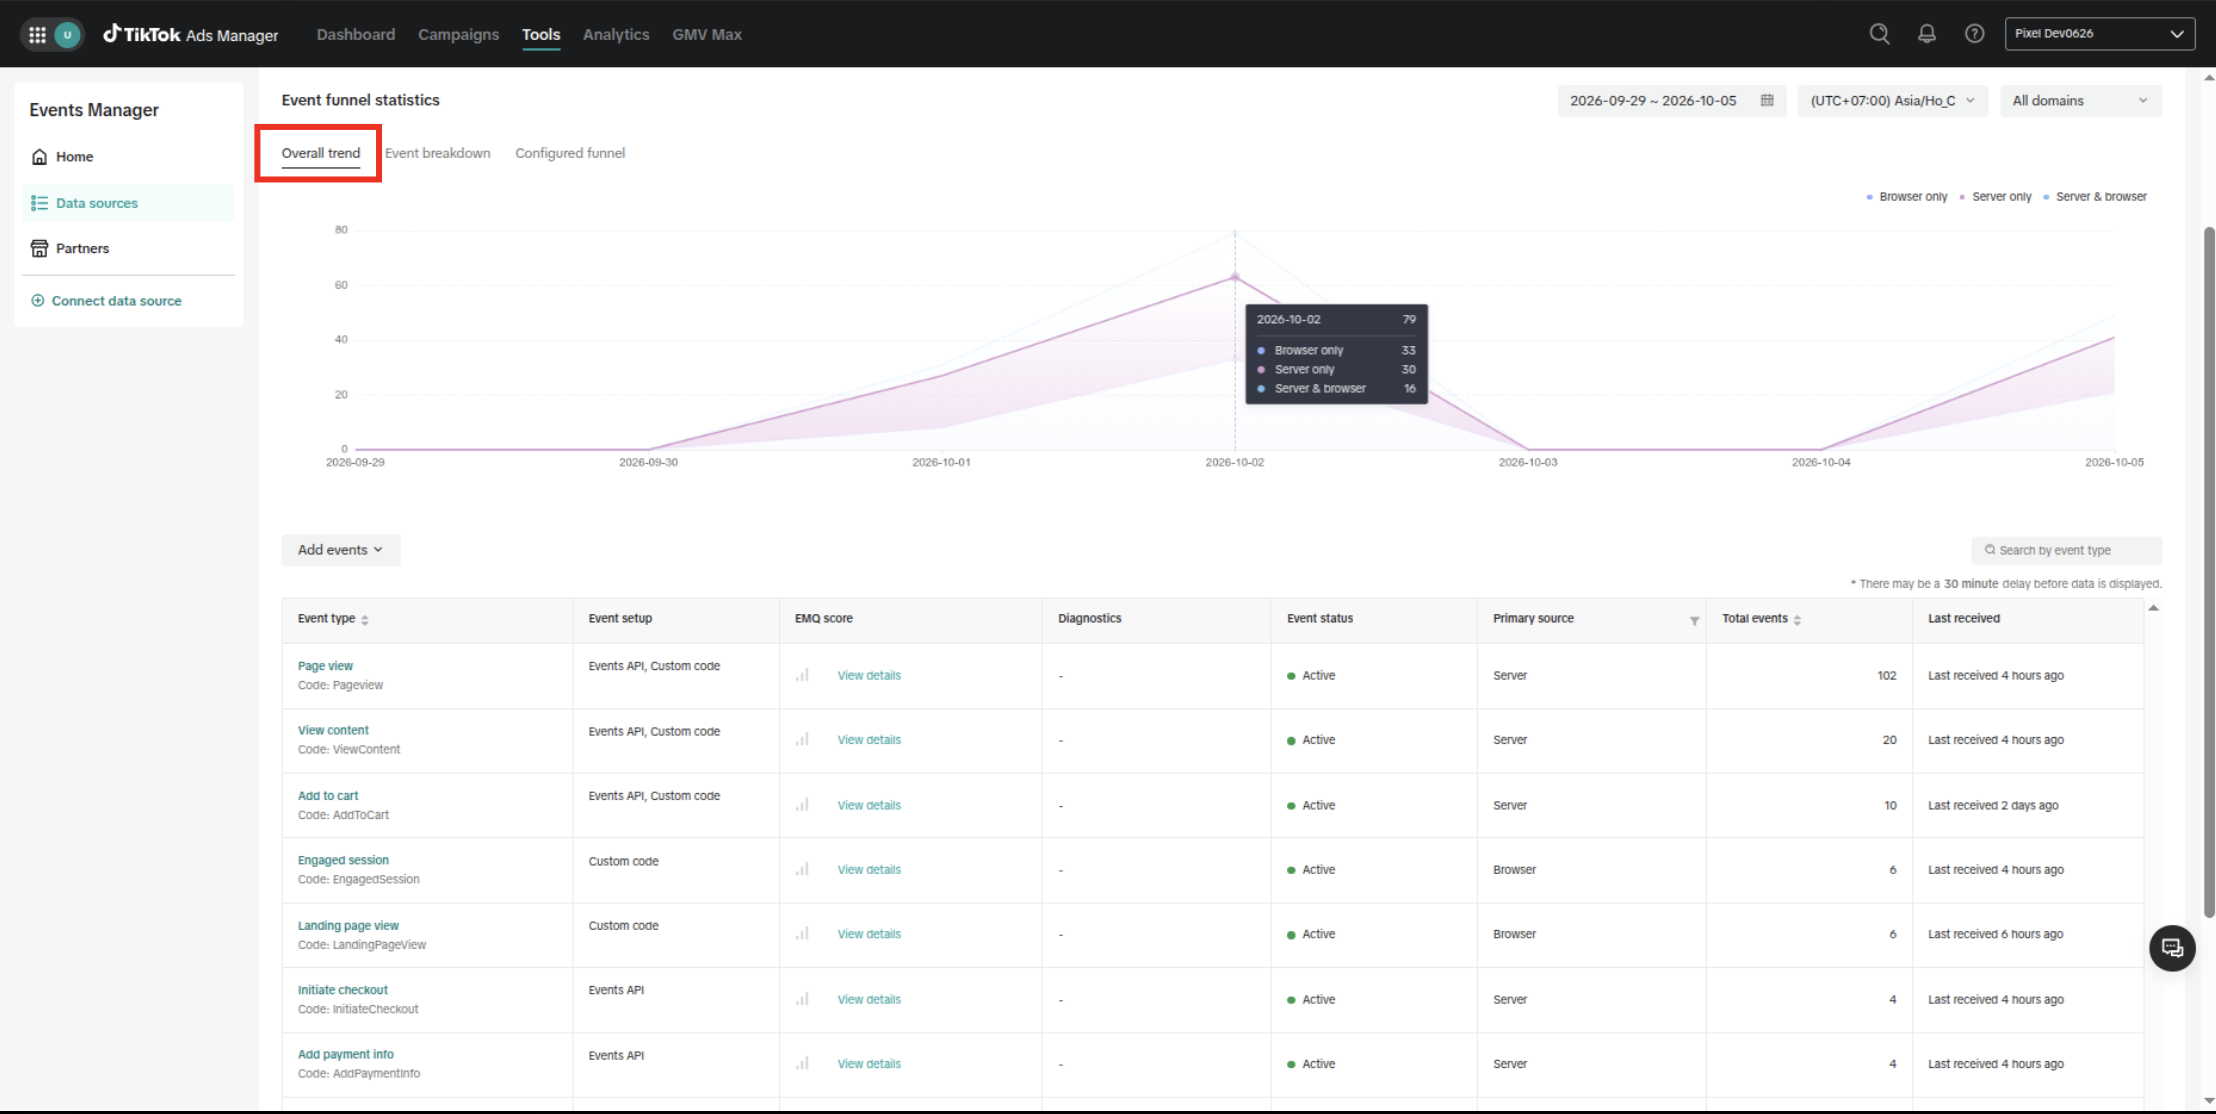
Verify Received Events
In the Overview tab, TikTok displays all events received by your Pixel, including whether each event came from the Browser (Pixel) or the Server (Events API).
These events may take some time to appear after being triggered.
Deduplication
When both TikTok Pixel and Events API are enabled, the app sends the same event ID with each browser and server event so TikTok can match them and count each event only once.
Note: Seeing the same event from both Browser and Server is expected. TikTok will deduplicate them automatically.
Custom Event Warning
⚠️ Pageview may appear as Custom Events in TikTok Events Manager because they are not included in TikTok's Standard Event list. This is expected behavior and does not affect tracking accuracy or event delivery.
Purchase Event Name
⚠️ On TikTok, the purchase event appears as CompletePayment instead of Purchase. This is TikTok's standard event name for completed orders.
Still need help?
Our support team is available 24/7. Contact support →