

Create TikTok Catalog
Create a TikTok Catalog to sync your Shopify products and use them in Catalog Ads and shopping experiences.
Overview
Create a TikTok Catalog to keep your Shopify products synchronized with TikTok for advertising and commerce.
From this guide, you will:
Connect your TikTok for Business account.
Create and configure a TikTok Catalog.
Link your catalog to a TikTok Pixel.
Verify that your products are synced successfully.
Create Catalog
Step 1: Open Catalog Manager
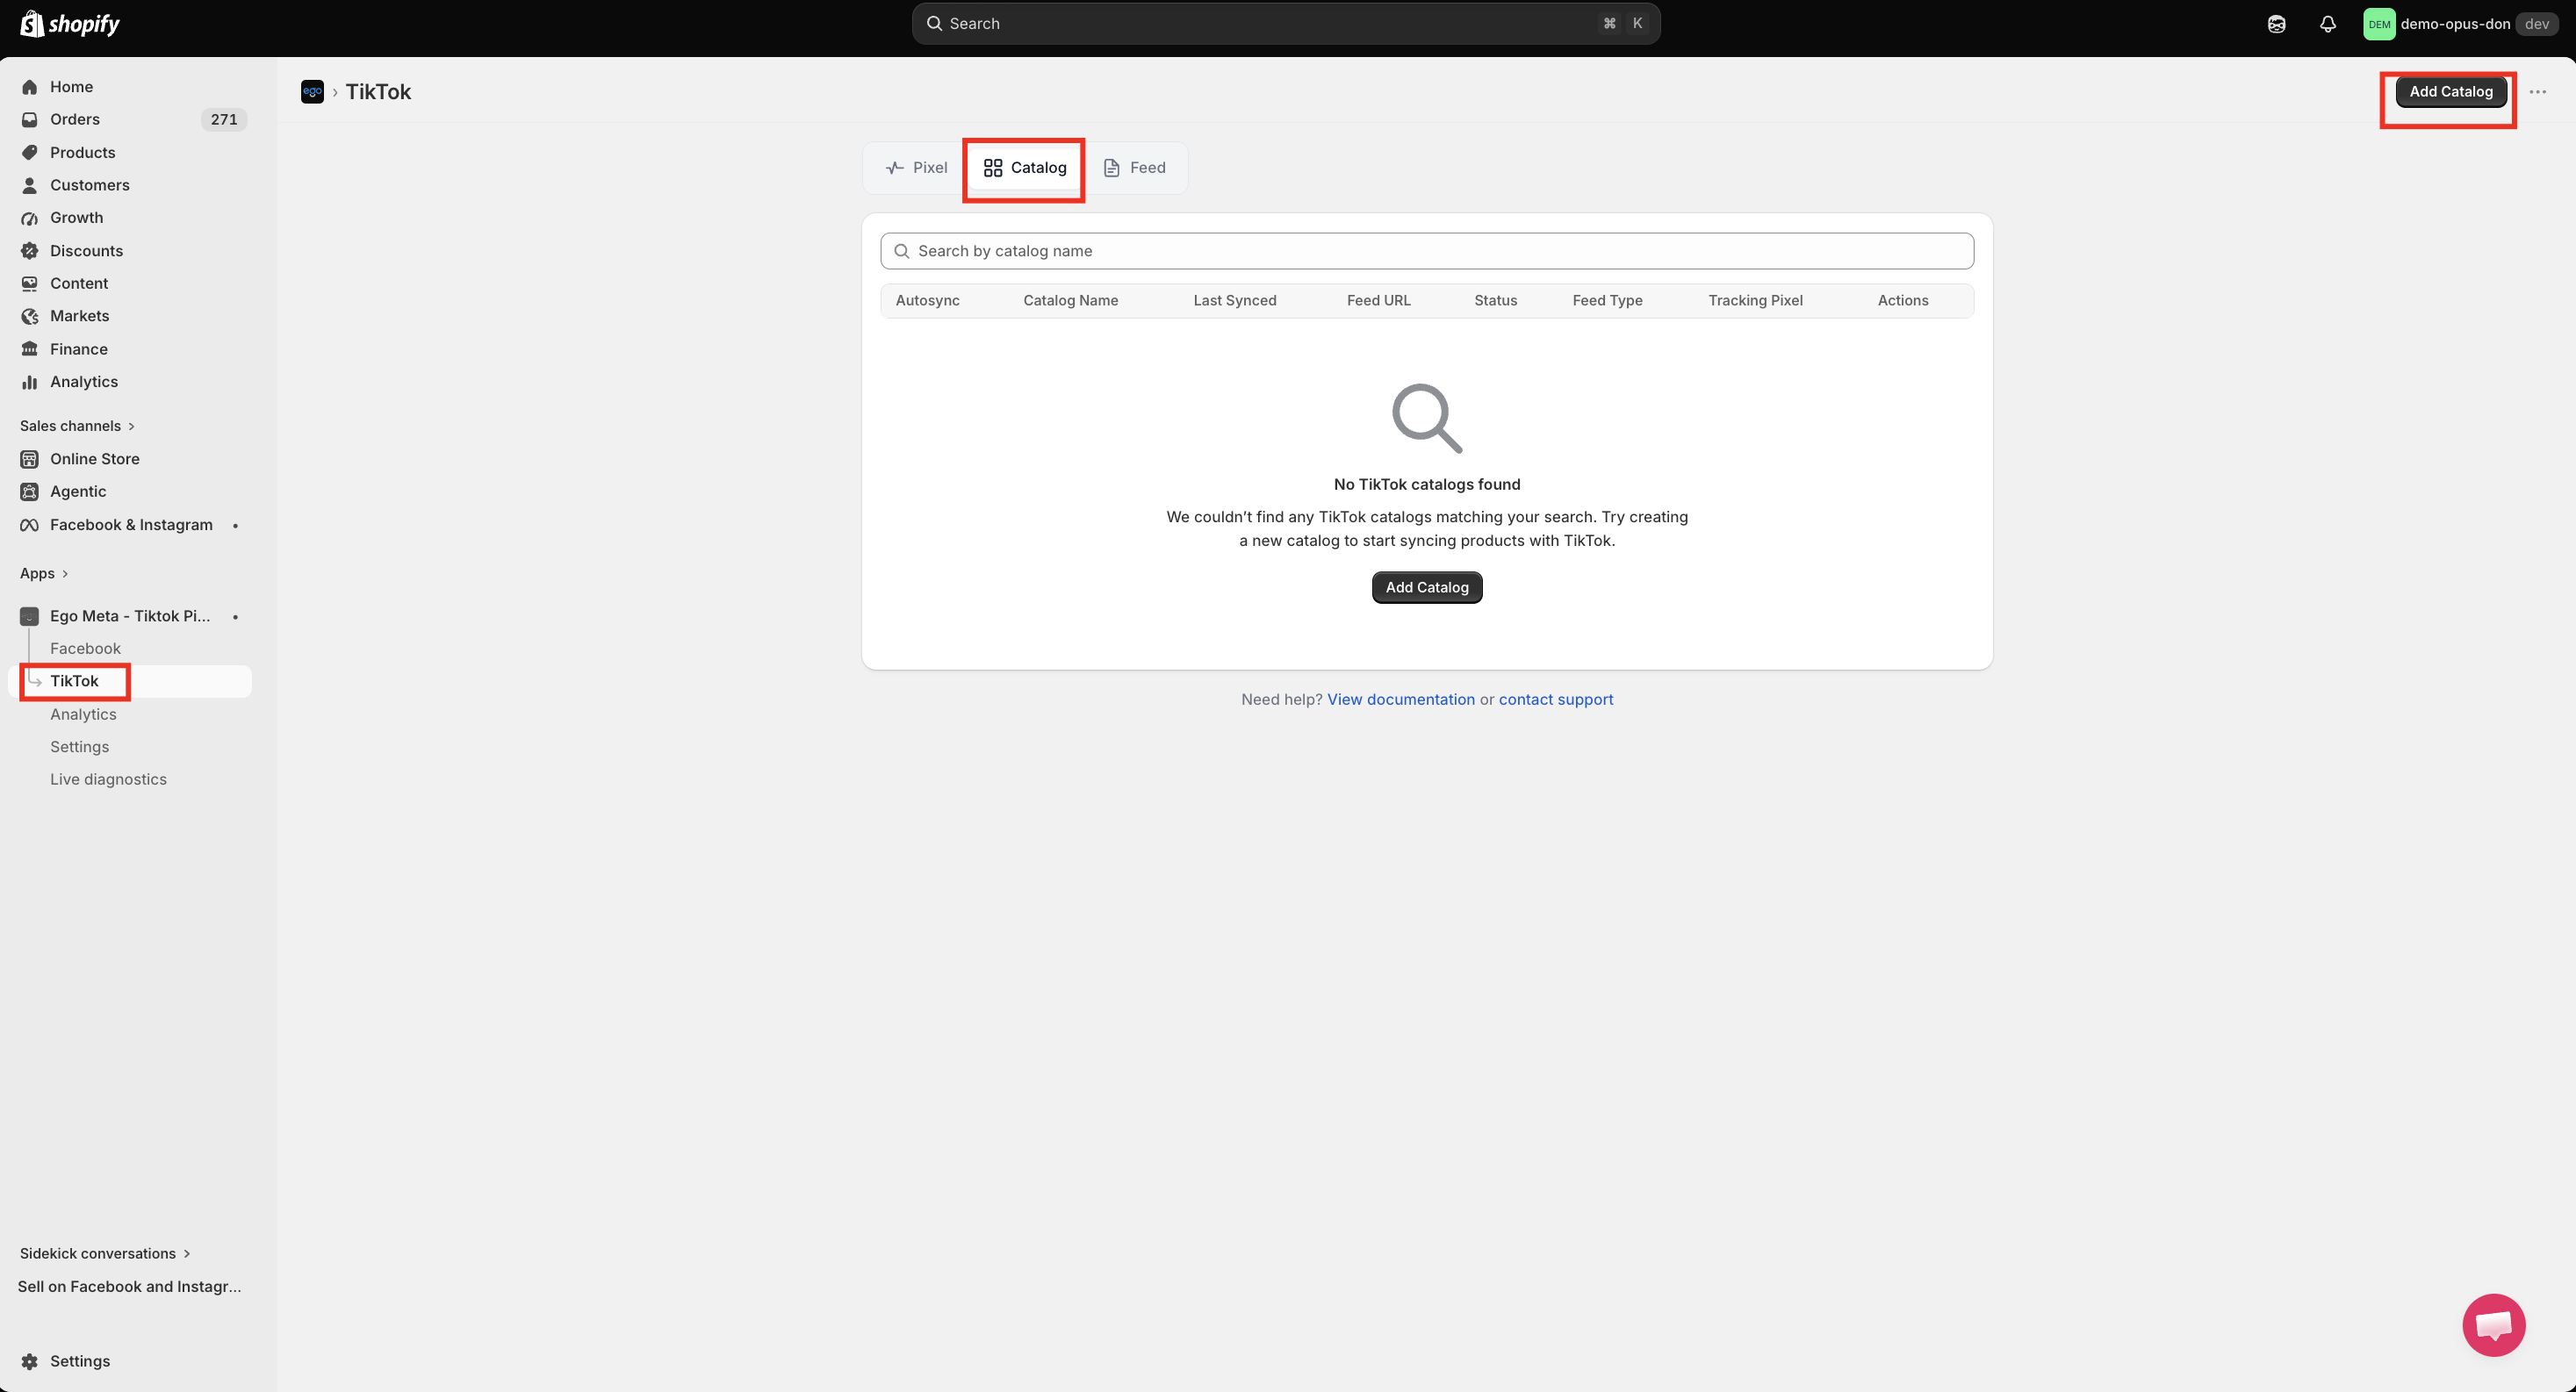
In the app dashboard, go to Catalog Manager.
Click Create Catalog to start creating a new catalog.
Step 2: Connect your TikTok account
Before creating a catalog, you need to connect your TikTok for Business account.
Log in to your TikTok for Business account and grant permissions.
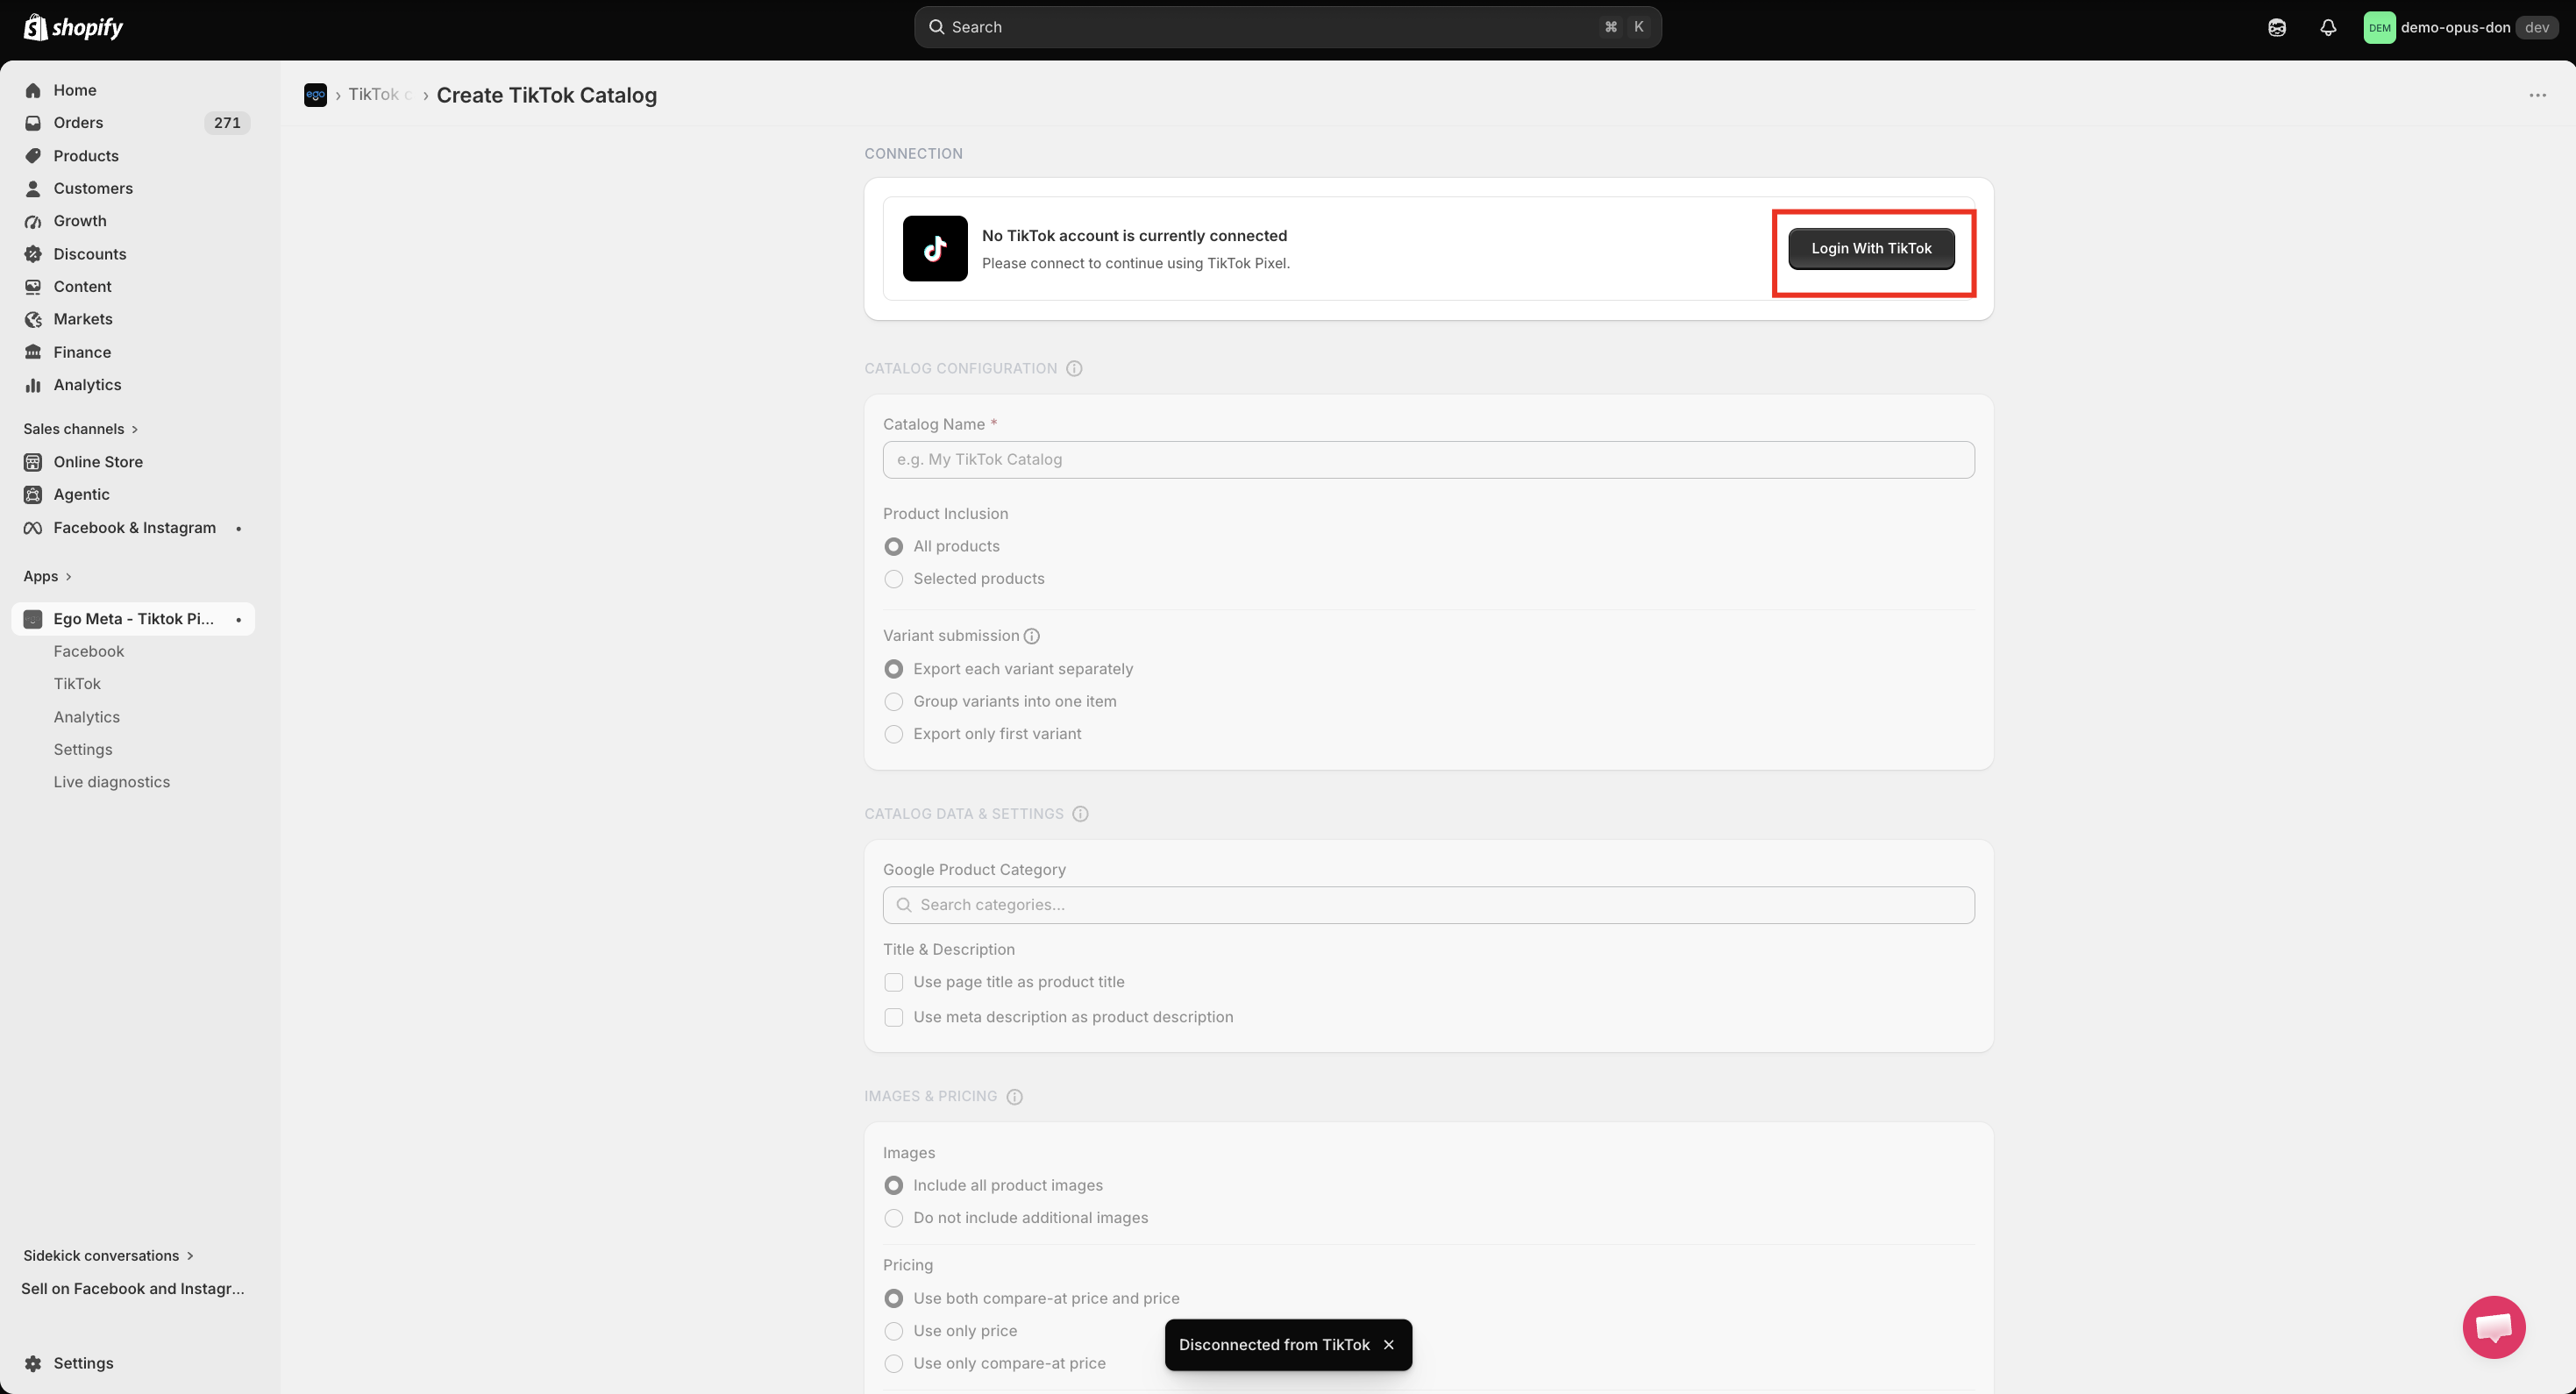
=> Once connected, you can create and manage catalogs directly from the app.
Step 3: Enter catalog information
Business Center / Ad Account – Select the connected TikTok account
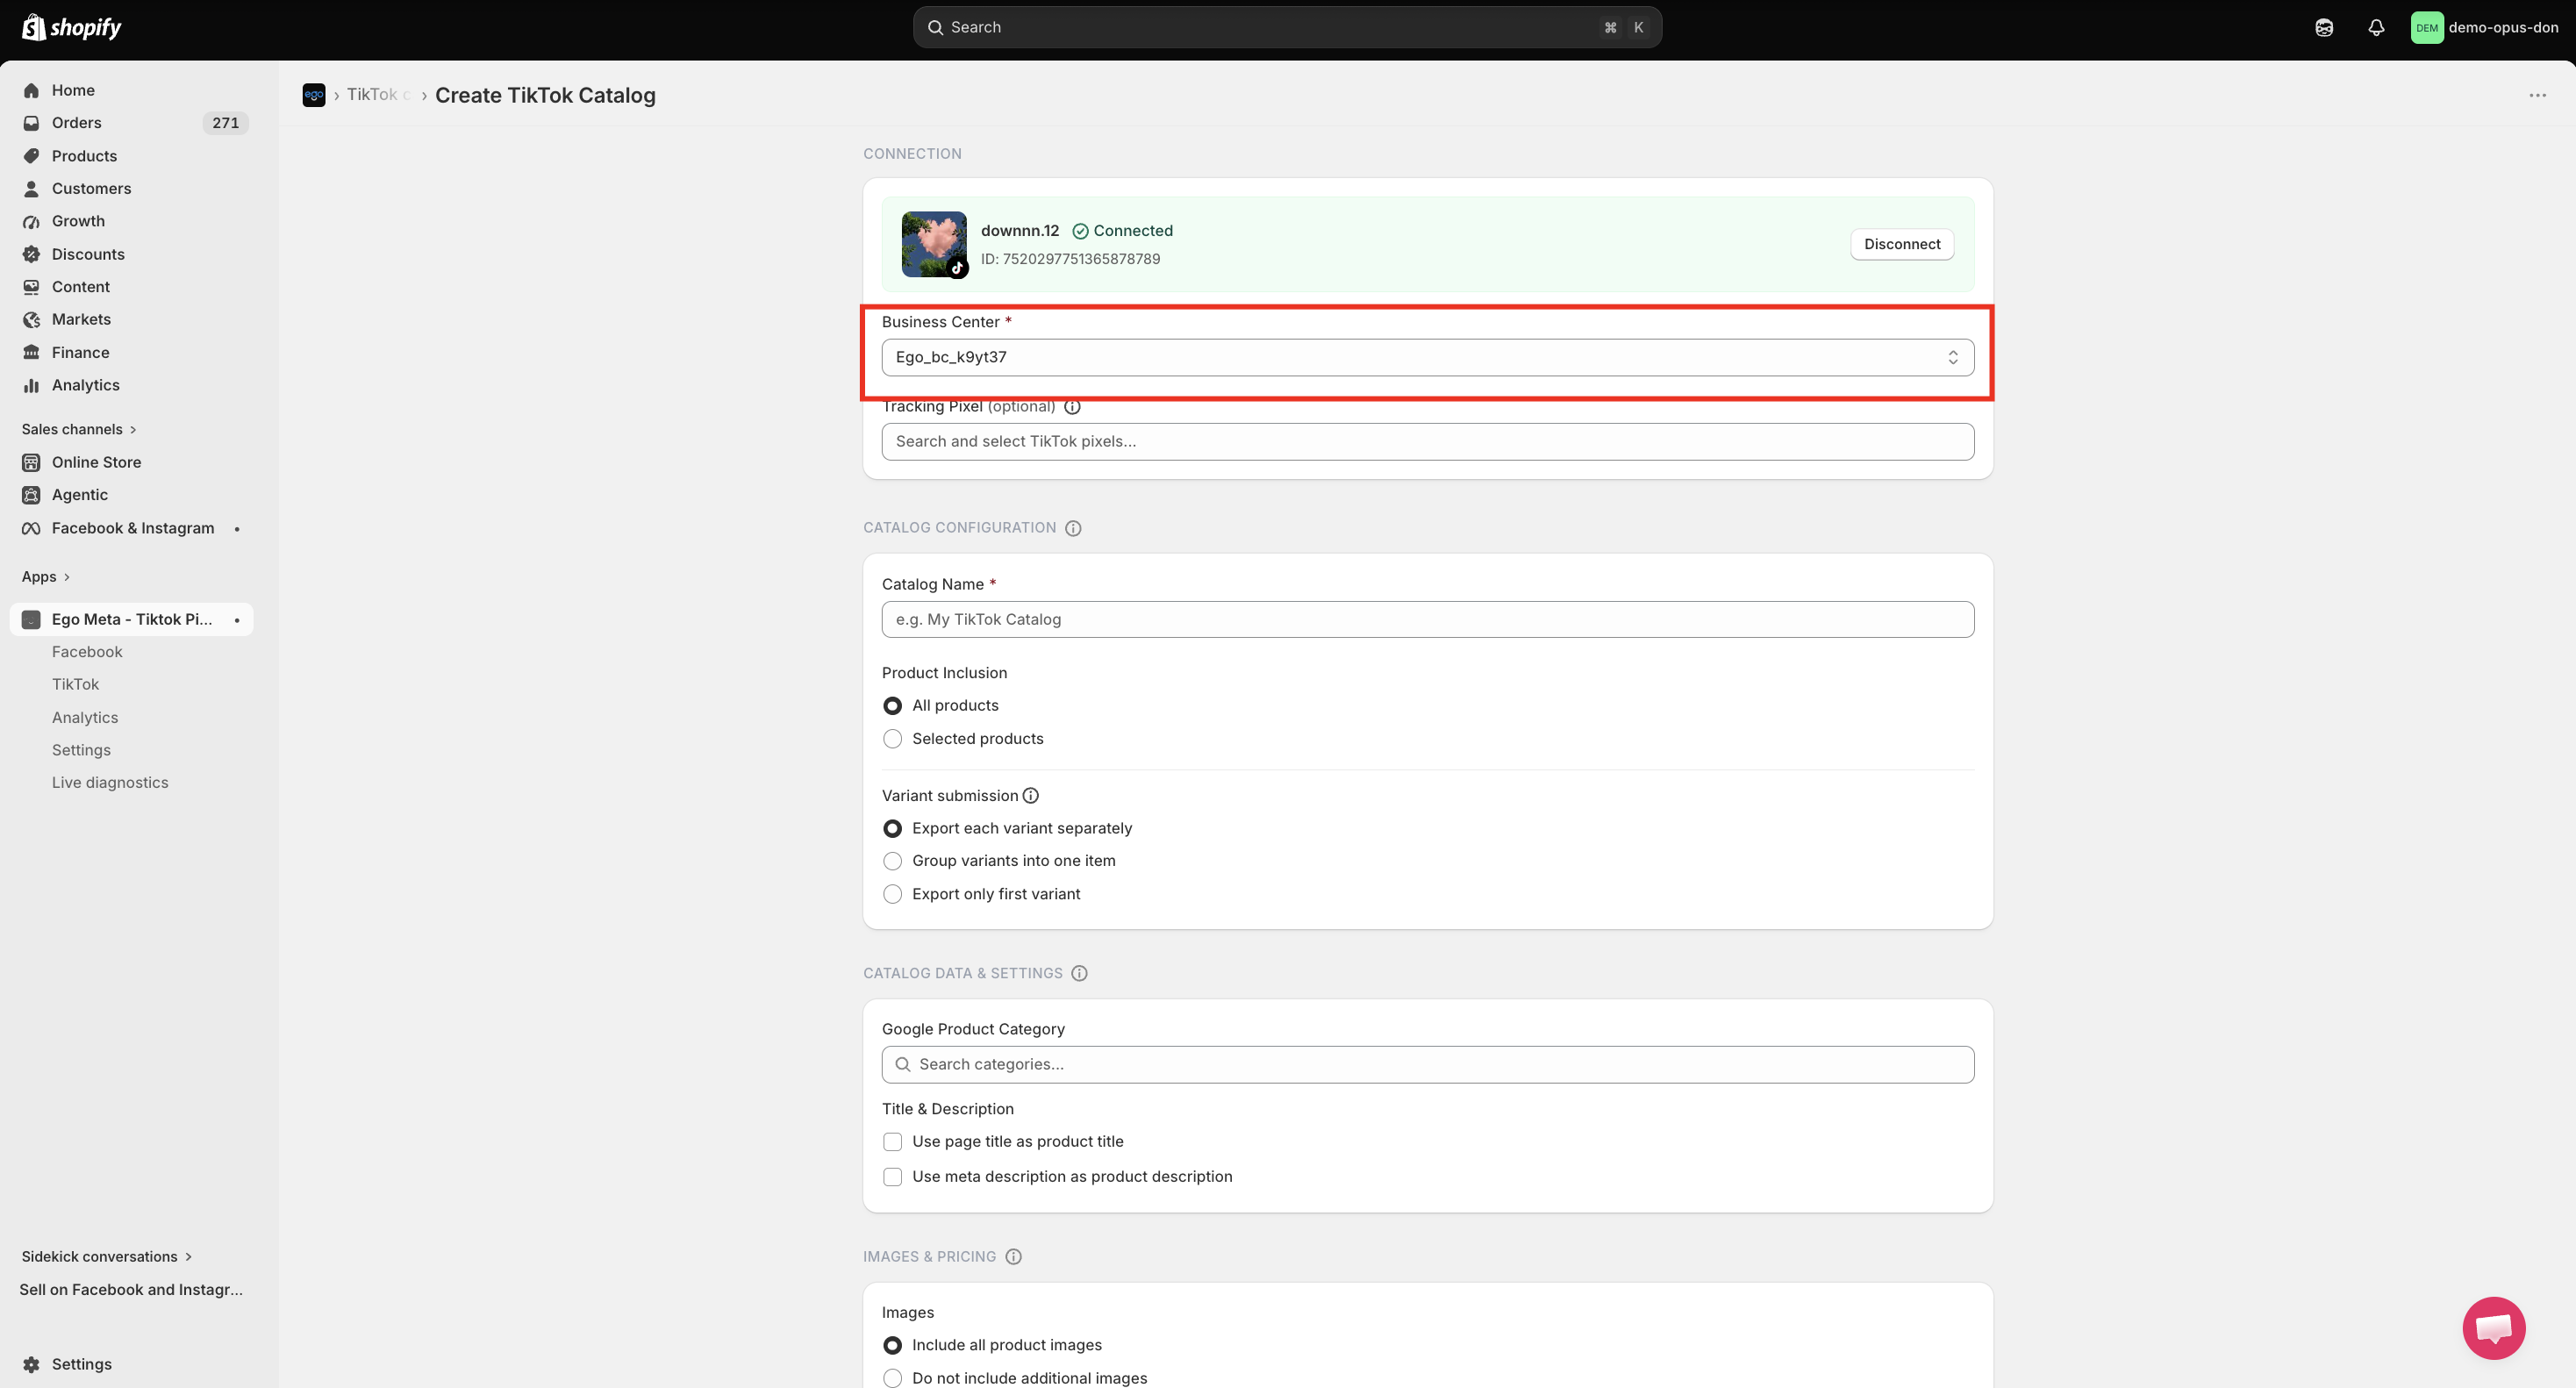
Pixel – Select the Pixel you want to connect with this catalog
Best practice: We recommend connecting only one TikTok Pixel to each catalog. Using a single pixel helps ensure accurate event tracking and improves product matching for Catalog Ads.
TikTok matches pixel events (such as ViewContent, AddToCart, and CompletePayment) with catalog products using the product ID, so make sure the Pixel used for your ads is the one linked to the catalog you advertise with.
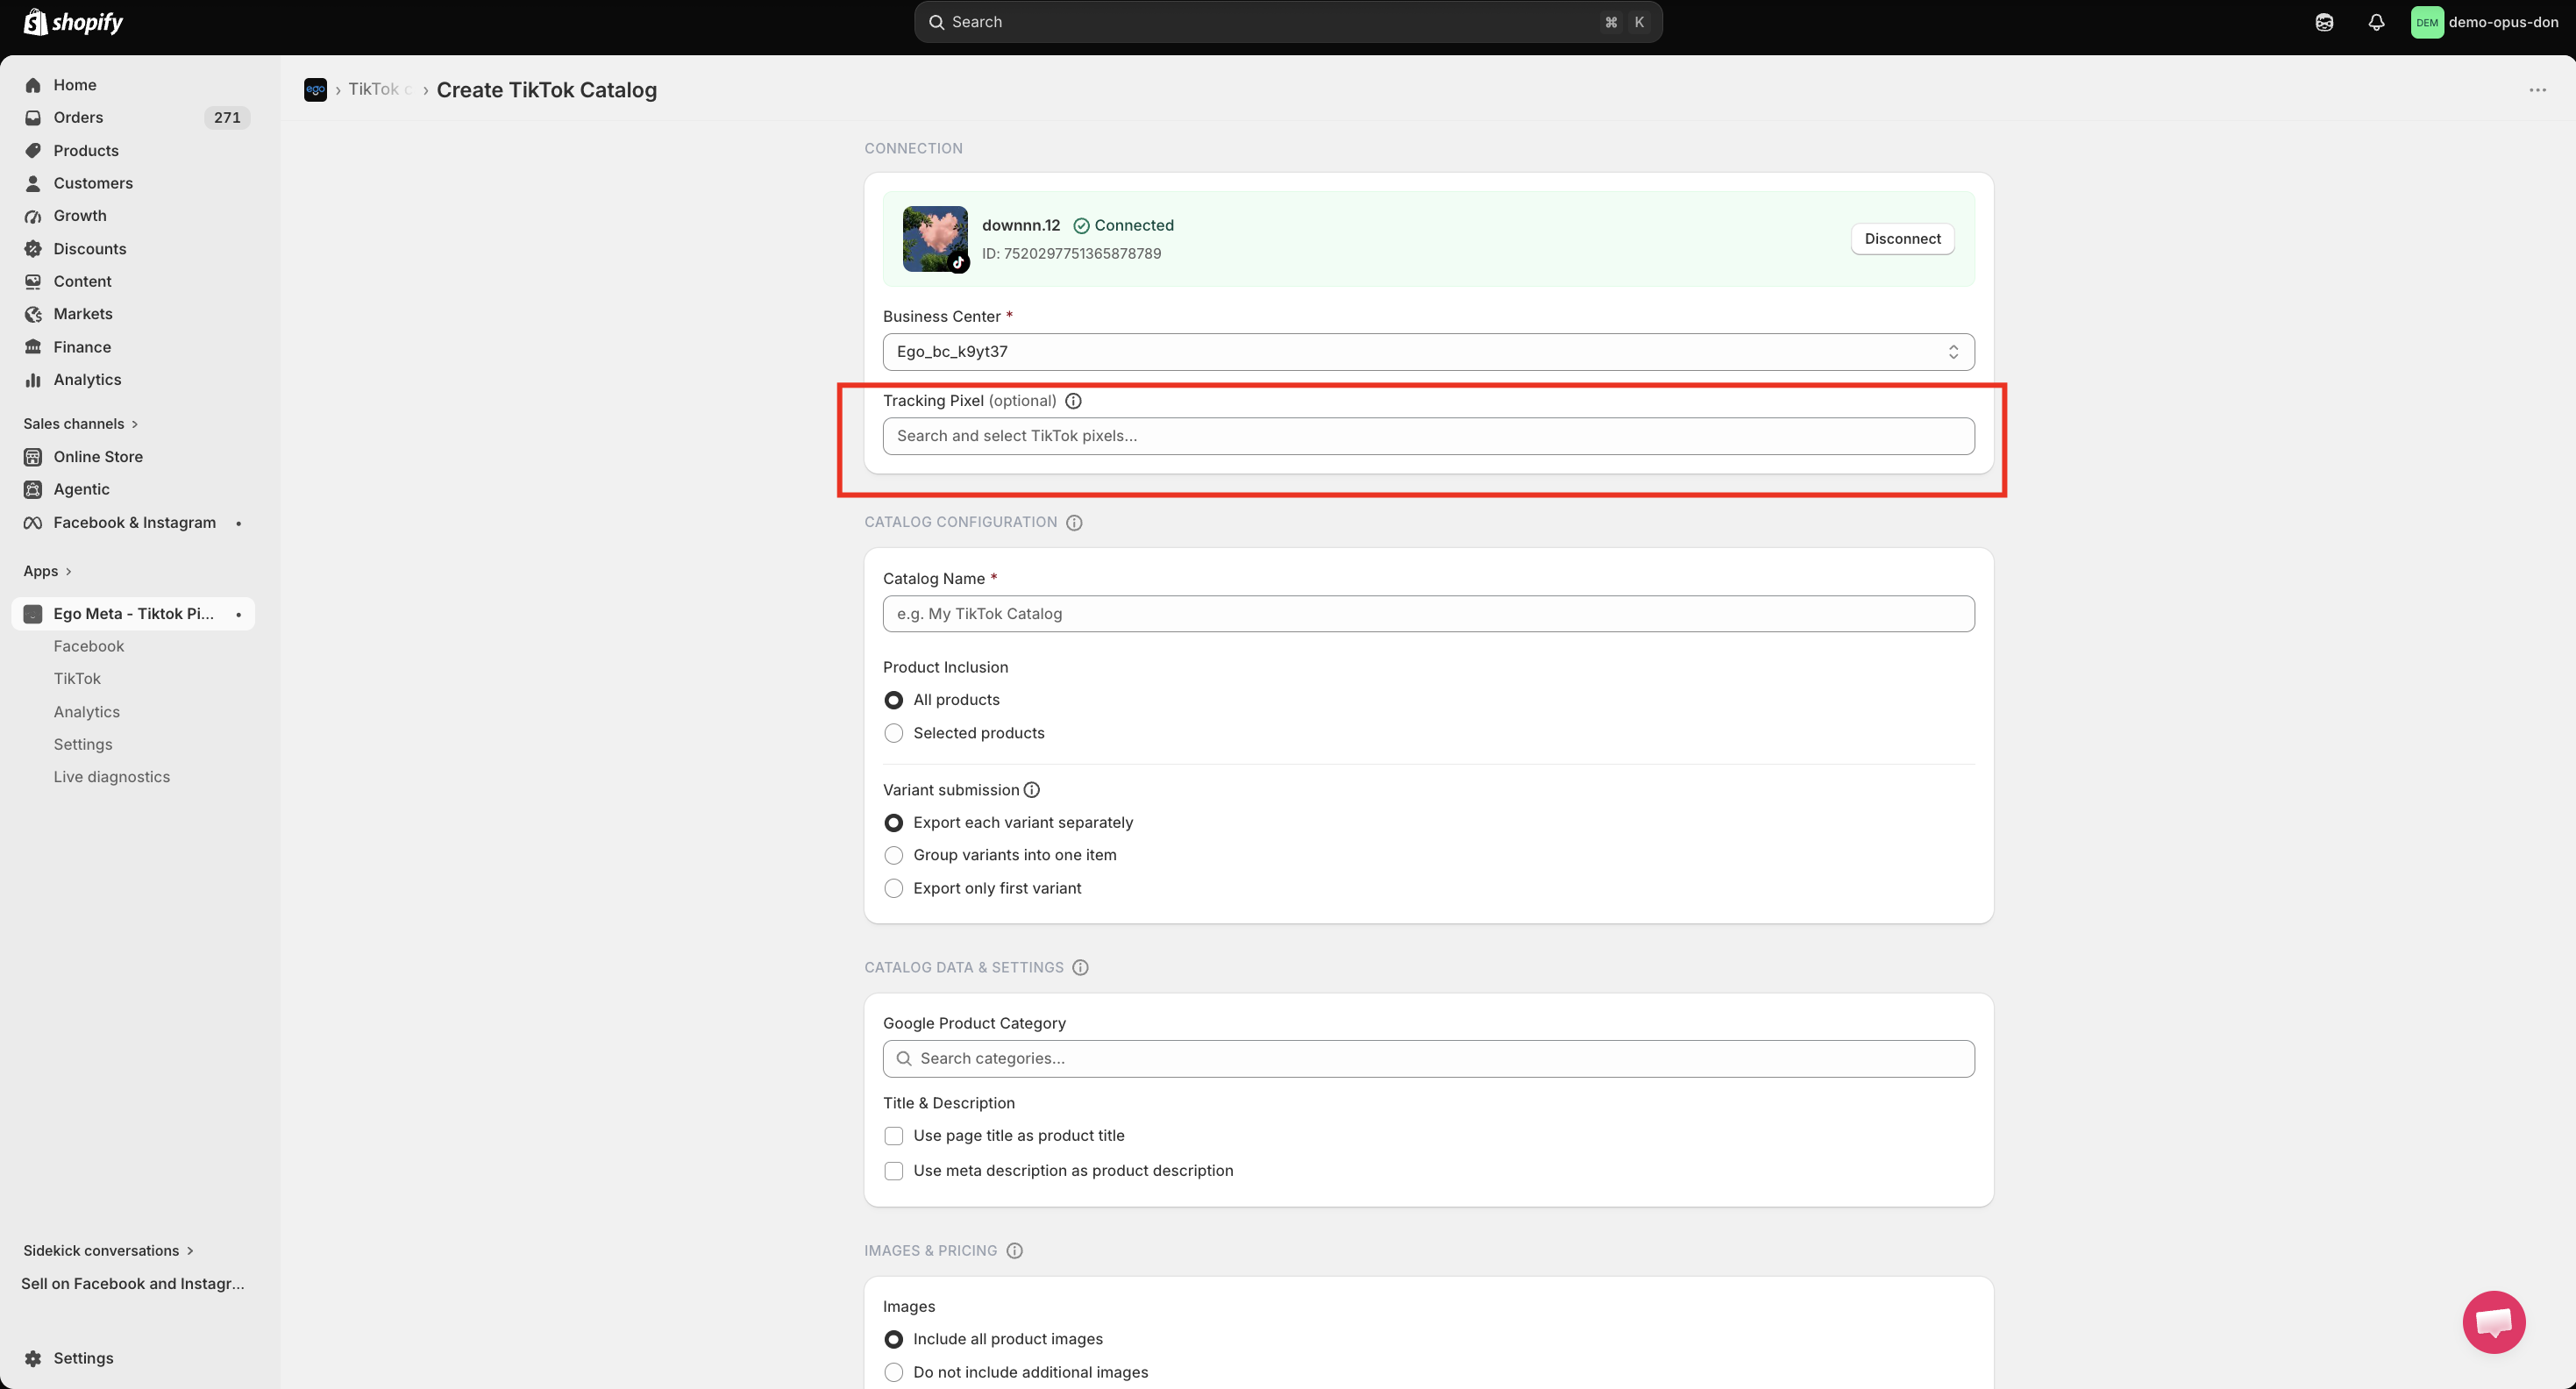
Catalog Name – Name of your catalog
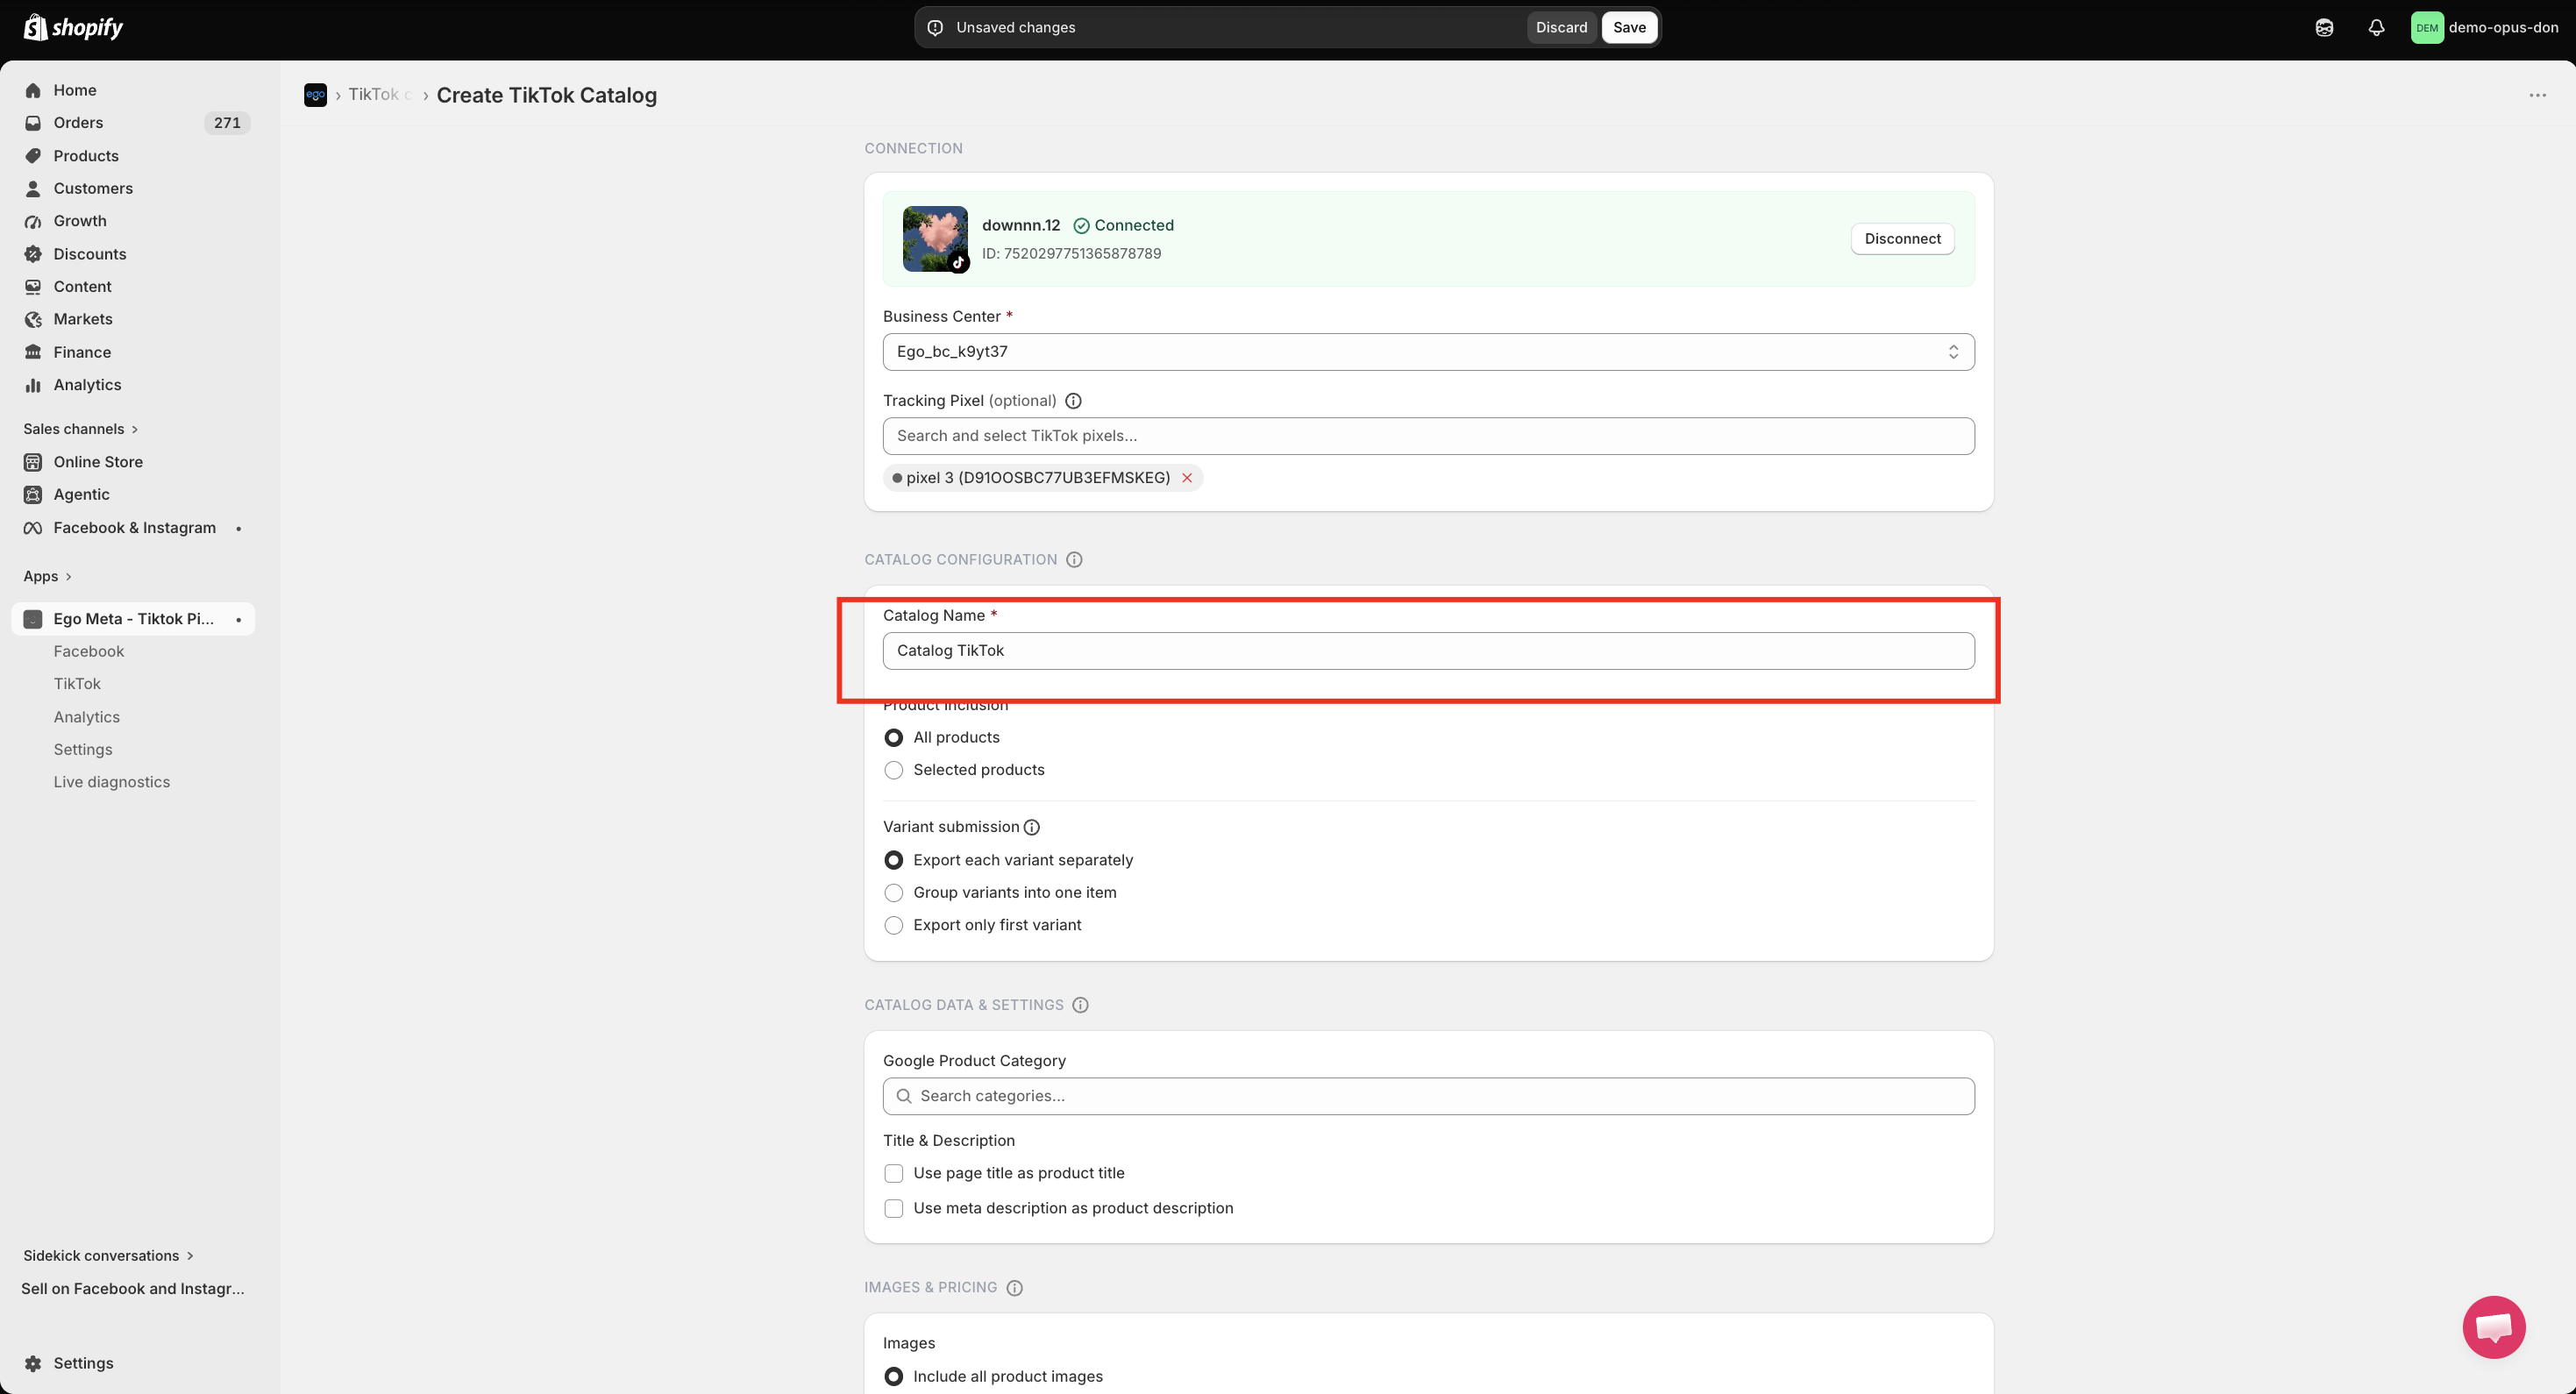
Step 4: Configure Catalog Settings
After entering the catalog name, configure the catalog settings:
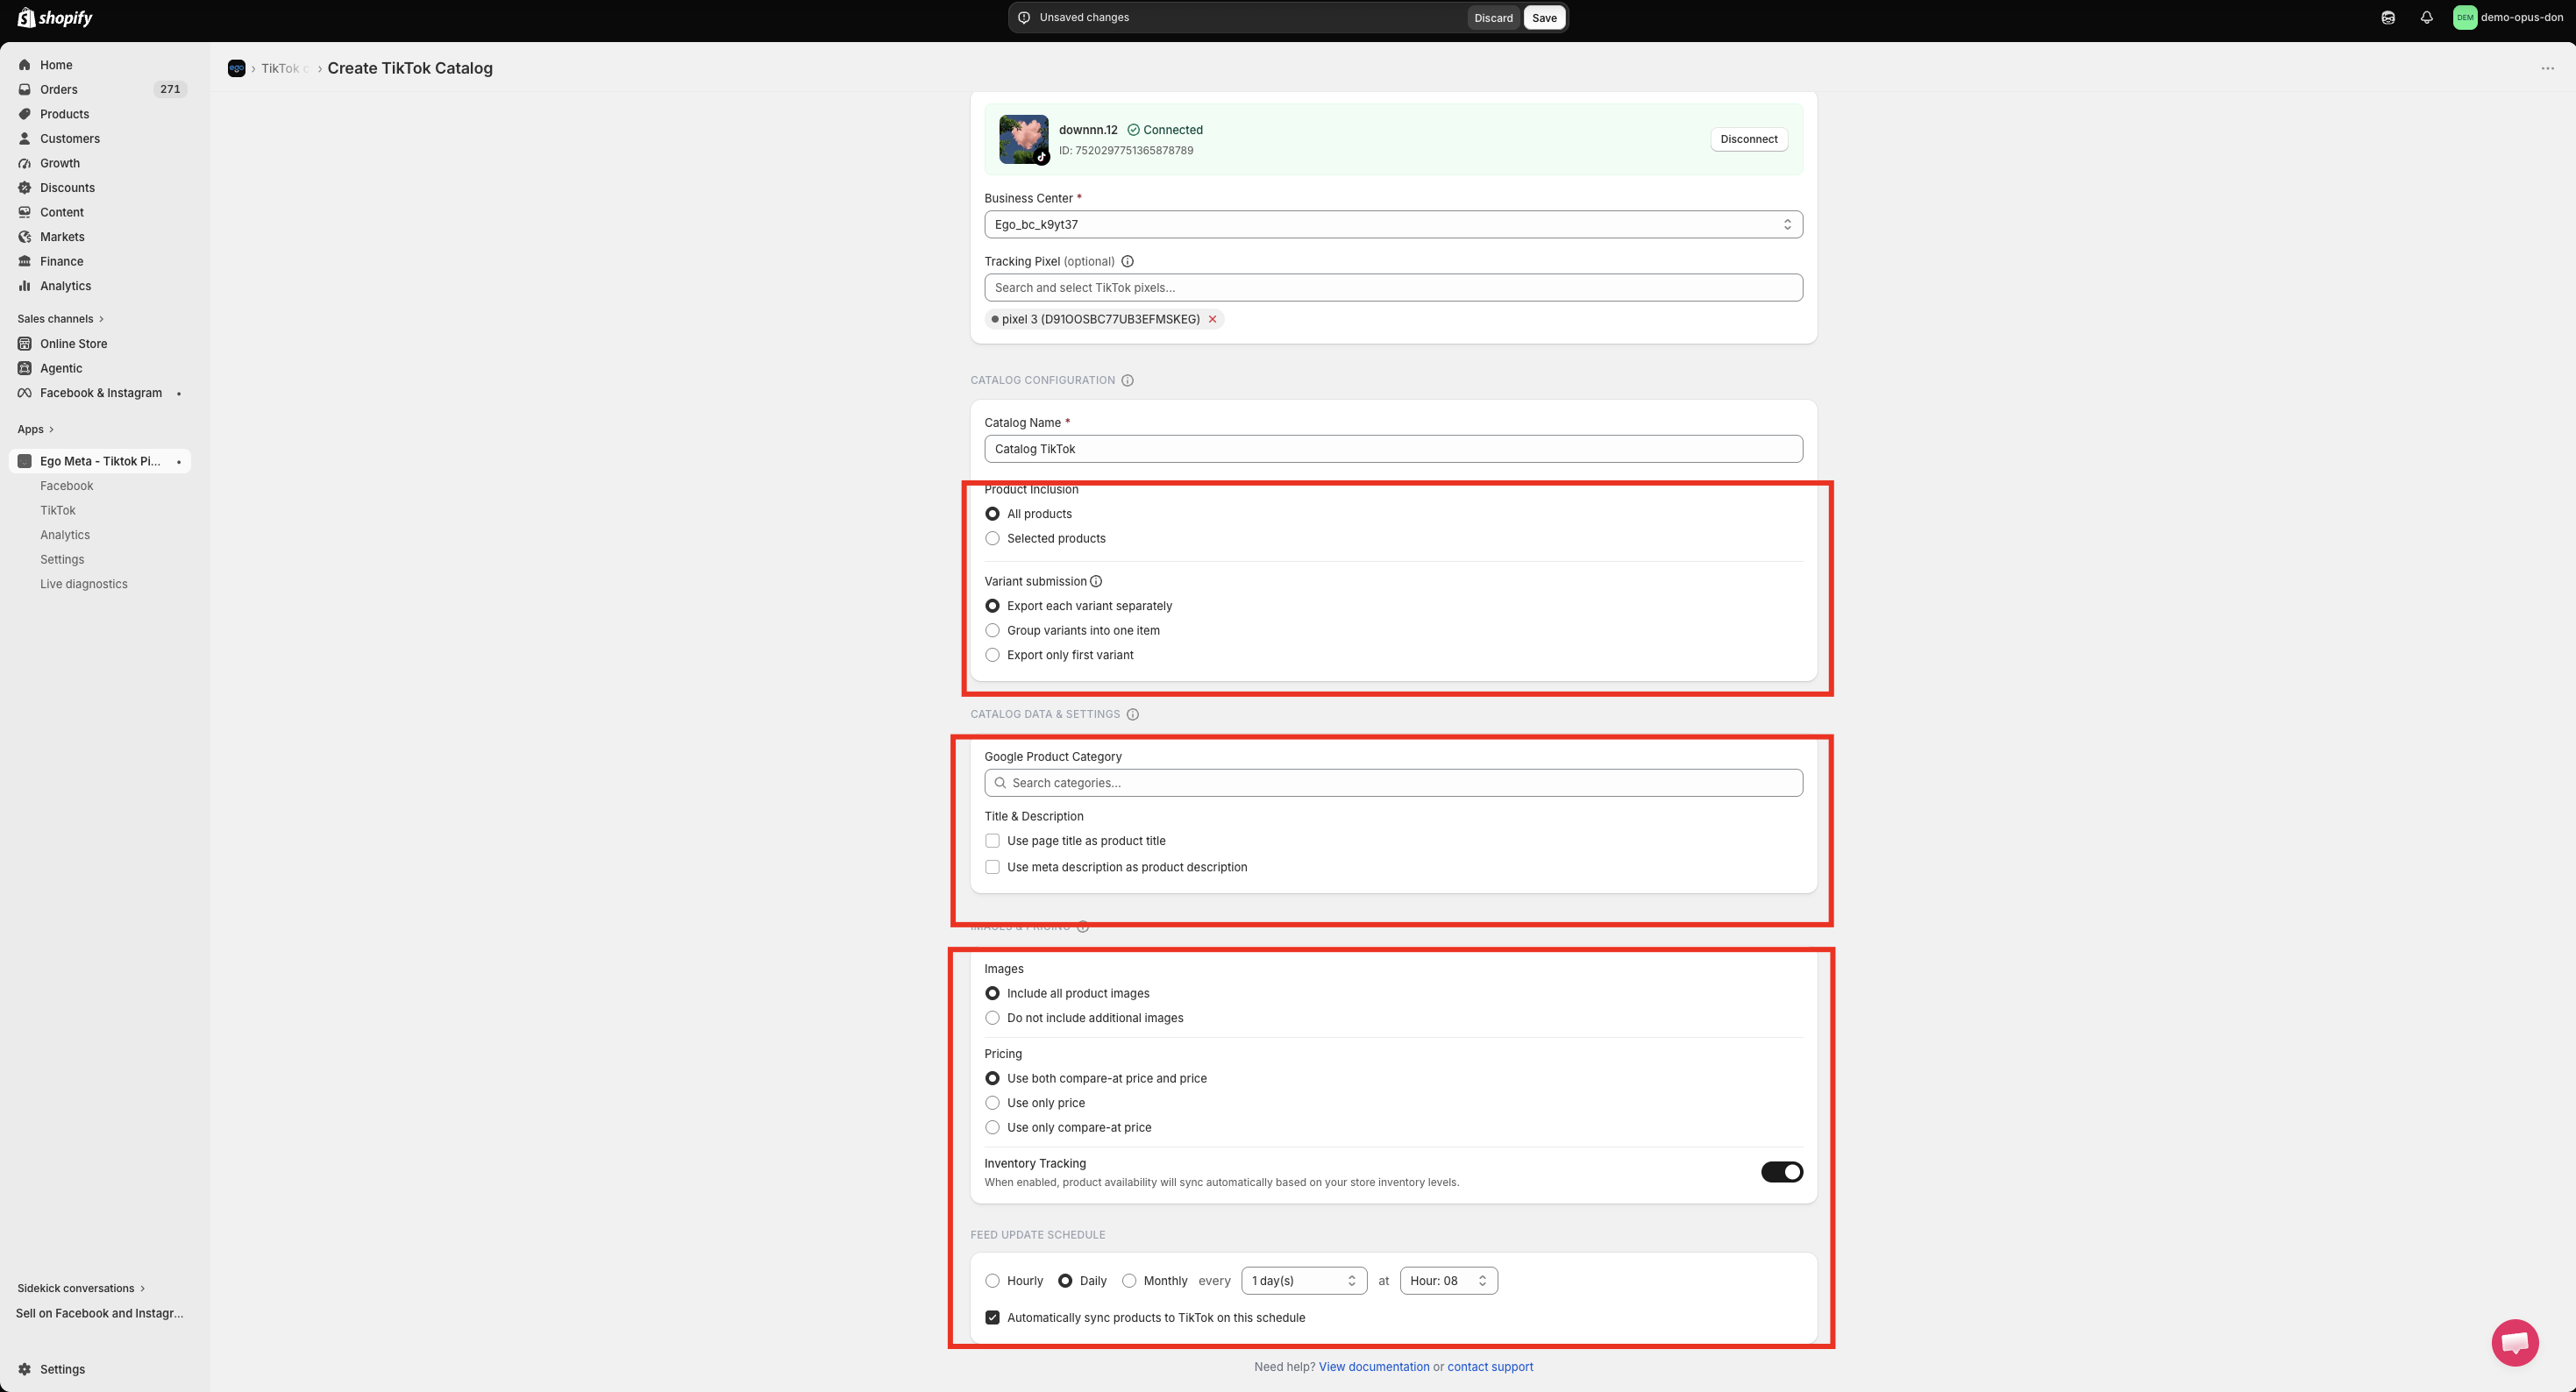
=> Then click "Save" to save the catalog.
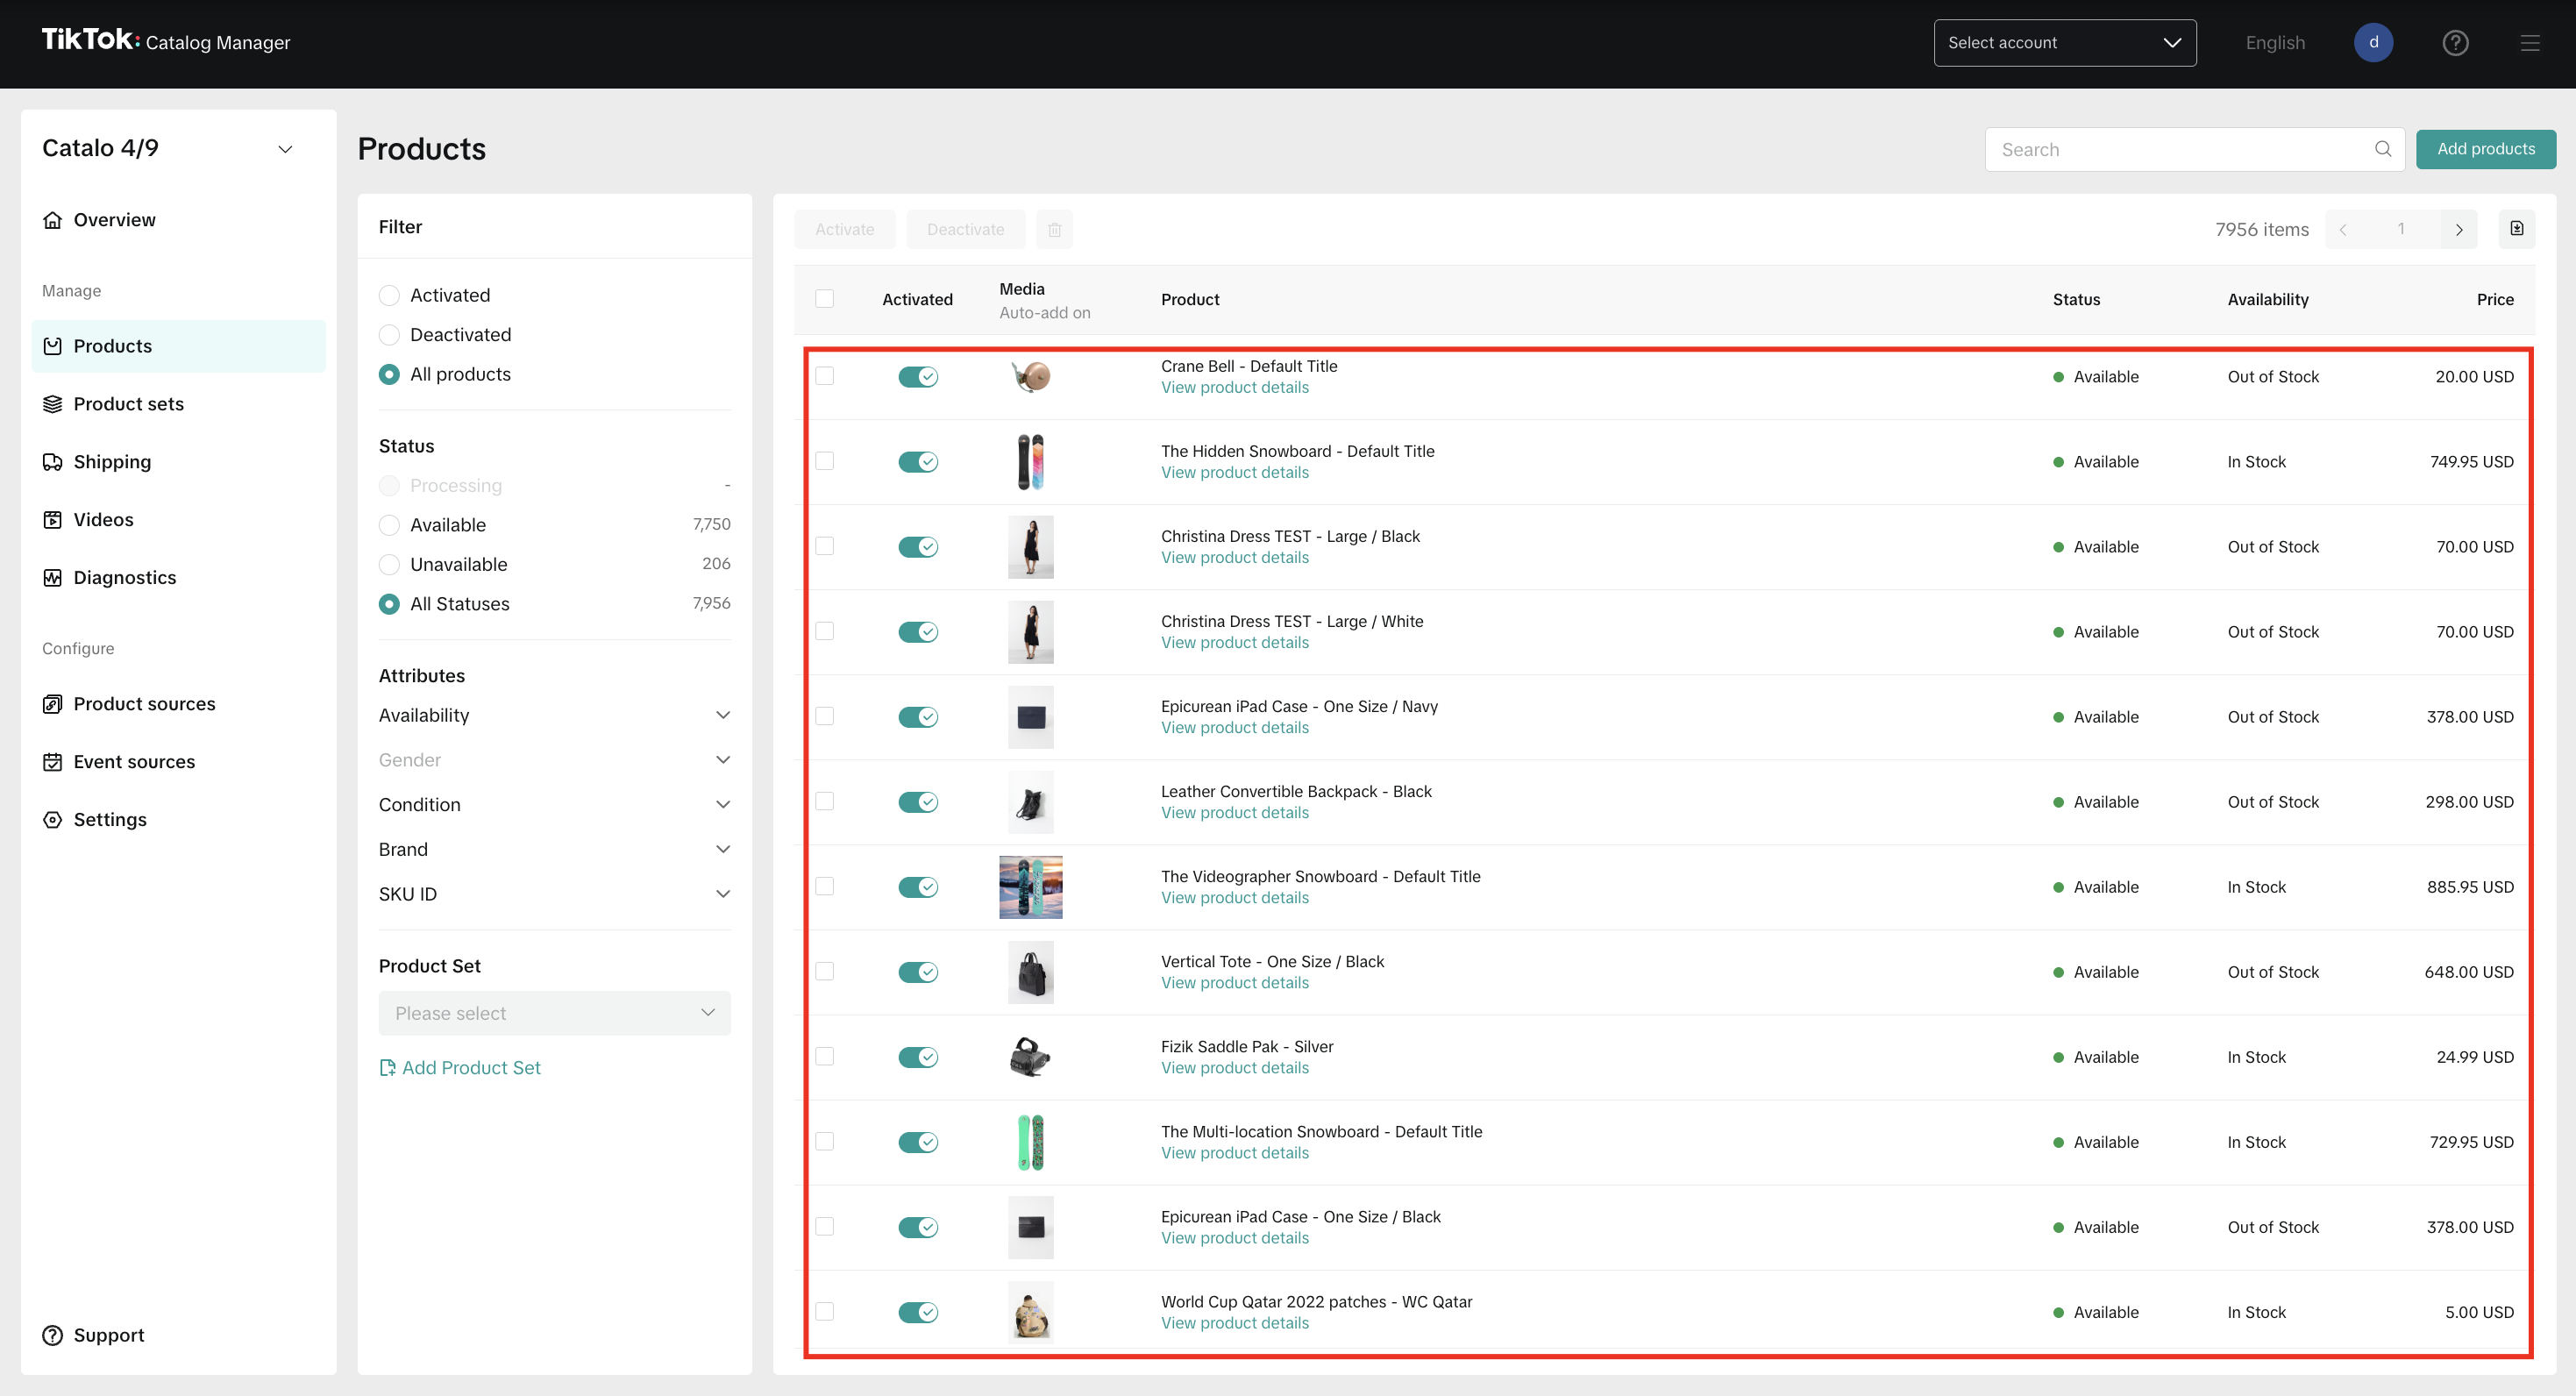
Step 5: Verify the catalog
You can check the catalog status in: Catalog Manager inside the app or TikTok Ads Manager (Assets → Catalog). https://ads.tiktok.com
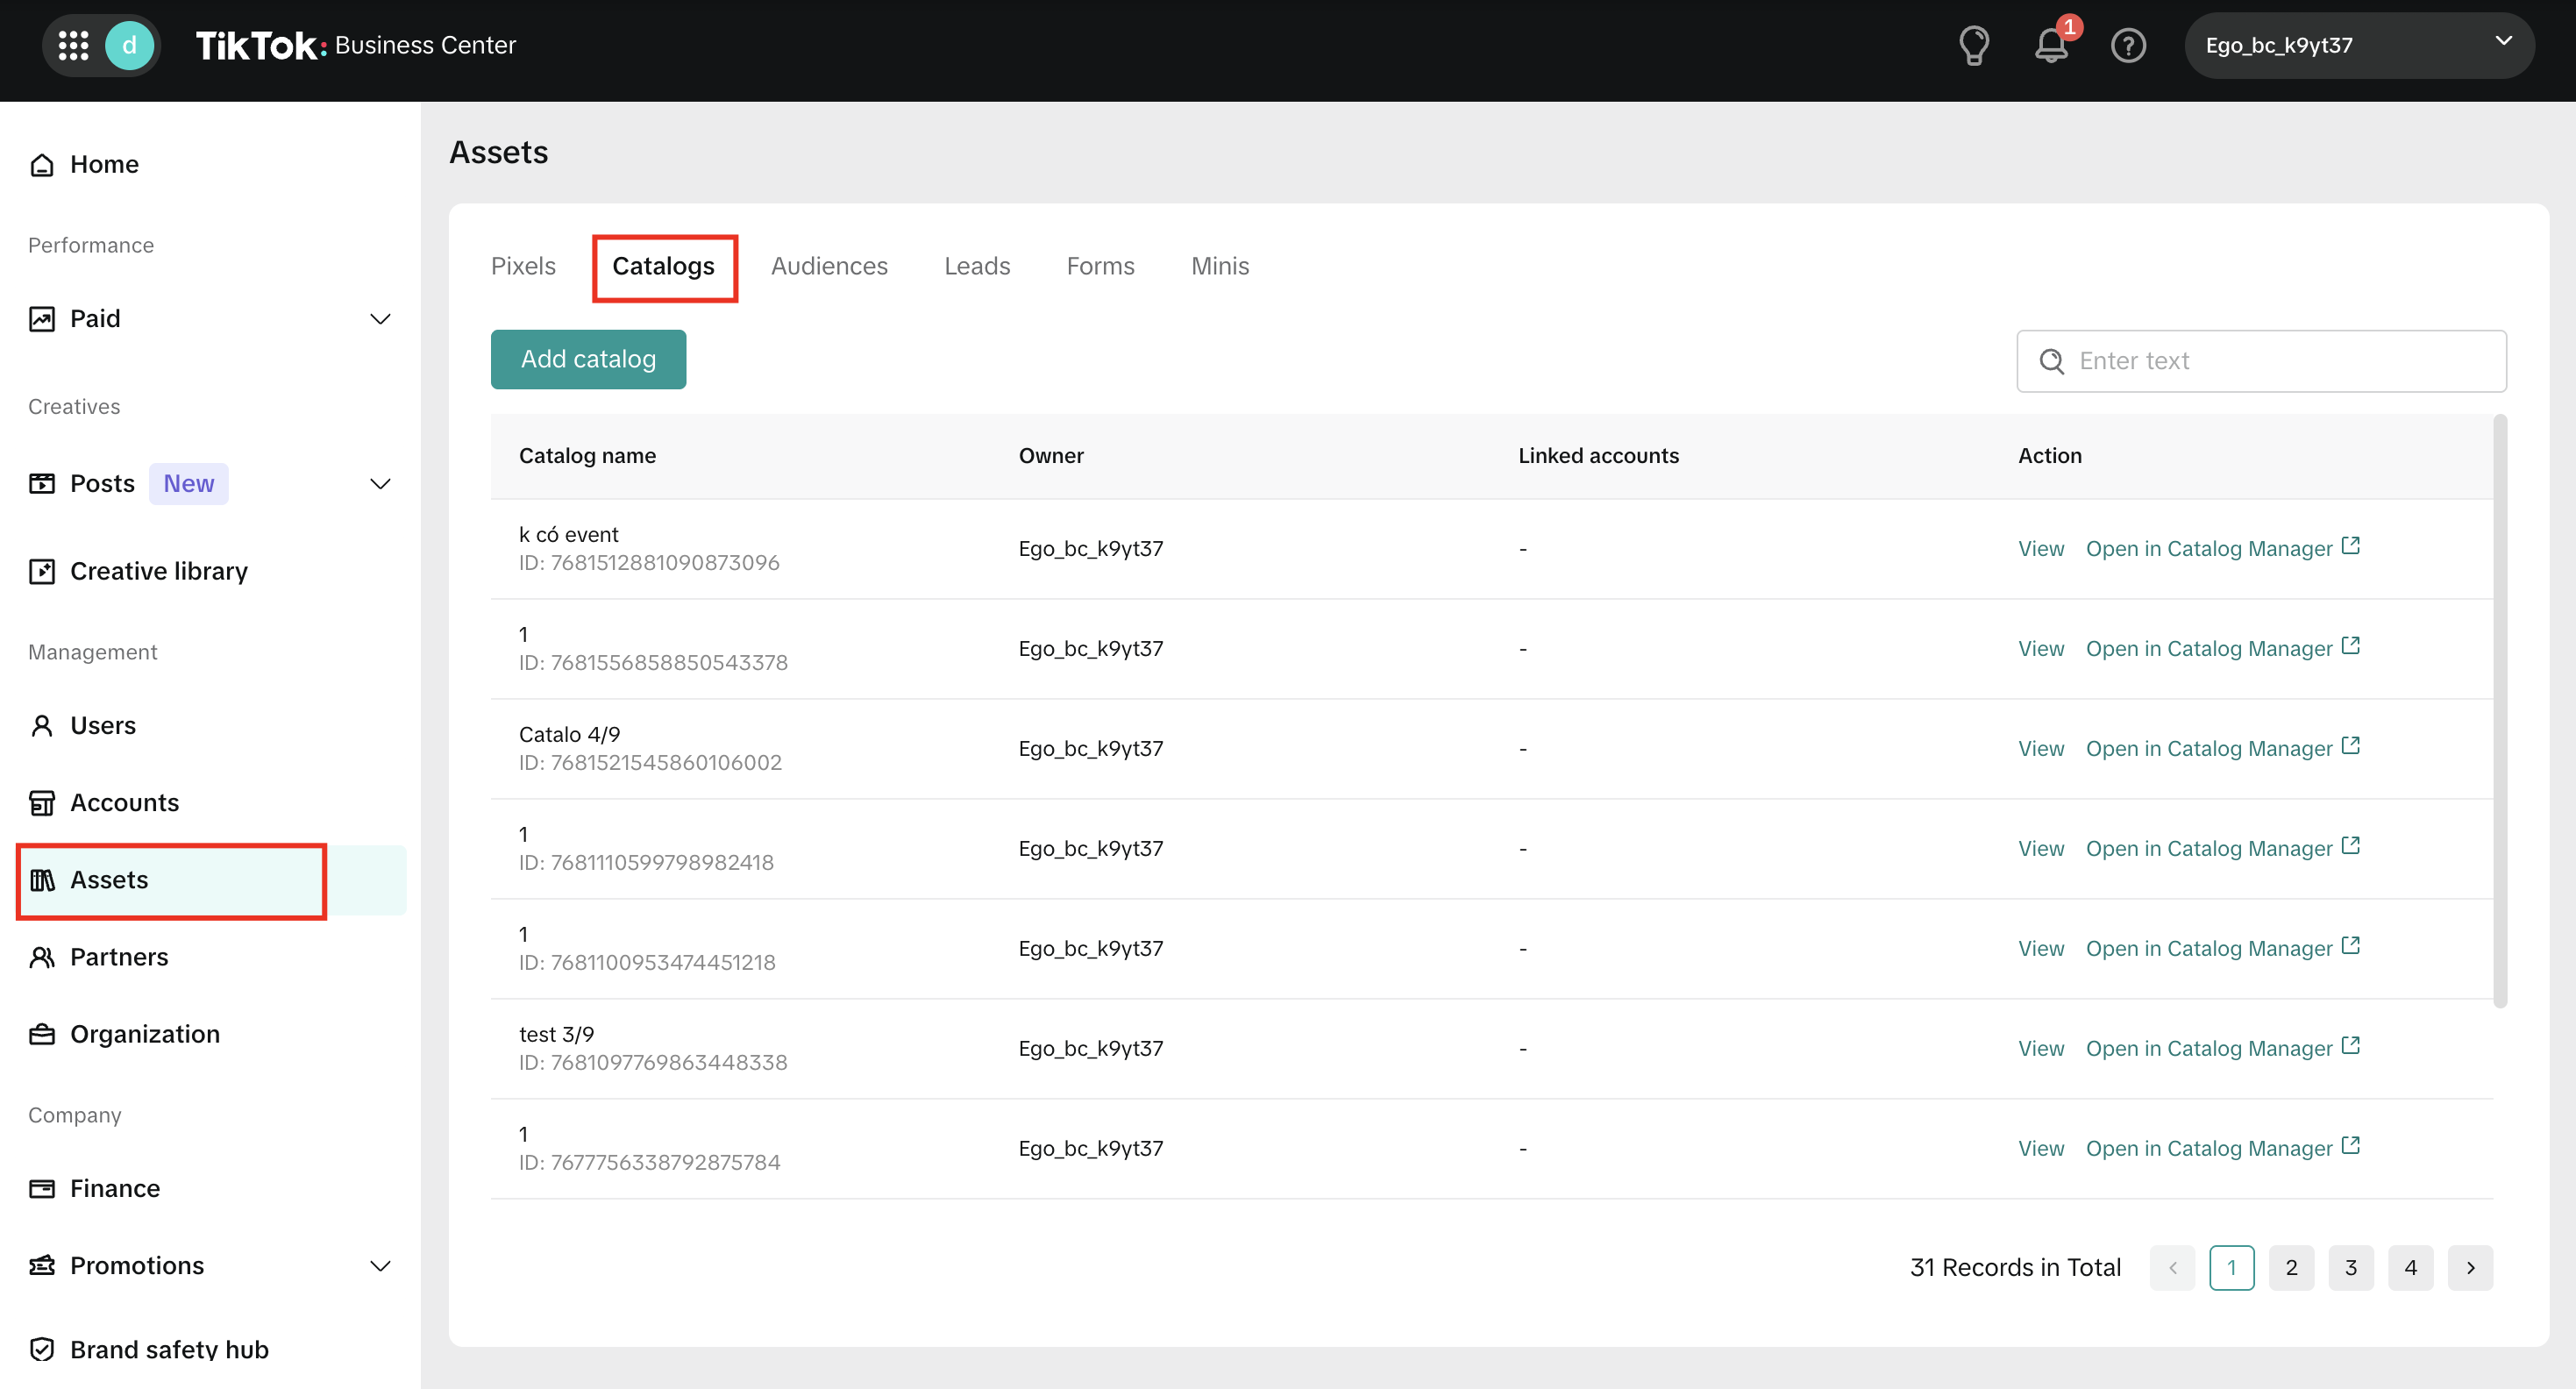
Click "Open in TikTok Catalog Manager" to manage the Catalog.
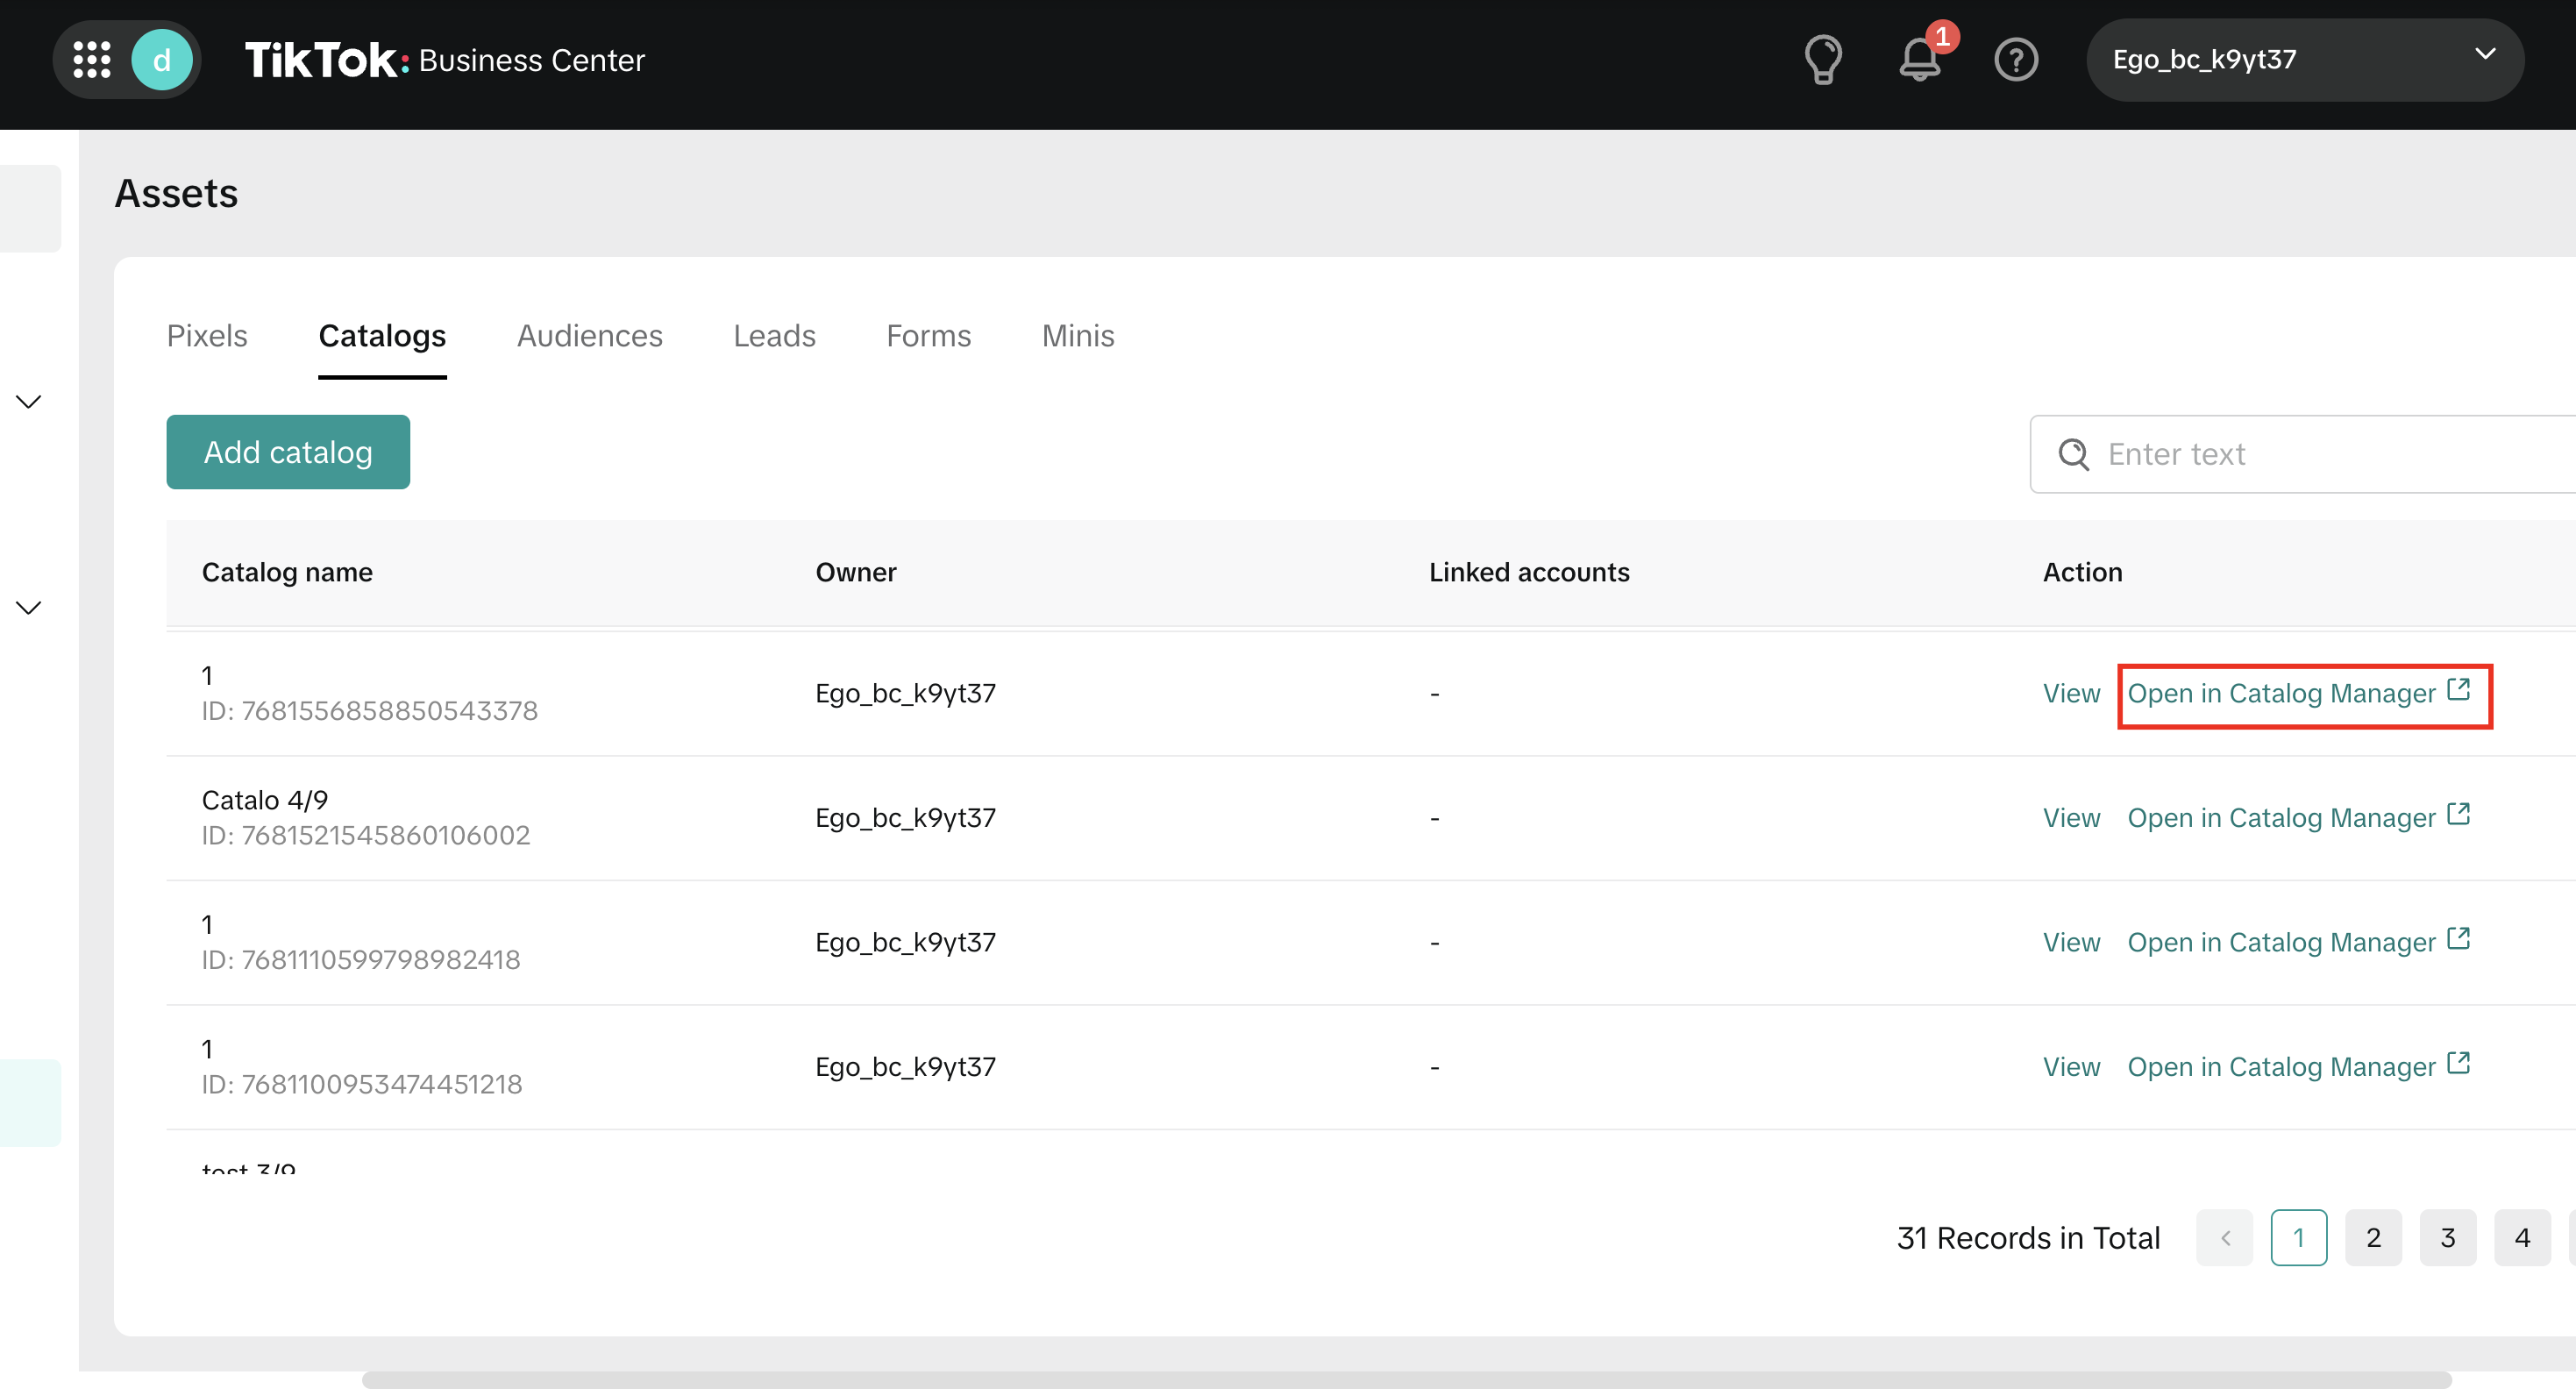
Make sure products are successfully synced and ready for advertising.
Still need help?
Our support team is available 24/7. Contact support →