

Add Your ChatGPT Pixel
Learn how to add your ChatGPT Pixel to Ego Pixel during onboarding or from the ChatGPT page. You'll also choose the tracking scope, the events to send and the customer data that helps OpenAI match orders to ad clicks.
Overview
Once your pixel and Conversions API key are ready, you can add your ChatGPT Pixel to Ego Pixel.
In this guide, you will:
Add your pixel during onboarding.
Add a pixel from the ChatGPT page.
Choose the events and customer data to send.
Manage your pixels.
Before you start, have these ready:
Your Pixel ID (see Prepare ChatGPT Pixel).
Your Conversions API key (see Set Up Conversions API Key).
Add Your Pixel During Onboarding
Step 1: Choose ChatGPT Pixel
On the platform screen, select ChatGPT Pixel.
Click Continue.
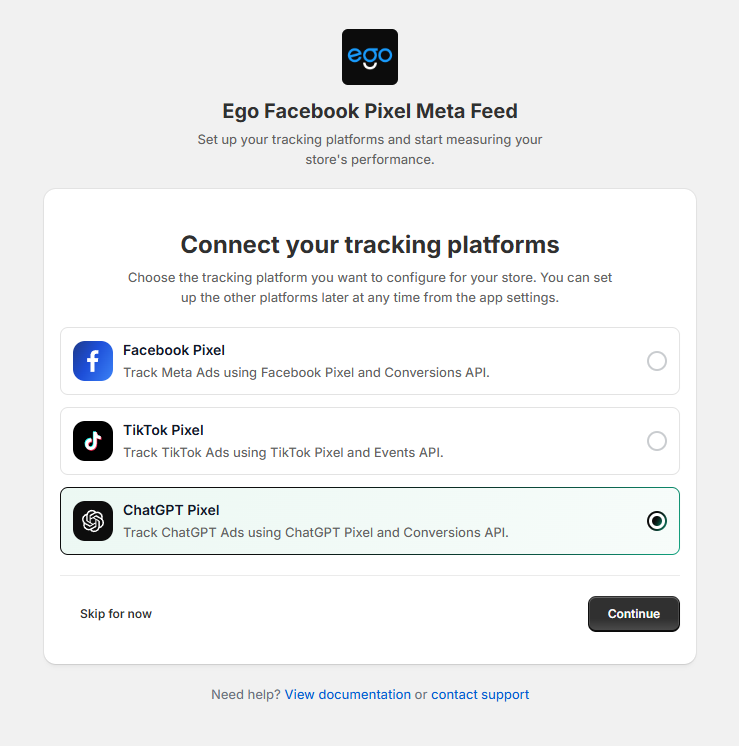
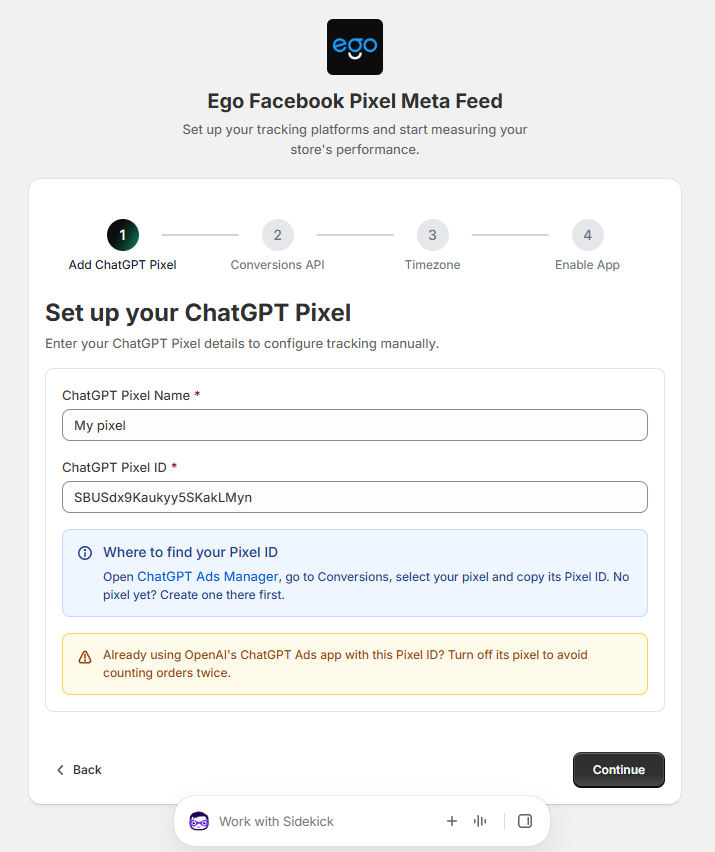
Step 2: Enter Your Pixel Details
Enter a ChatGPT Pixel Name.
Paste your ChatGPT Pixel ID.
Click Continue.
Step 3: Add Your Conversions API Key
Paste your Conversions API key.
Click Continue once the key is accepted.
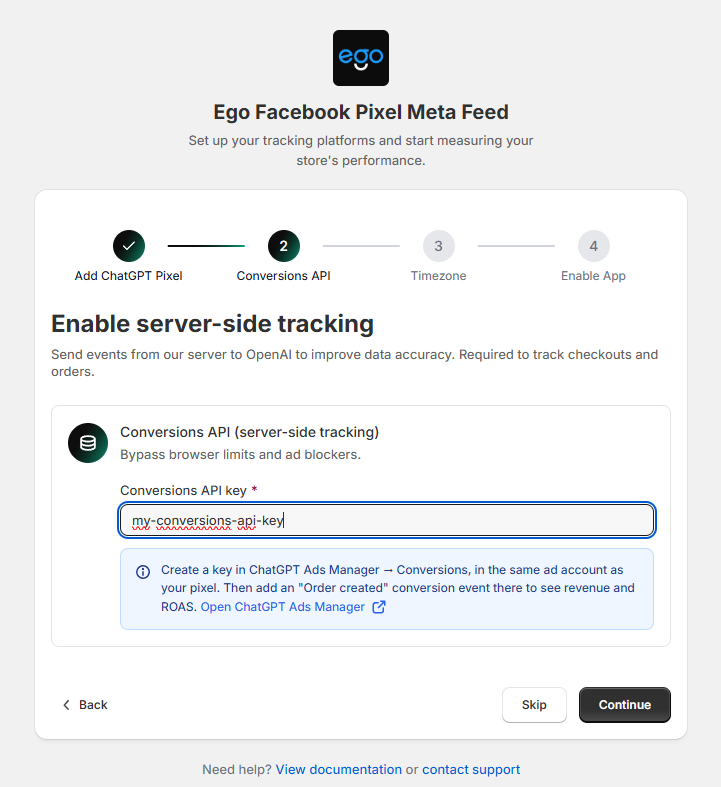
⇒ No key yet? Click Skip. You can add it later, but Initiate Checkout and Purchase won't be tracked until you do.
Step 4: Set Your Timezone
Choose your store's timezone. Your analytics reports use it to split data by day.
Step 5: Enable the App Embed
Click Shopify Theme Editor.
In App embeds, turn on Ego Pixel and click Save.
Return to the app and check I've done this.
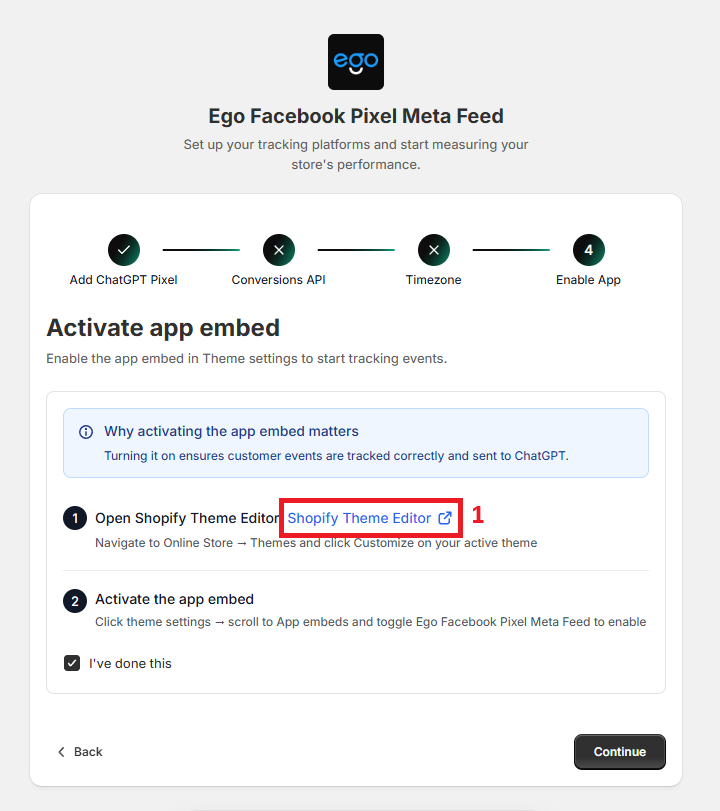
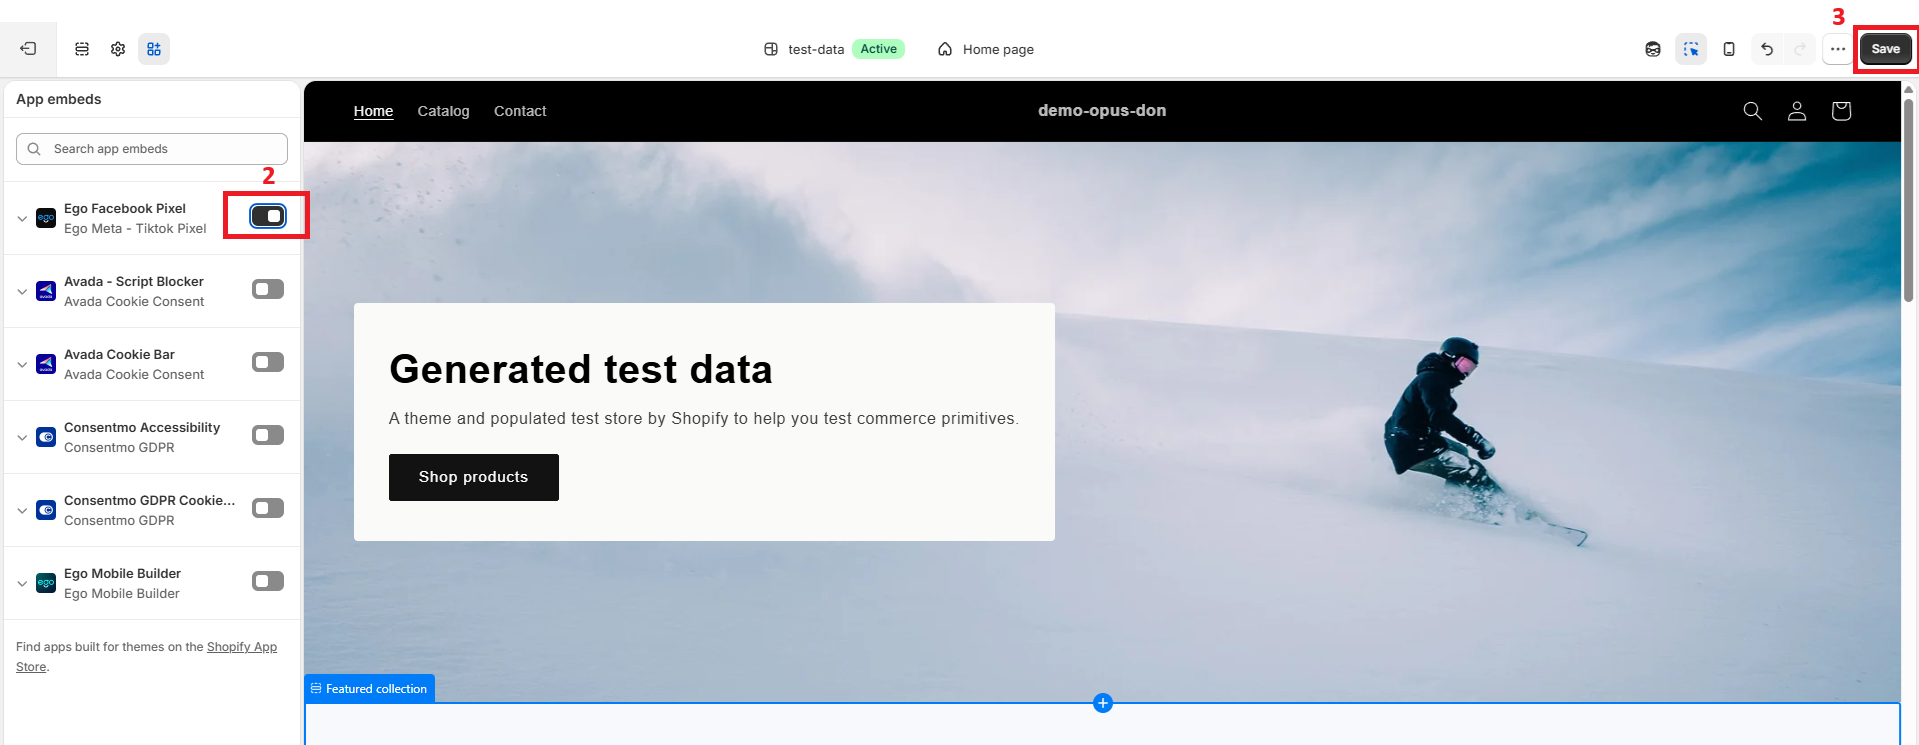
⇒ Tracking starts only after the app embed is on. See Enable Ego Pixel Theme Extension for details.
Add a Pixel from the ChatGPT Page
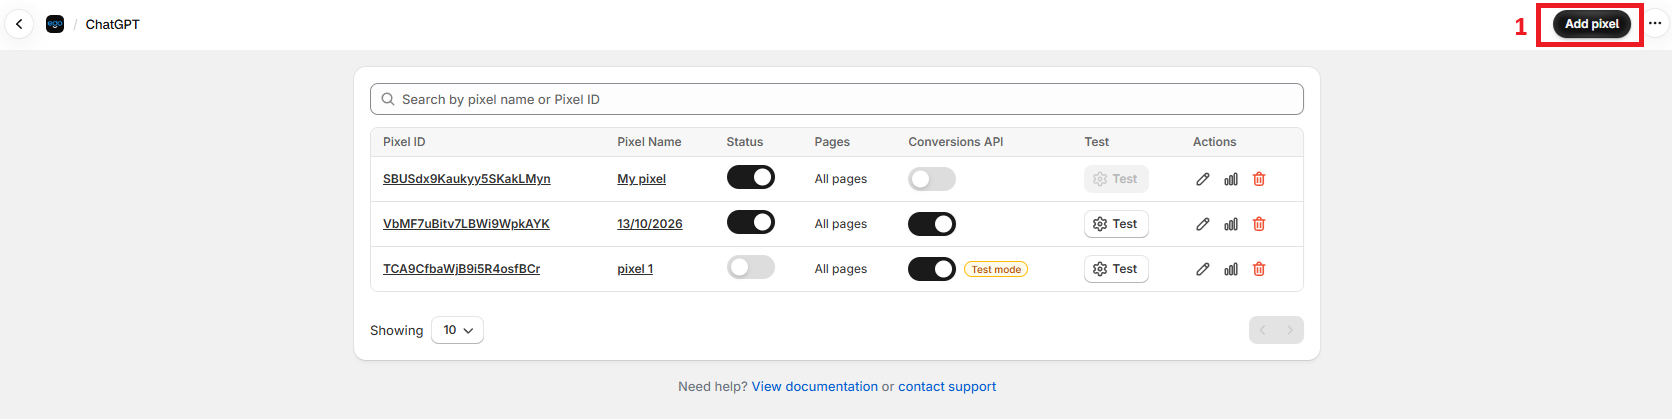
Step 1: Open the ChatGPT Page
Go to ChatGPT in the app menu and click Add pixel.
Step 2: Enter Your Pixel Details
Enter a Pixel name and your Pixel ID.
Step 3: Choose the Tracking Scope
Entire store: track all pages and products. Recommended for most stores.
Specific target: track only selected products, collections or tags.
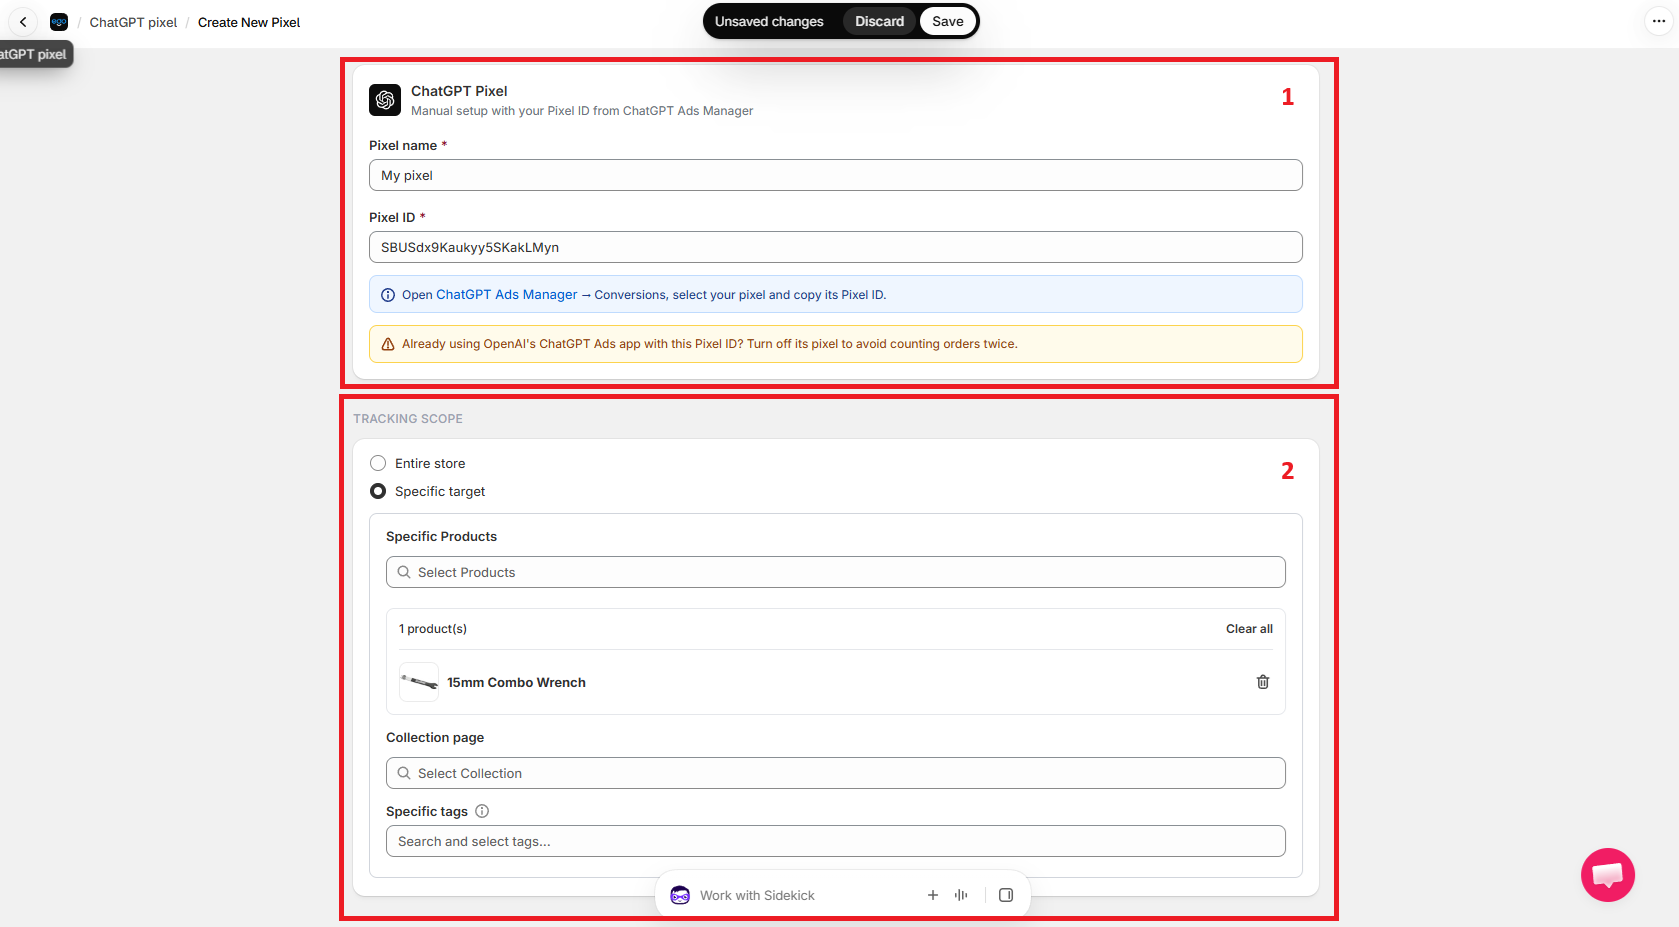
⇒ With Specific target, orders are sent to this pixel only if they contain at least one selected product.
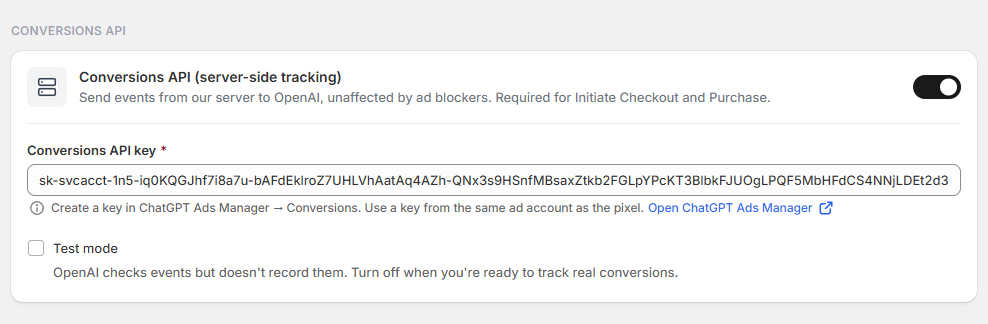
Step 4: Turn On Conversions API
Turn on Conversions API (server-side tracking).
Paste your Conversions API key.
Leave Test mode off unless you're testing.
Step 5: Select Events
Click the events you want to send to ChatGPT:
Event in Ego Pixel | Name in ChatGPT Ads Manager | Needs Conversions API |
|---|---|---|
Page View | page_viewed | No |
View Content | contents_viewed | No |
Add To Cart | items_added | No |
Initiate Checkout | checkout_started | Yes |
Purchase | order_created | Yes |
⇒ Initiate Checkout and Purchase show a Server-side label and can't be selected until Conversions API is on.
Step 6: Choose Customer Information
Select the customer details to send with events: Email, Phone, External ID, First Name, Last Name, City, Region, Postal Code and Country.
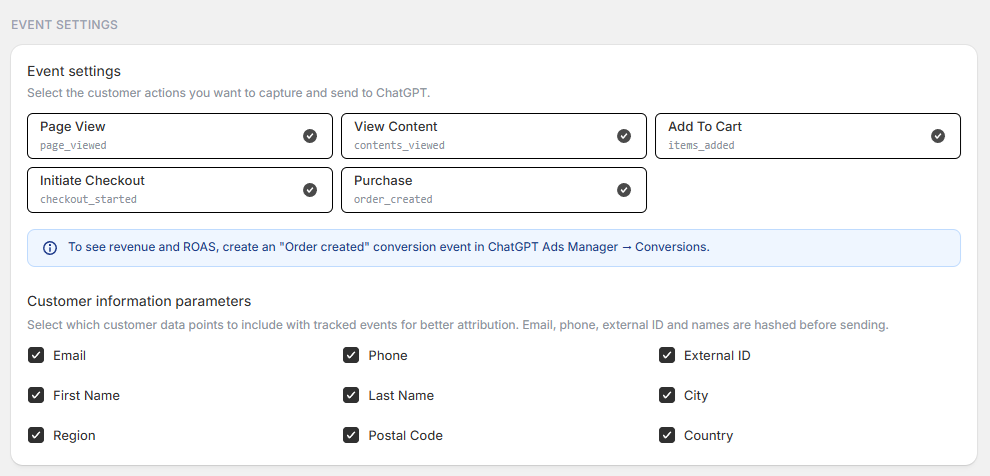
⇒ More details help OpenAI match orders to ad clicks. Email, phone, external ID and names are hashed before they're sent.
Step 7: Save Your Pixel
Click Save in the bar at the top of the page.
⇒ Your settings are applied to your store right away.
Manage Your Pixels
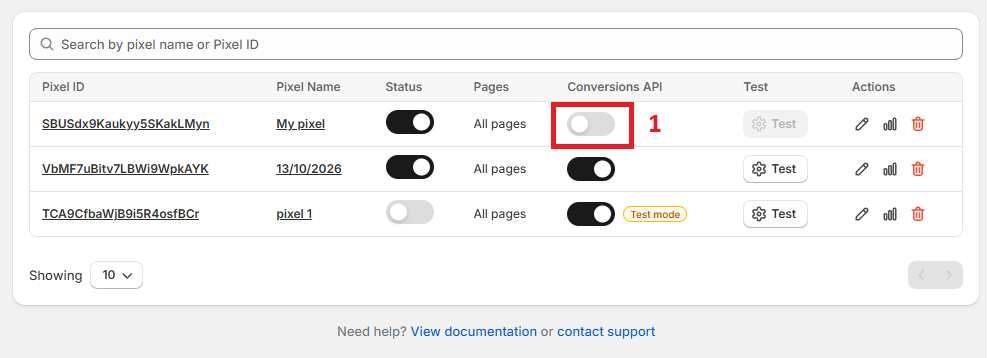
On the ChatGPT page, each pixel has these controls:
Status: turn the pixel on or off.
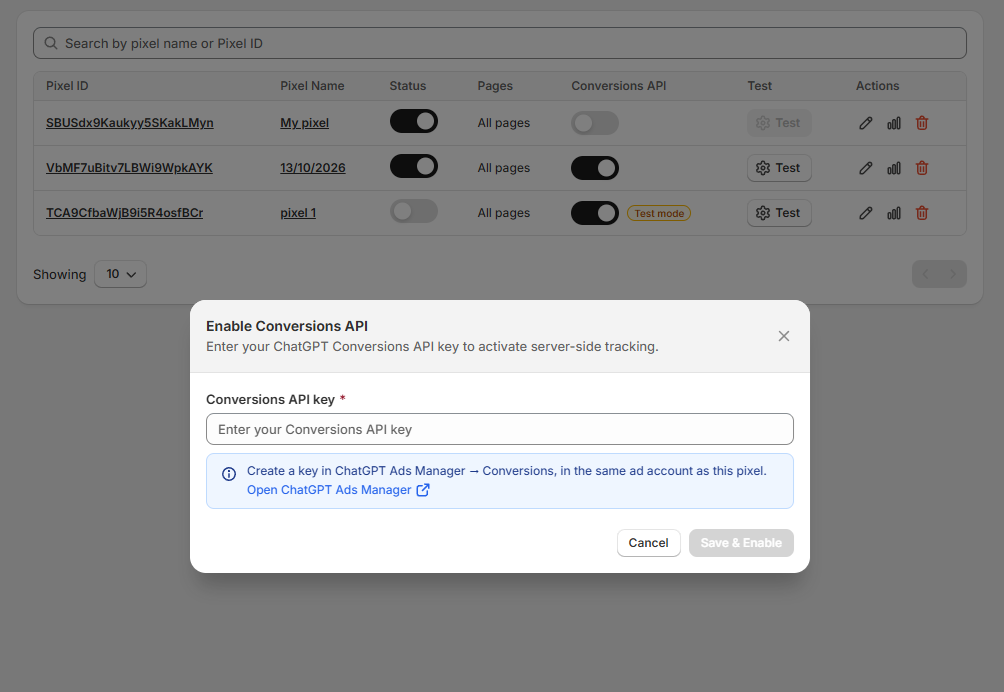
Conversions API: turn server-side tracking on or off. If the pixel has no key yet, a window asks you for one.
Test: open Live Diagnostic for this pixel.
Actions: edit the pixel, view its analytics or delete it.
Note: Deleting a pixel in Ego Pixel stops tracking on your store. It doesn't delete the pixel in ChatGPT Ads Manager.
Still need help?
Our support team is available 24/7. Contact support →