

Check Event Delivery
Learn how to verify that your ChatGPT Pixel and Conversions API events reach OpenAI. Check them in Live Diagnostic, with the ChatGPT Pixel Helper and in ChatGPT Ads Manager, and fix the most common issues.
Overview
After adding your pixel, check that your events reach OpenAI.
In this guide, you will:
Test events in Live Diagnostic.
Check browser events with ChatGPT Pixel Helper.
Verify events in ChatGPT Ads Manager.
Fix the most common issues.
Before you start, make sure that:
Your pixel is on.
Test mode is off.
The Ego Pixel app embed is enabled.
Ad blockers are off in your browser, or you're using a private window.
Test in Live Diagnostic
Your pixel needs Conversions API turned on.
Step 1: Open Live Diagnostic
On the ChatGPT page, click Test next to your pixel.
⇒ Live Diagnostic opens with your pixel selected.
Step 2: Create Test Events
Open your store in another tab.
View a product.
Add it to the cart.
Start checkout and place a test order.
Step 3: Check the Results
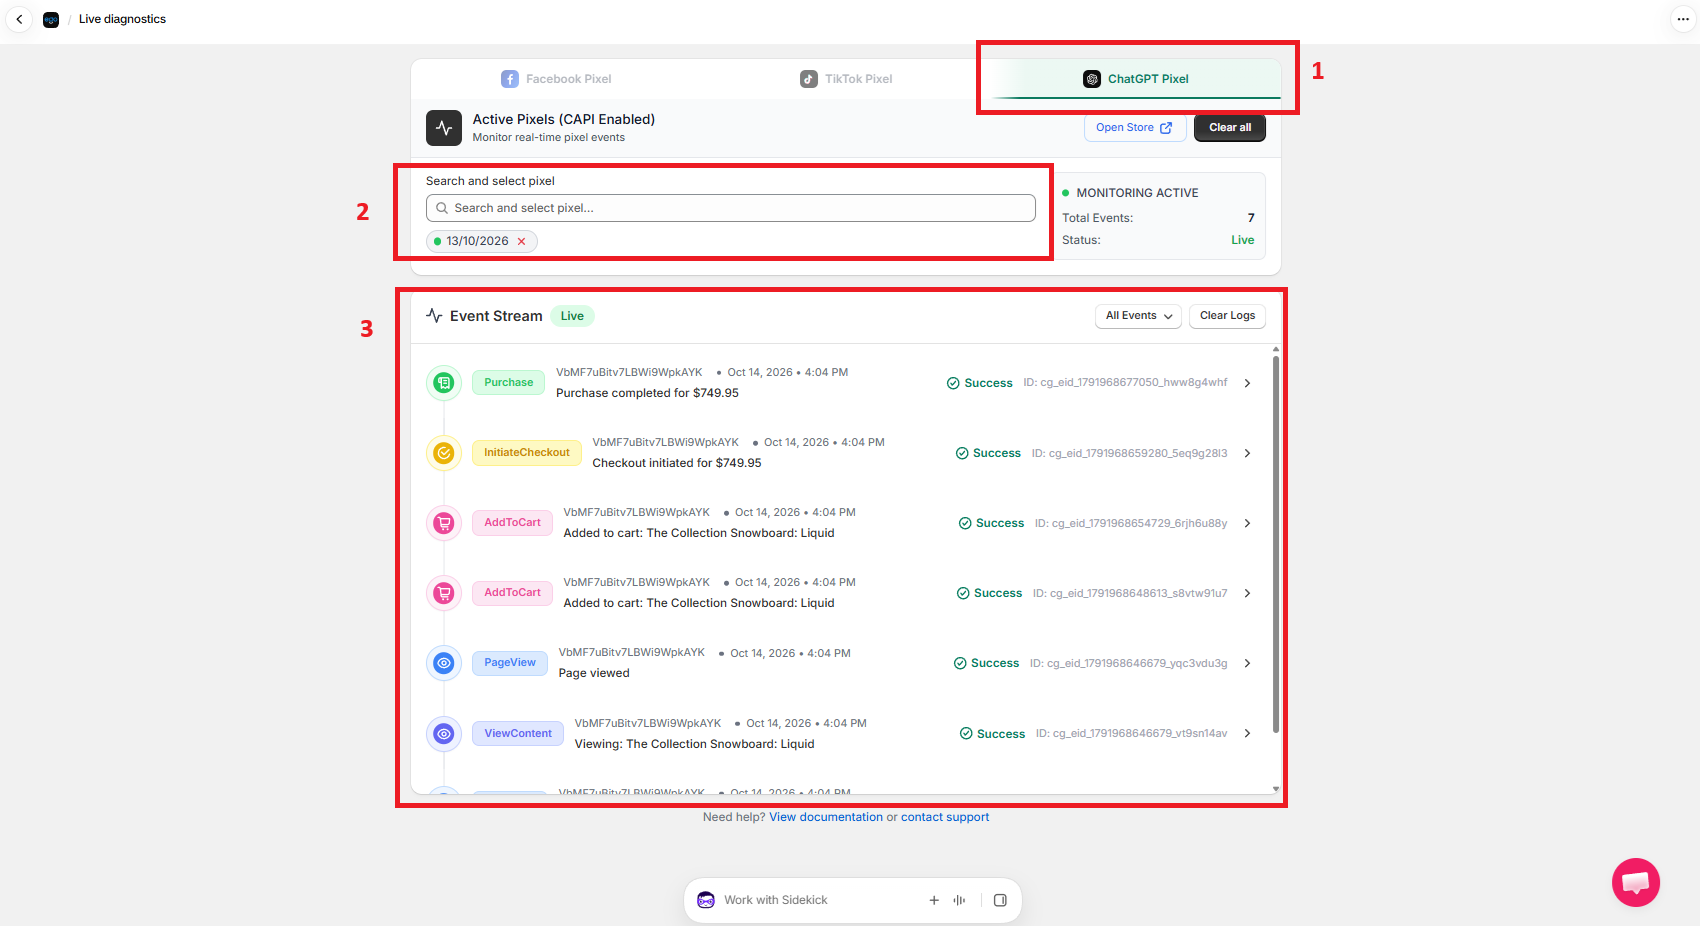
Return to Live Diagnostic. Each event appears as it arrives and shows when it has been sent to OpenAI.
⇒ Click an event to see the data sent to OpenAI. Purchase shows as Purchase in the list, and the details show the name OpenAI received: order_created.
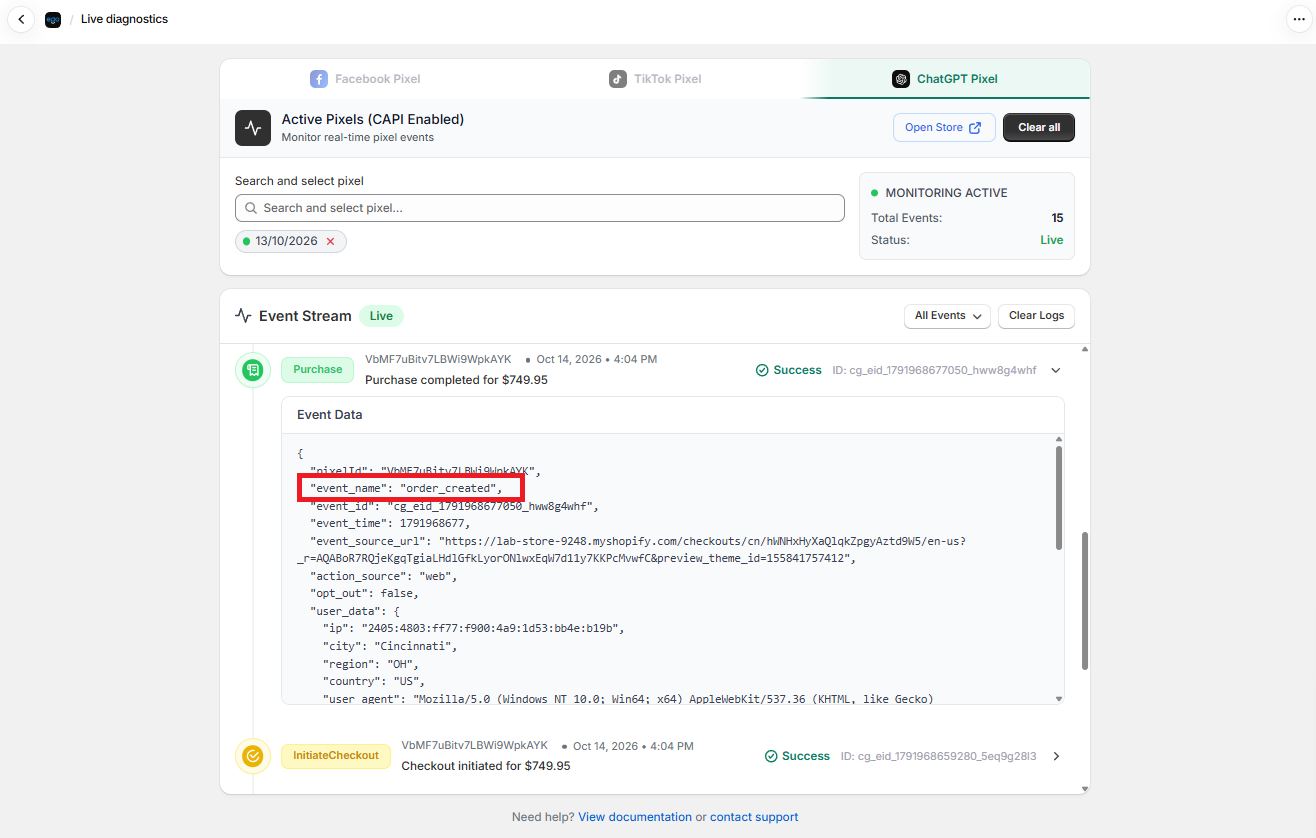
Note: Initiate Checkout and Purchase are sent from our server only, so Live Diagnostic and ChatGPT Ads Manager are the places to check them.
Test in Your Browser with ChatGPT Pixel Helper
Step 1: Install the Extension
Install the ChatGPT Pixel Helper extension from the Chrome Web Store.
Step 2: Check Your Pixel
Open your store.
Click the extension icon.
⇒ Pixel active means the pixel loaded on your store.
Step 3: Check Your Events
View a product and add it to the cart. You should see page_viewed, contents_viewed and items_added.
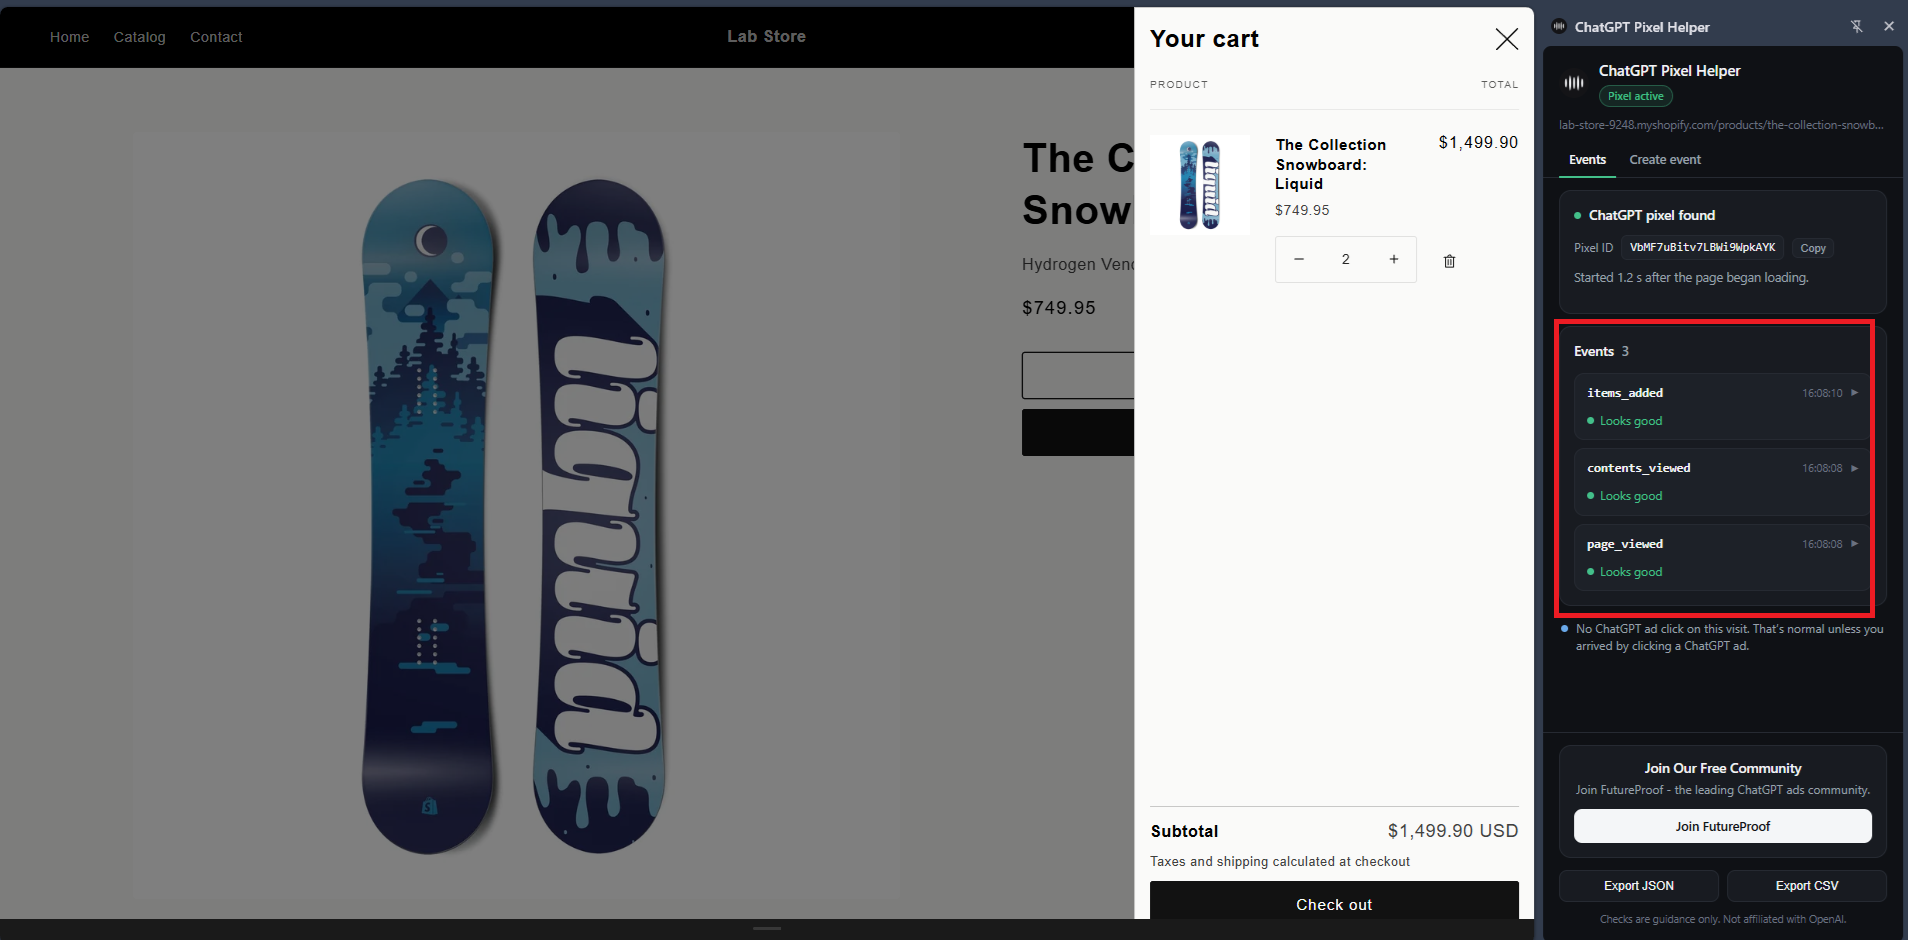
Seeing "Events 0" with more than one ChatGPT pixel? That's expected. With several ChatGPT pixels, Ego Pixel sends events to each pixel separately so each keeps its own event settings. Pixel Helper can't display these events, but they still reach OpenAI. Check them in Live Diagnostic or ChatGPT Ads Manager.
Verify in ChatGPT Ads Manager
Step 1: Open Your Pixel
Open ChatGPT Ads Manager: https://ads.openai.com
Go to Conversions and select your pixel.
Step 2: Review Recent Events
Check the list of recent events.
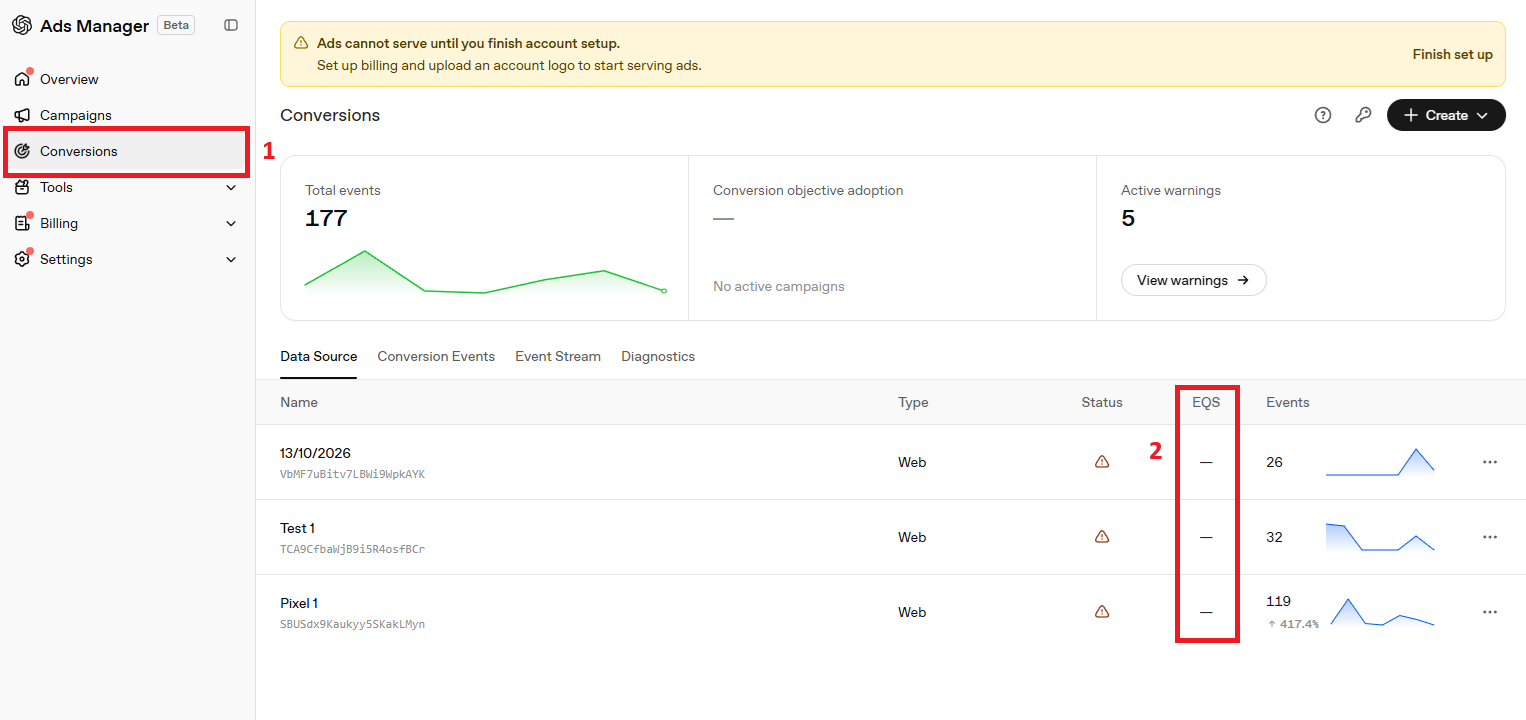
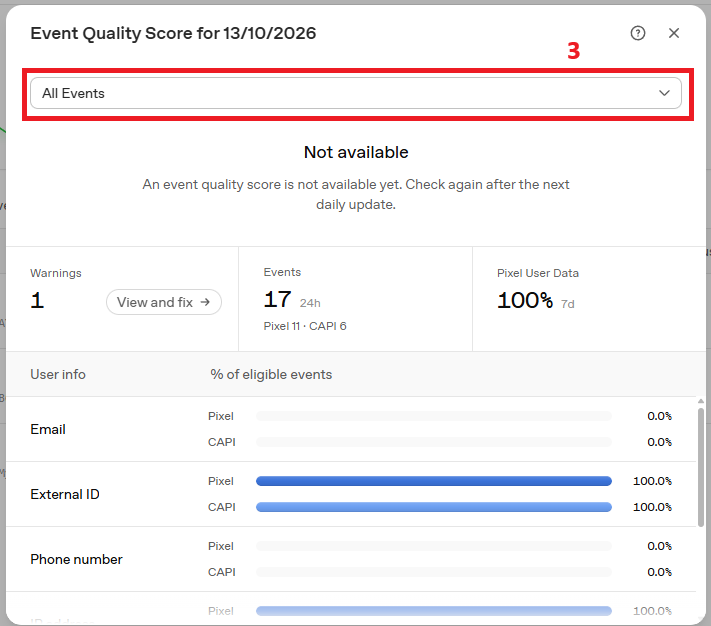
⇒ New events can take 30 minutes or more to appear in ChatGPT Ads Manager. If you don't see them yet, check back later.
Note: A delay in ChatGPT Ads Manager doesn't mean your events are missing. To confirm right away, use Live Diagnostic: it shows each event within seconds of sending it to OpenAI.
Good to know:
ChatGPT uses its own event names: page_viewed, contents_viewed, items_added, checkout_started and order_created (Purchase).
The same event can arrive from both the browser and our server. Ego Pixel sends a matching event ID, so OpenAI counts it once.
Events sent with Test mode on are checked but not recorded, so they don't appear here.
Troubleshooting
What you see | What to do |
|---|---|
Pixel Helper finds no pixel | Turn off Test mode, check that the pixel is on and the app embed is enabled, and turn off ad blockers. |
Reloading the page adds no new Page View | This is expected. Ego Pixel ignores reloads of the same page within 30 seconds to filter out fake views. Wait, or open another page. |
No Initiate Checkout or Purchase | Turn on Conversions API and add your key. |
Events arrive but campaigns show no revenue | Create an "Order created" conversion event (see Prepare ChatGPT Pixel). |
Orders are counted twice | Turn off the pixel in OpenAI's ChatGPT Ads app if it uses the same Pixel ID. |
A "Requires Attention" warning on your pixel | Replace your key (see Fix a Rejected Conversions API Key). |
Still need help?
Our support team is available 24/7. Contact support →