

Create Your First Form
Step by step: pick a template, open the builder and save your first form.
Step 1 — Open Forms
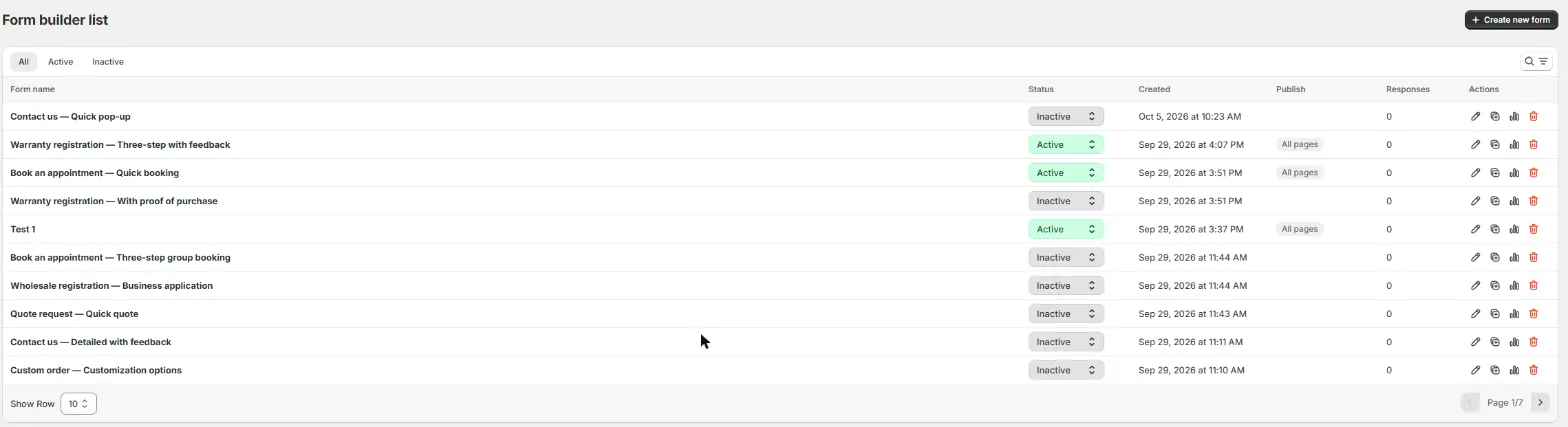
In your Shopify admin open the app and click Forms in the left menu, then Create new form in the top right.
Step 2 — Choose a template
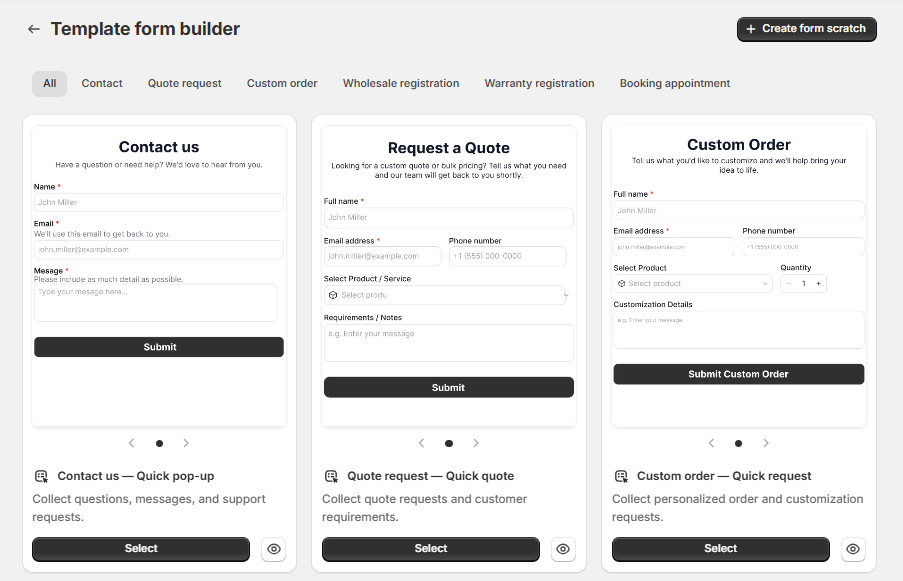
The Template from builder page opens
Use the tabs to filter templates by use case: Contact, Quote request, Custom order, Wholesale registration, Warranty registration or Booking appointment.
Click the eye icon to preview a template. For forms with several pages, use the arrows under the preview to see each page
Click Select on the template you want
To start with an empty form, click Create form scratch in the top right
Step 3 — Get to know the builder
The template opens in the form builder
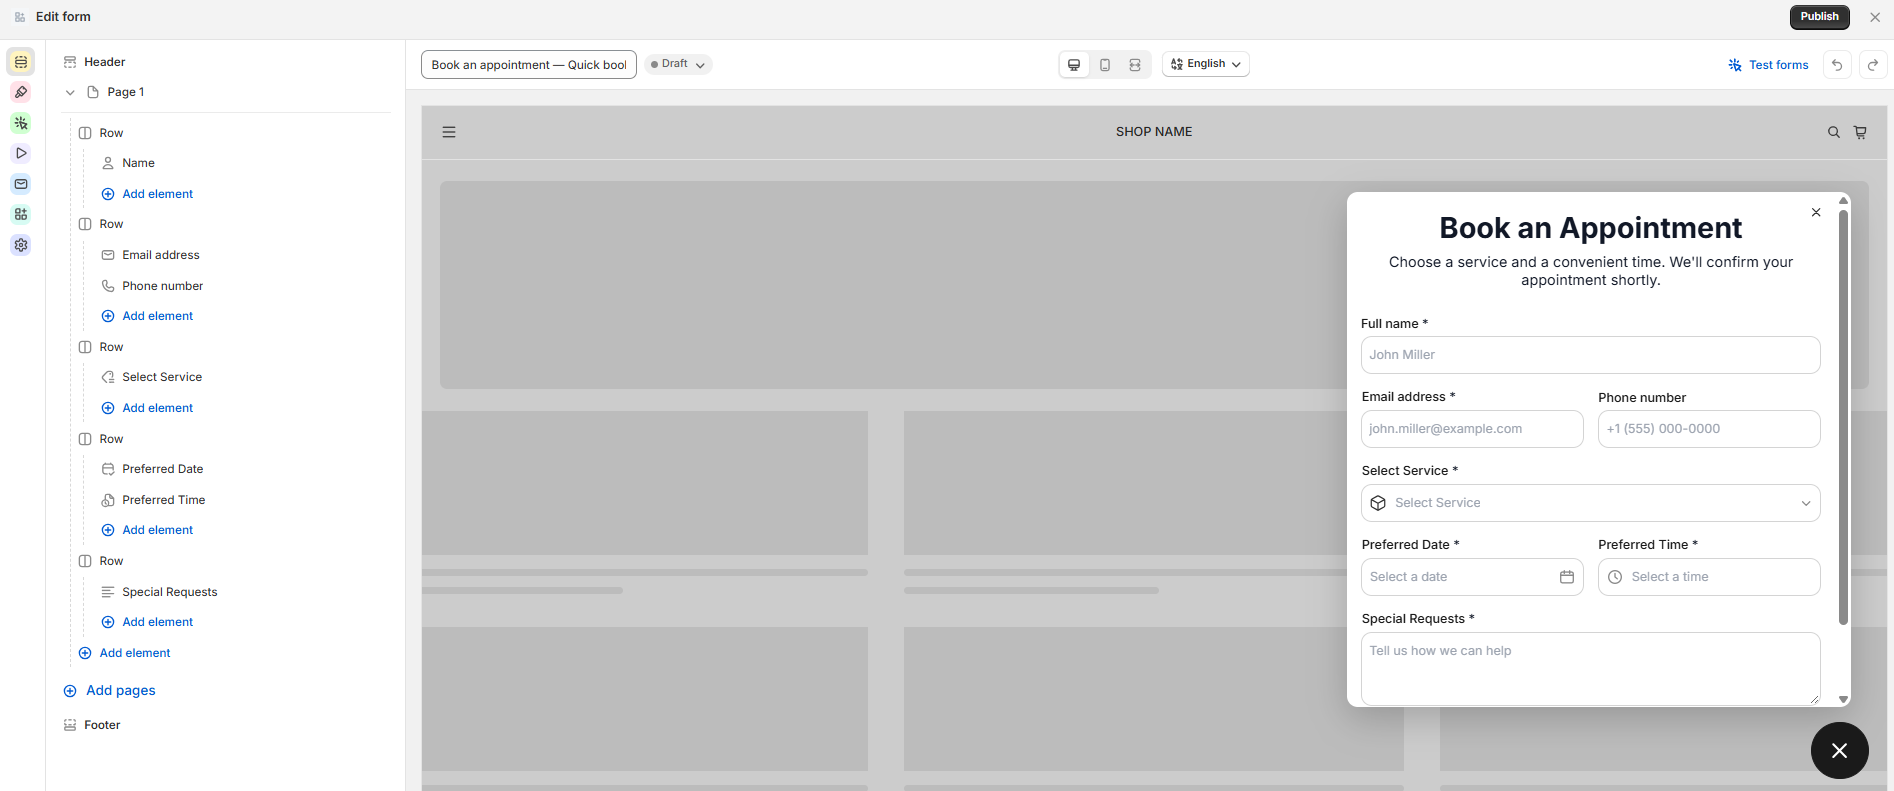
Icon rail (far left) - switches between panels: Elements, Design, After submit, Trigger, Email, Integration and Settings. Hover over an icon to see its name
Structure - lists the Header, each Page with its rows and fields, and the Footer. Click any item to edit it. Use Add element to add a field and Add pages to add a page
Preview - shows the form as customers will sê it
Toolbar (top) - the form name, its status (for example Draft), the desktop and mobile preview, the language, Test forms and undo/ redo
Step 4 — Name and save the form
Enter a name for the form in the field at the top. This name is used in the form list and in notification emails.
Edit the fields and the design as you need.
When you make a change, the Unsaved changes bar appears at the top. Click Save to keep your changes, or Discard to undo them.
When the form is ready, click Publish to show it on your storefront. See Triggers & Publishing.
Still need help?
Our support team is available 24/7. Contact support →