

Add Your Pixel
Add a Meta Pixel to Ego Pixel using either Manual Input or Auto Connect. Choose the method that best fits your setup.
Overview
Add your Meta Pixel to start tracking events with Ego Pixel.
From this guide, you will:
Add a Pixel using Manual Input or Auto Connect (recommended).
Configure tracking and event settings.
Save your Pixel and start tracking your storefront.
Method 1: Manual Input Pixel
Step 1: Open the Create Pixel screen
Open the app in your Shopify Admin.
Go to Facebook Pixel.
Click Create New Pixel.
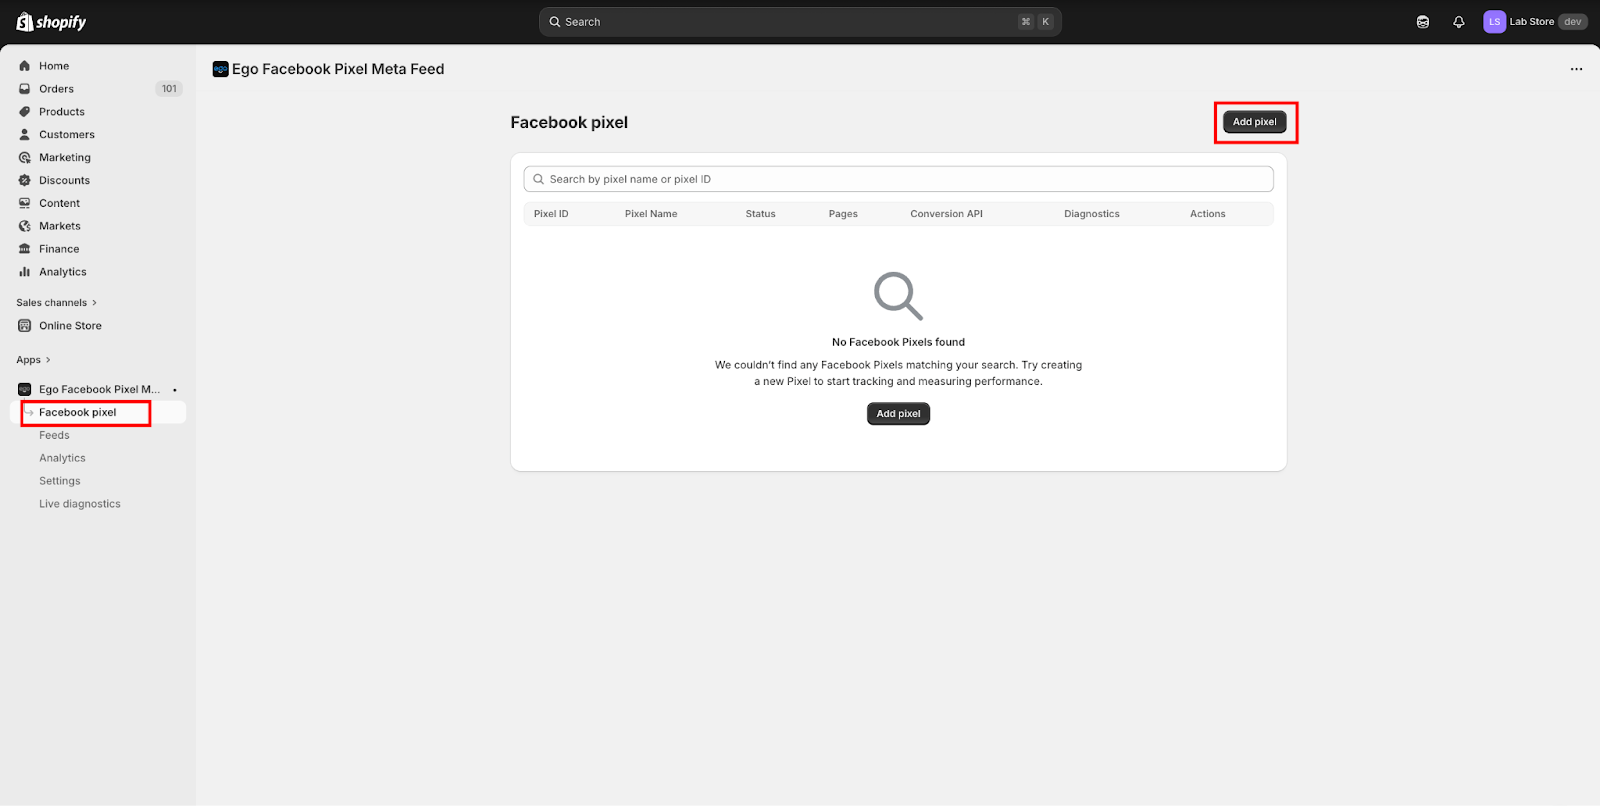
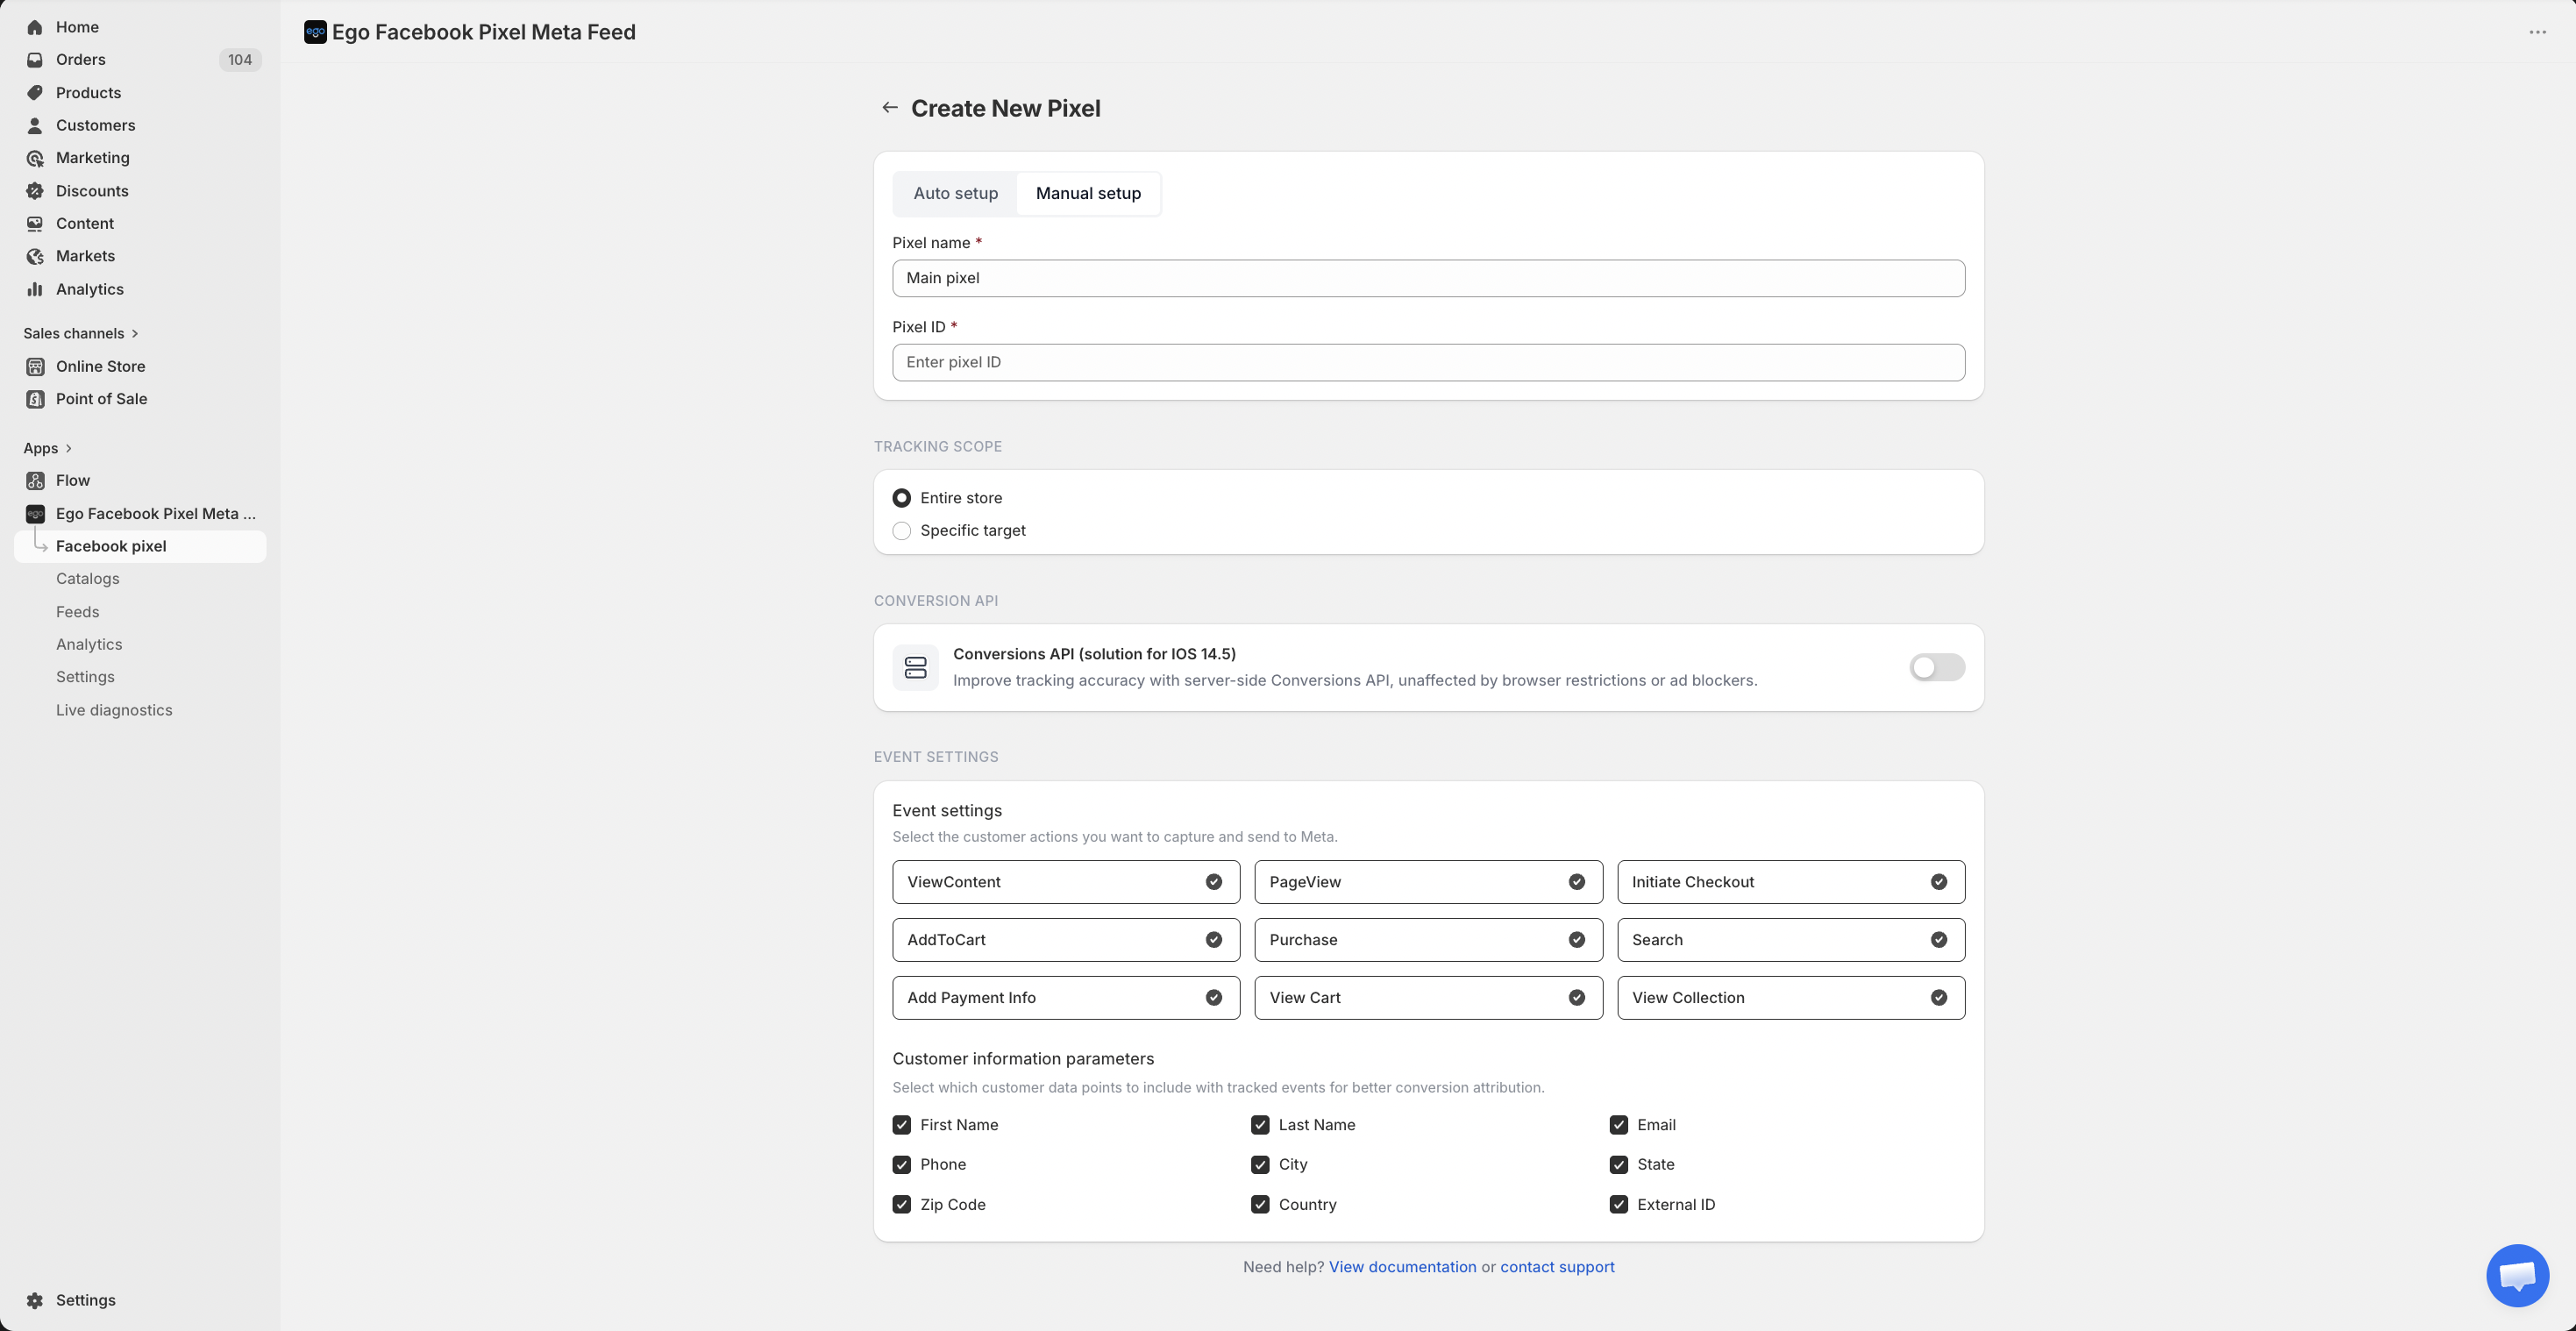
=> You will see the Create New Pixel configuration screen.
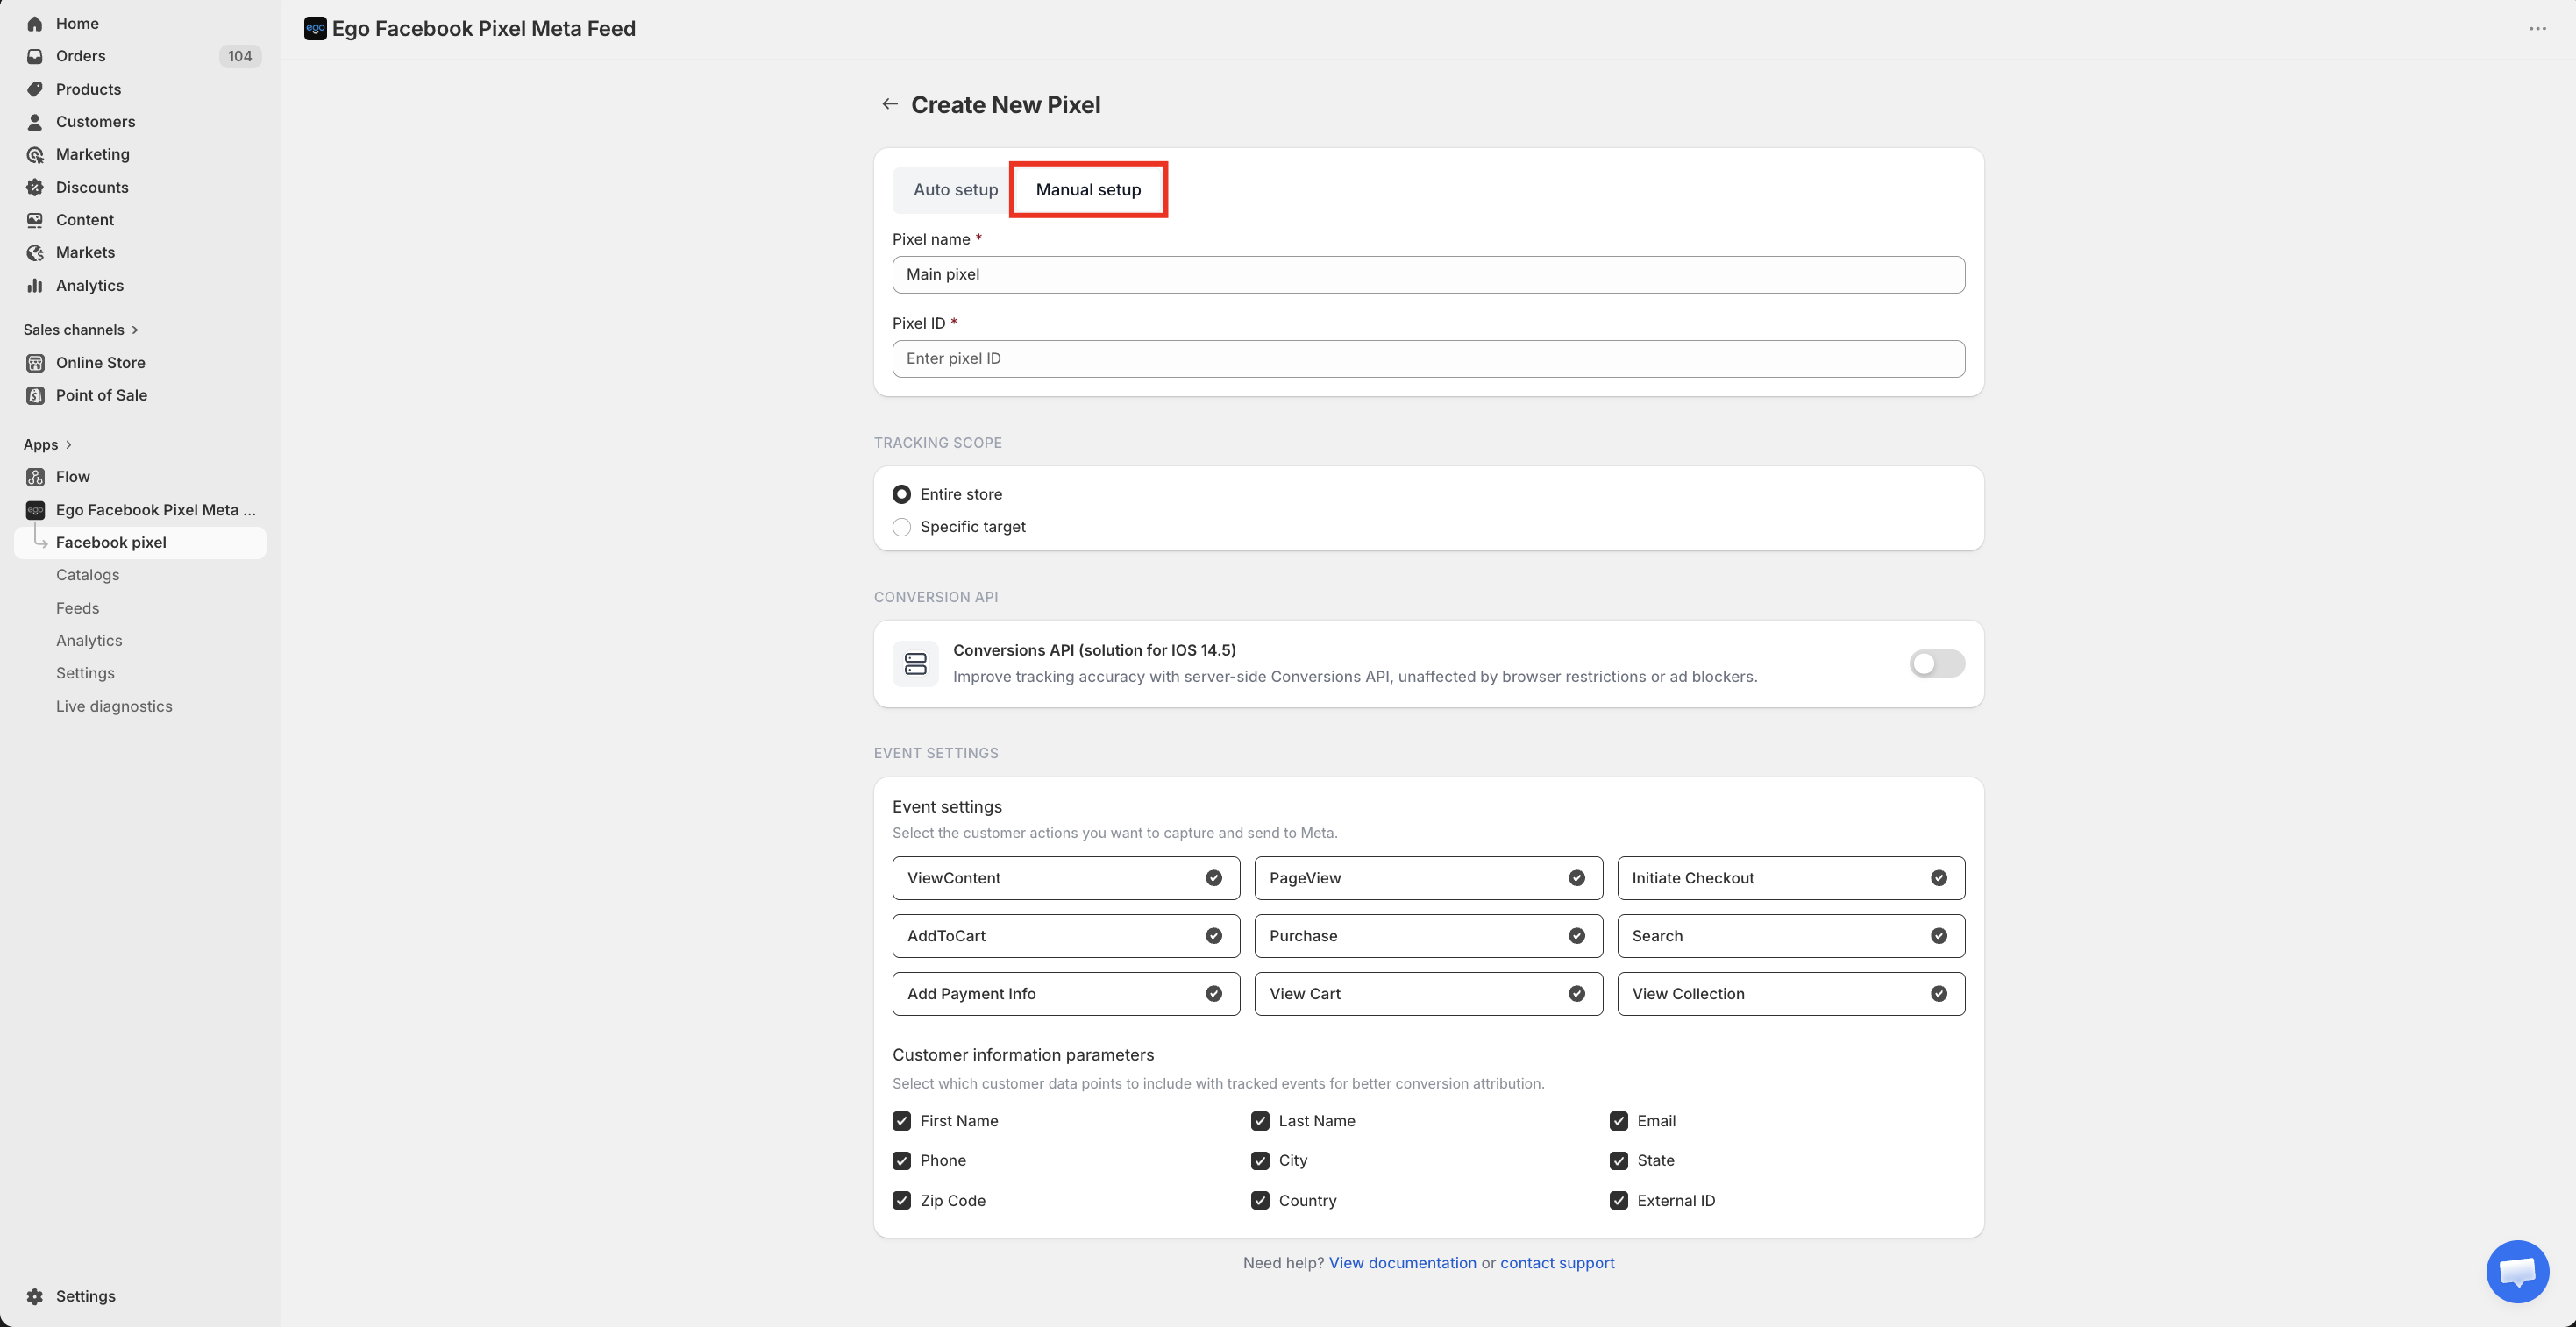
Step 2: Choose Manual Setup
At the top of the setup screen ⇒ Select Manual Setup
Step 3: Enter Pixel Information
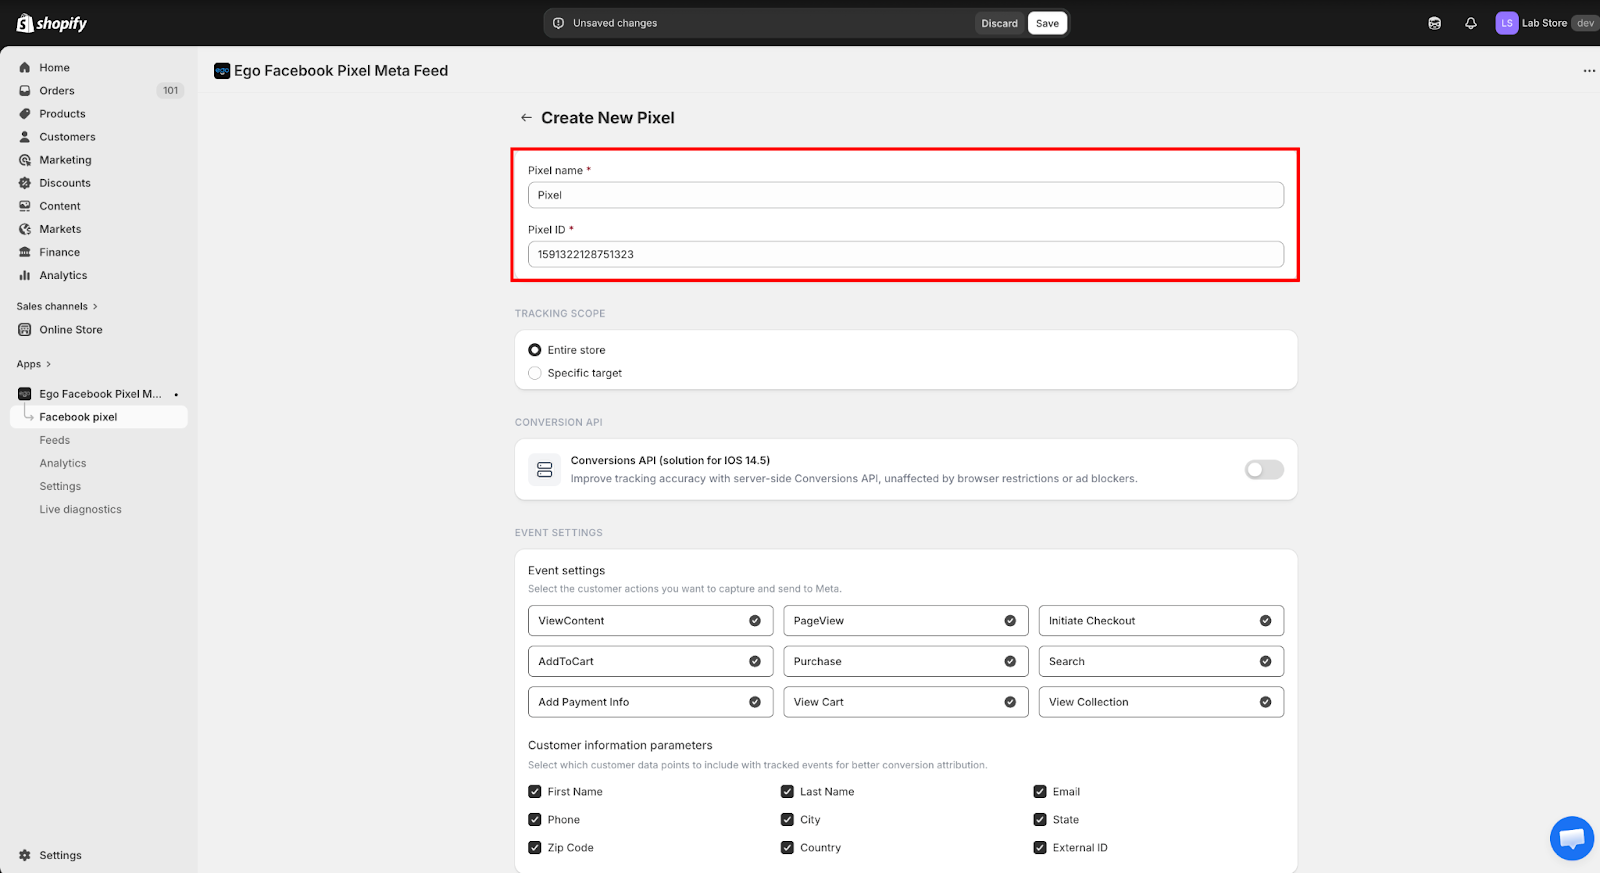
At the top of the page, enter the required pixel details.
Pixel name: Enter a name to identify this pixel in your store.
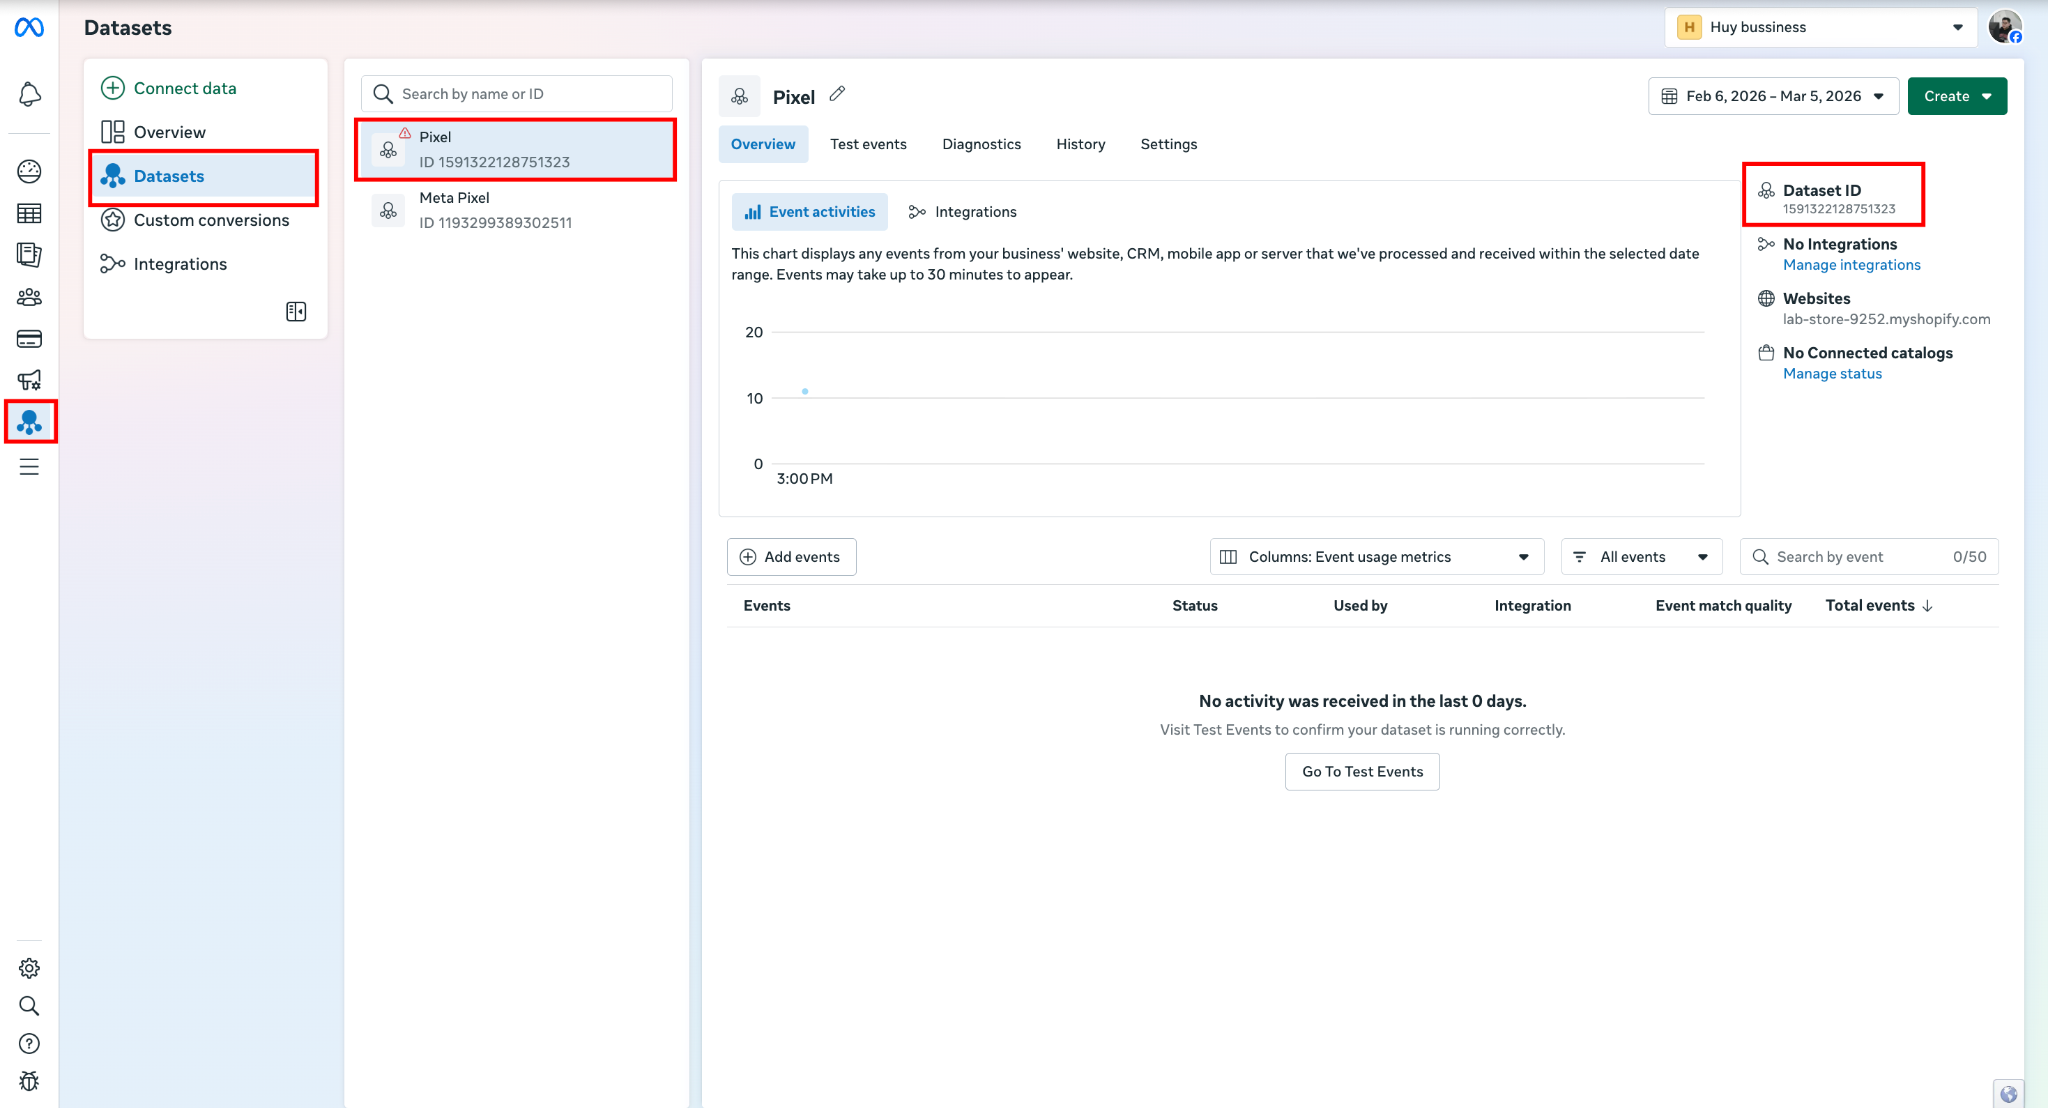
Pixel ID: Paste your Facebook Pixel ID from Meta Events Manager.
How to get your Pixel ID?
Go to Meta Events Manager https://business.facebook.com/events_manager
Select the Pixel you want to use.
In the Overview tab, find the Pixel ID displayed at the top of the page.
Copy the Pixel ID.
Return to the app and paste the Pixel ID into the “Pixel ID” field.
Step 4: Choose Tracking Scope
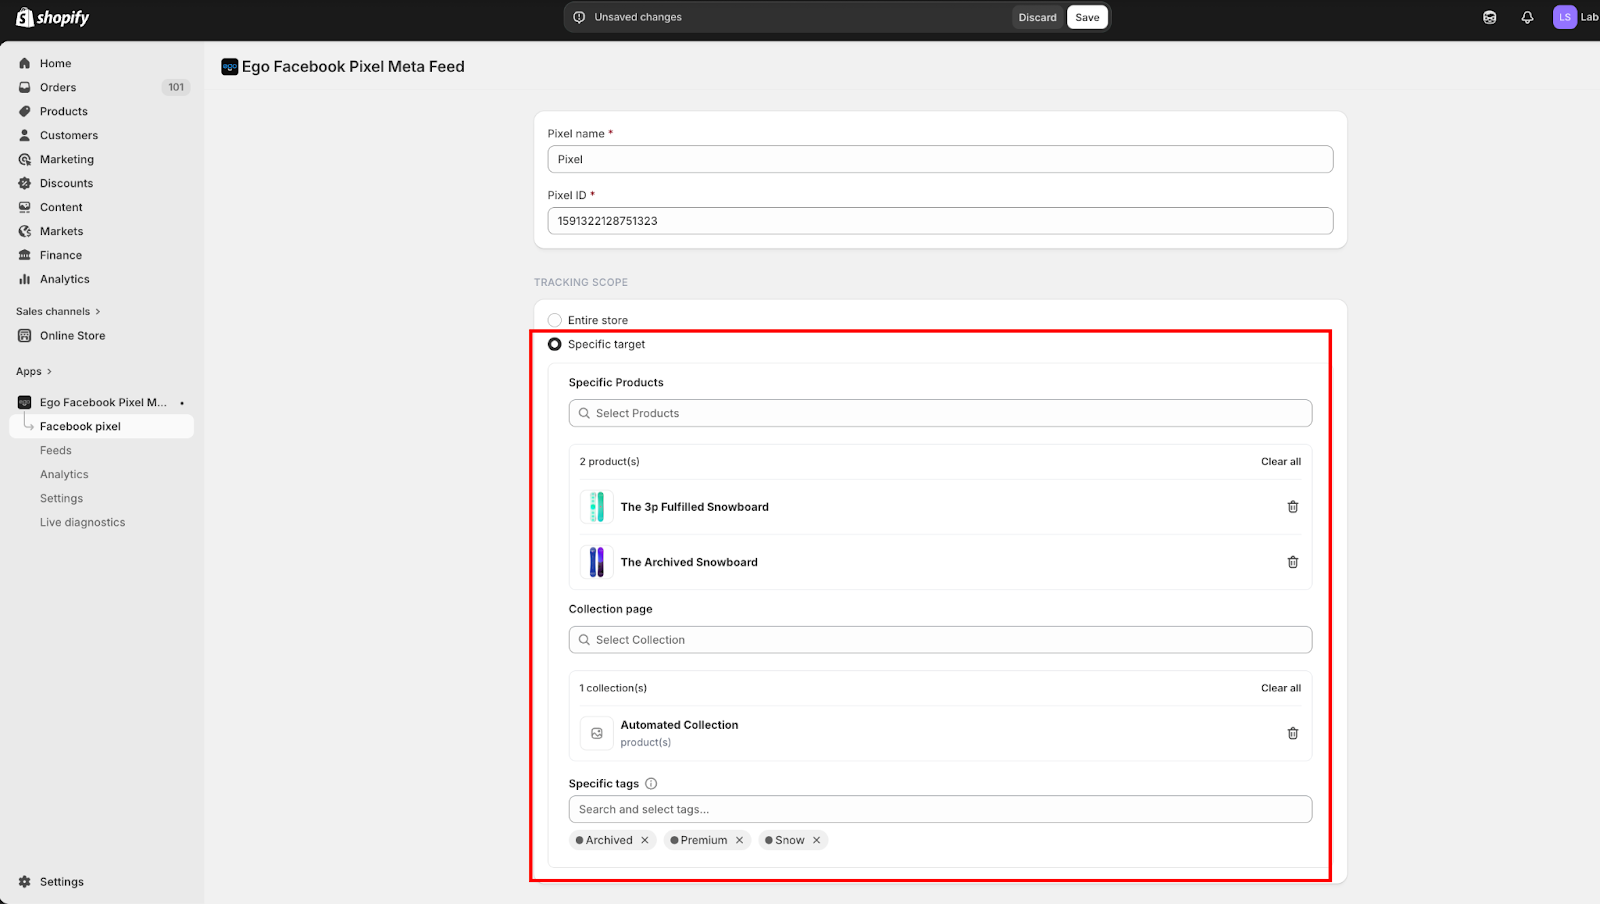
In the Tracking Scope section, choose where the pixel will track events.
Entire store: Track events across your entire store.
Specific target: Track events only for selected items. If you choose this option, you can configure:
- Specific Products – select products to track
- Collection page – select specific collections
- Specific tags – track products with selected tags
Step 5: Enable Conversion API (Optional)
In the Conversion API section: Turn on Conversions API (solution for iOS 14.5)
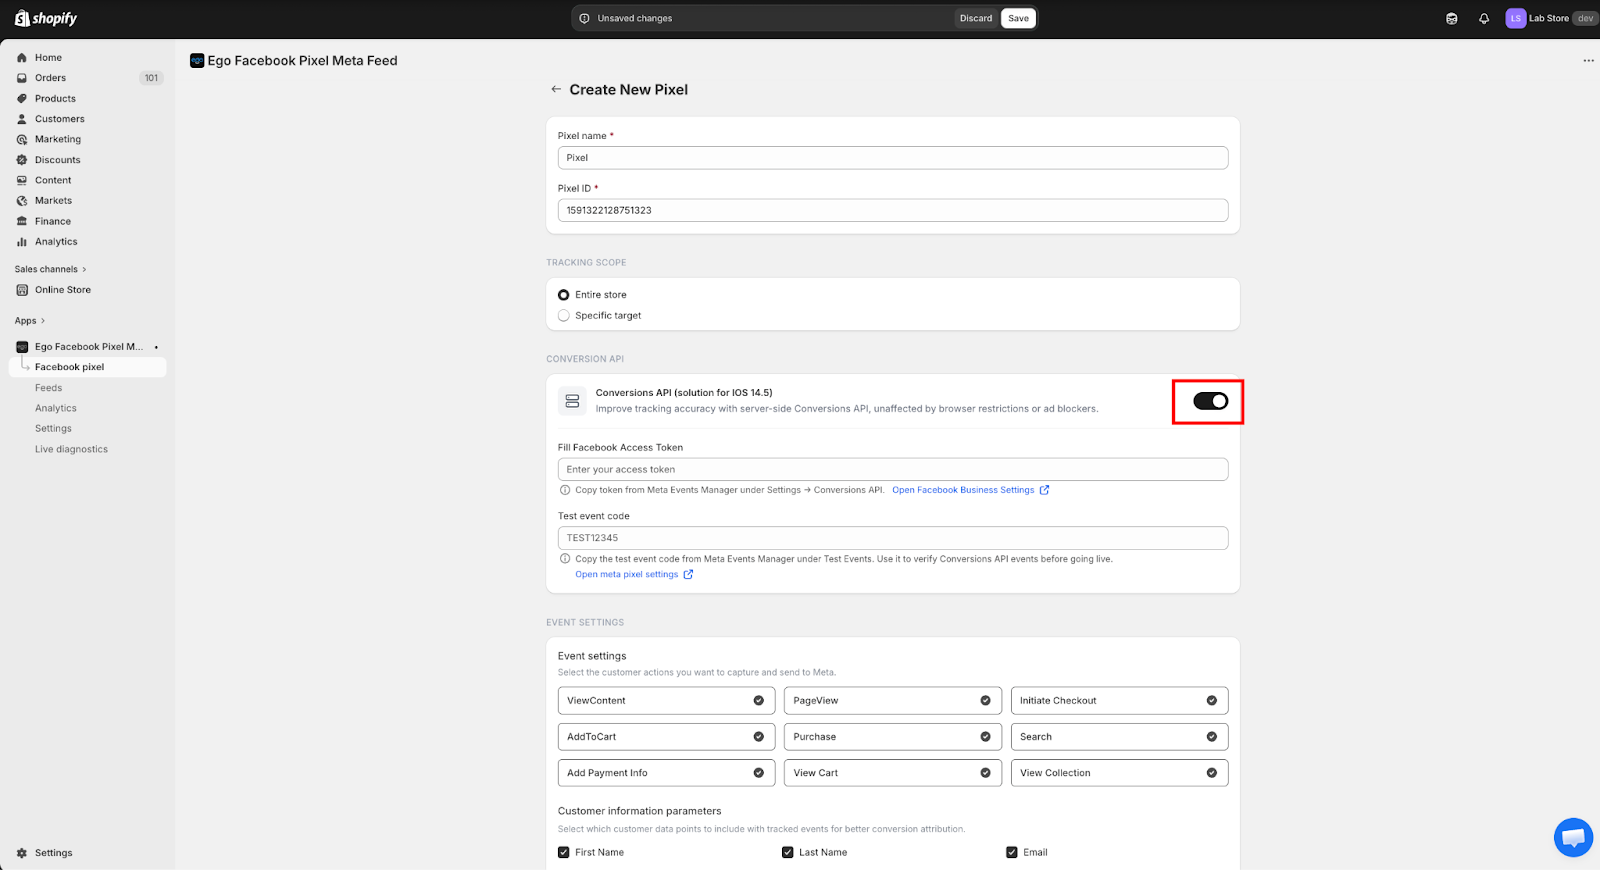
=> This enables server-side tracking, which improves event accuracy and helps avoid browser restrictions or ad blockers.
Set up Conversions API (CAPI) token in your Ego Pixel
Step 6: Configure Event Settings
In the Event settings section, select the events you want to send to Meta.
Available events include:
PageView
ViewContent
AddToCart
ViewCart
InitiateCheckout
AddPaymentInfo
Purchase
Search
ViewCollection
=> Only enabled events will be sent to Meta.
Step 7: Select Customer Information Parameters
In Customer information parameters, choose the customer data to include with events for better matching in Meta.
Available parameters include:
First Name
Last Name
Email
Phone
City
State
Zip Code
Country
External ID
=> Providing more parameters can improve event matching quality.
Step 8: Save the Pixel
After finishing the configuration, Click Save in the top-right corner.
⇒ The pixel will start tracking events based on your settings.
Method 2: Auto Connect Pixel (Recommended)
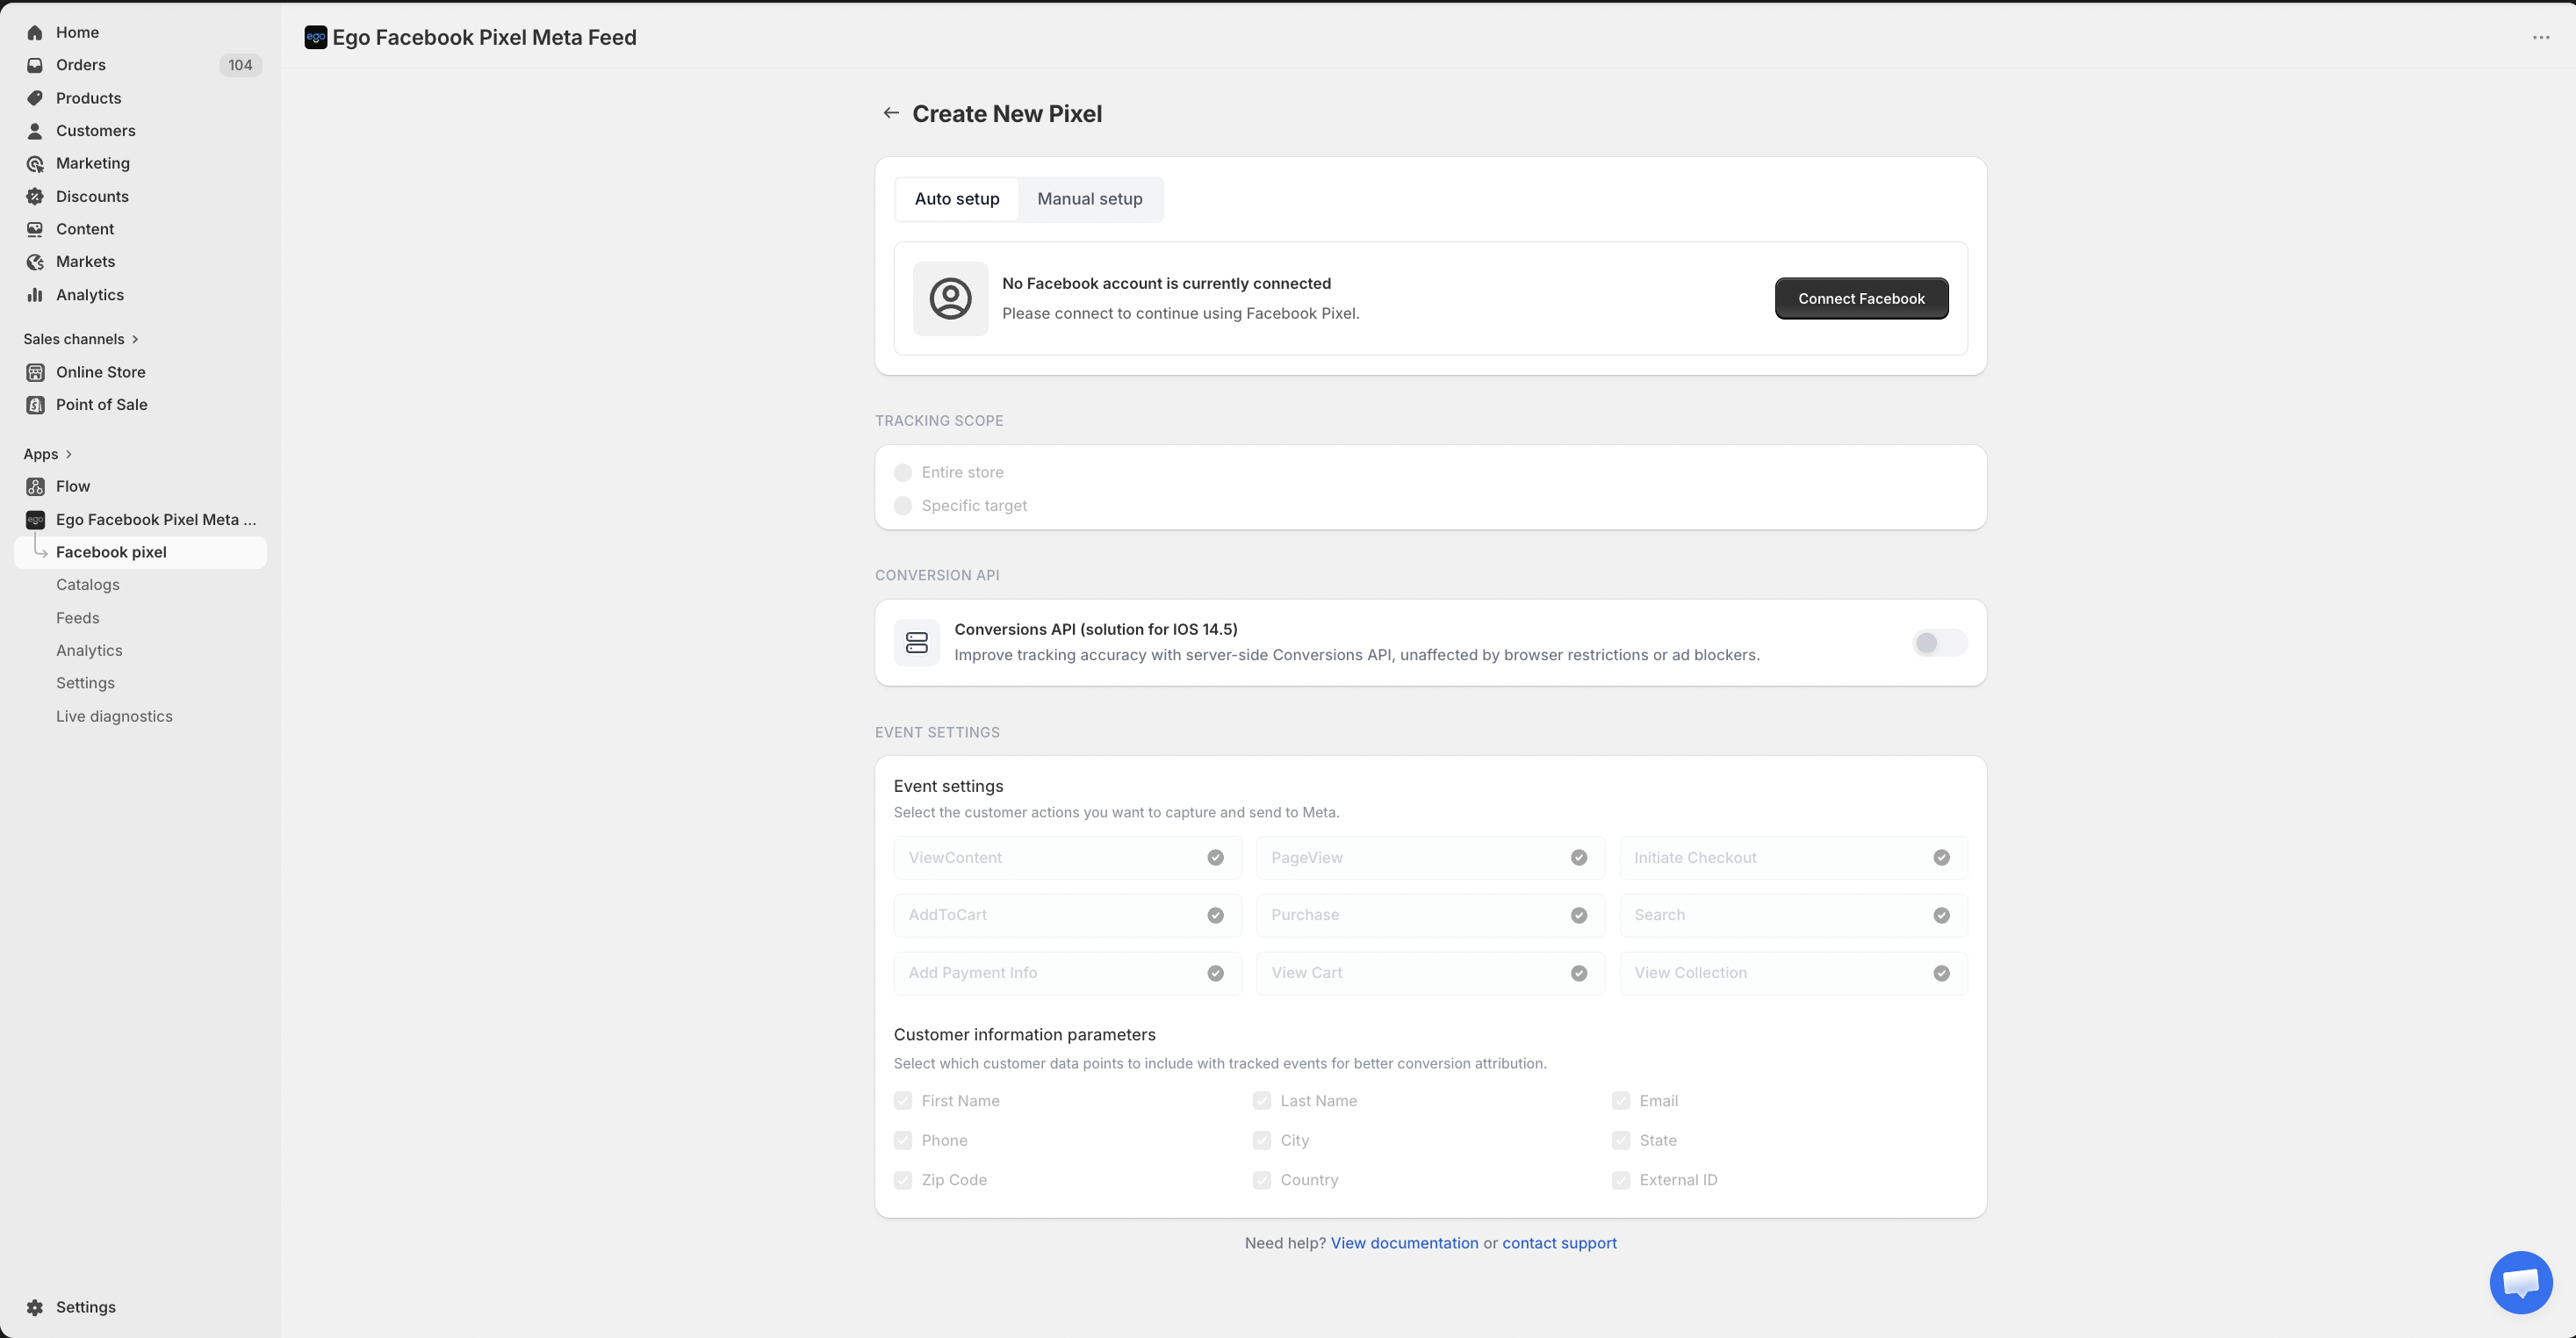
Step 1: Open the Pixel Manager screen
Open the app in your Shopify Admin.
Go to Facebook Pixel.
Click Create New Pixel.
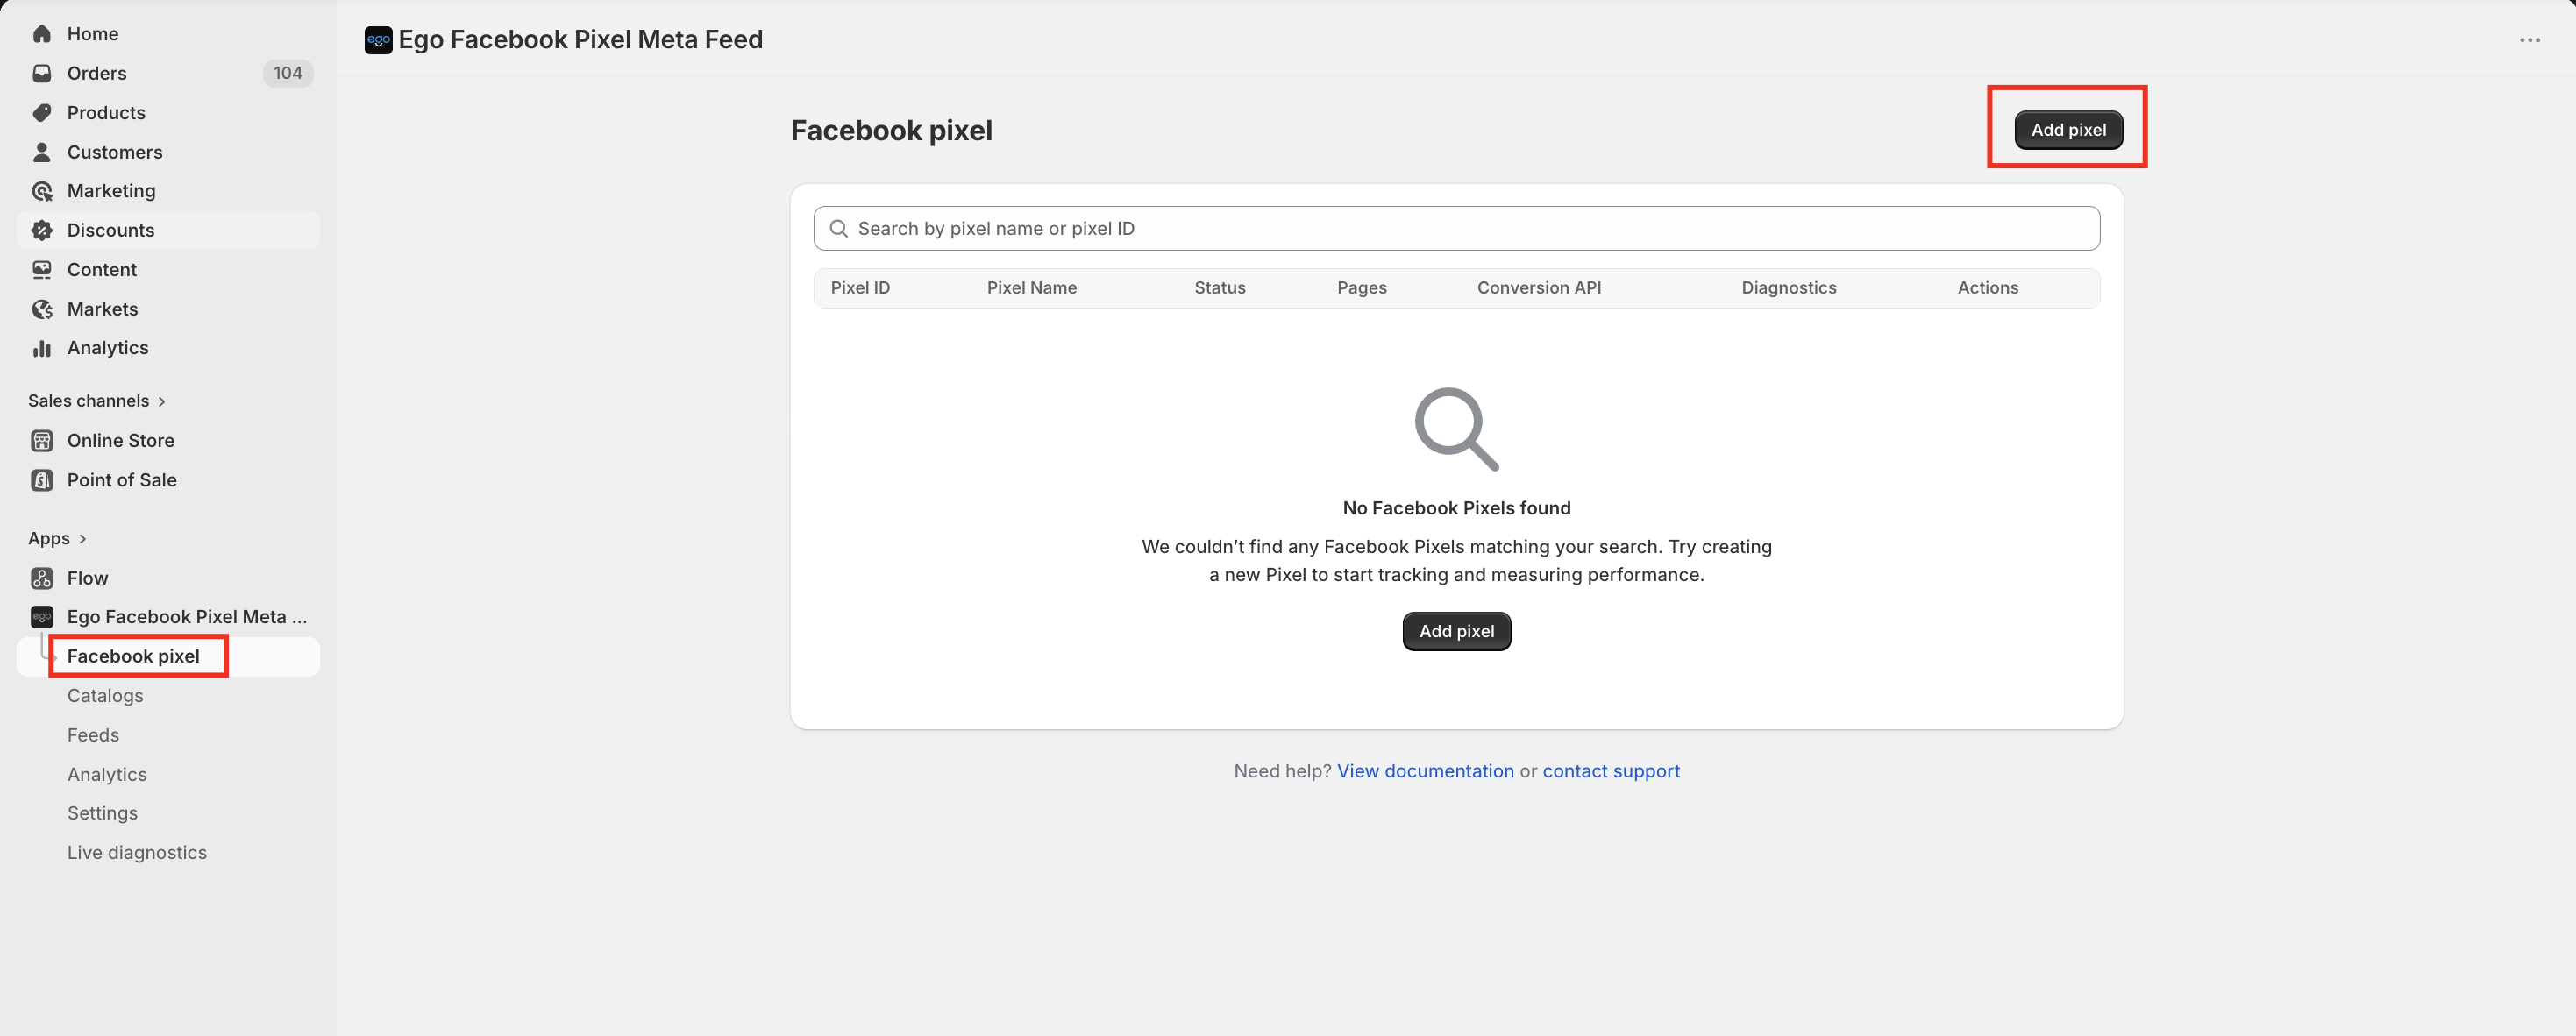
➡ You will see the Pixel setup screen.
Step 2: Choose Auto Connect Pixel
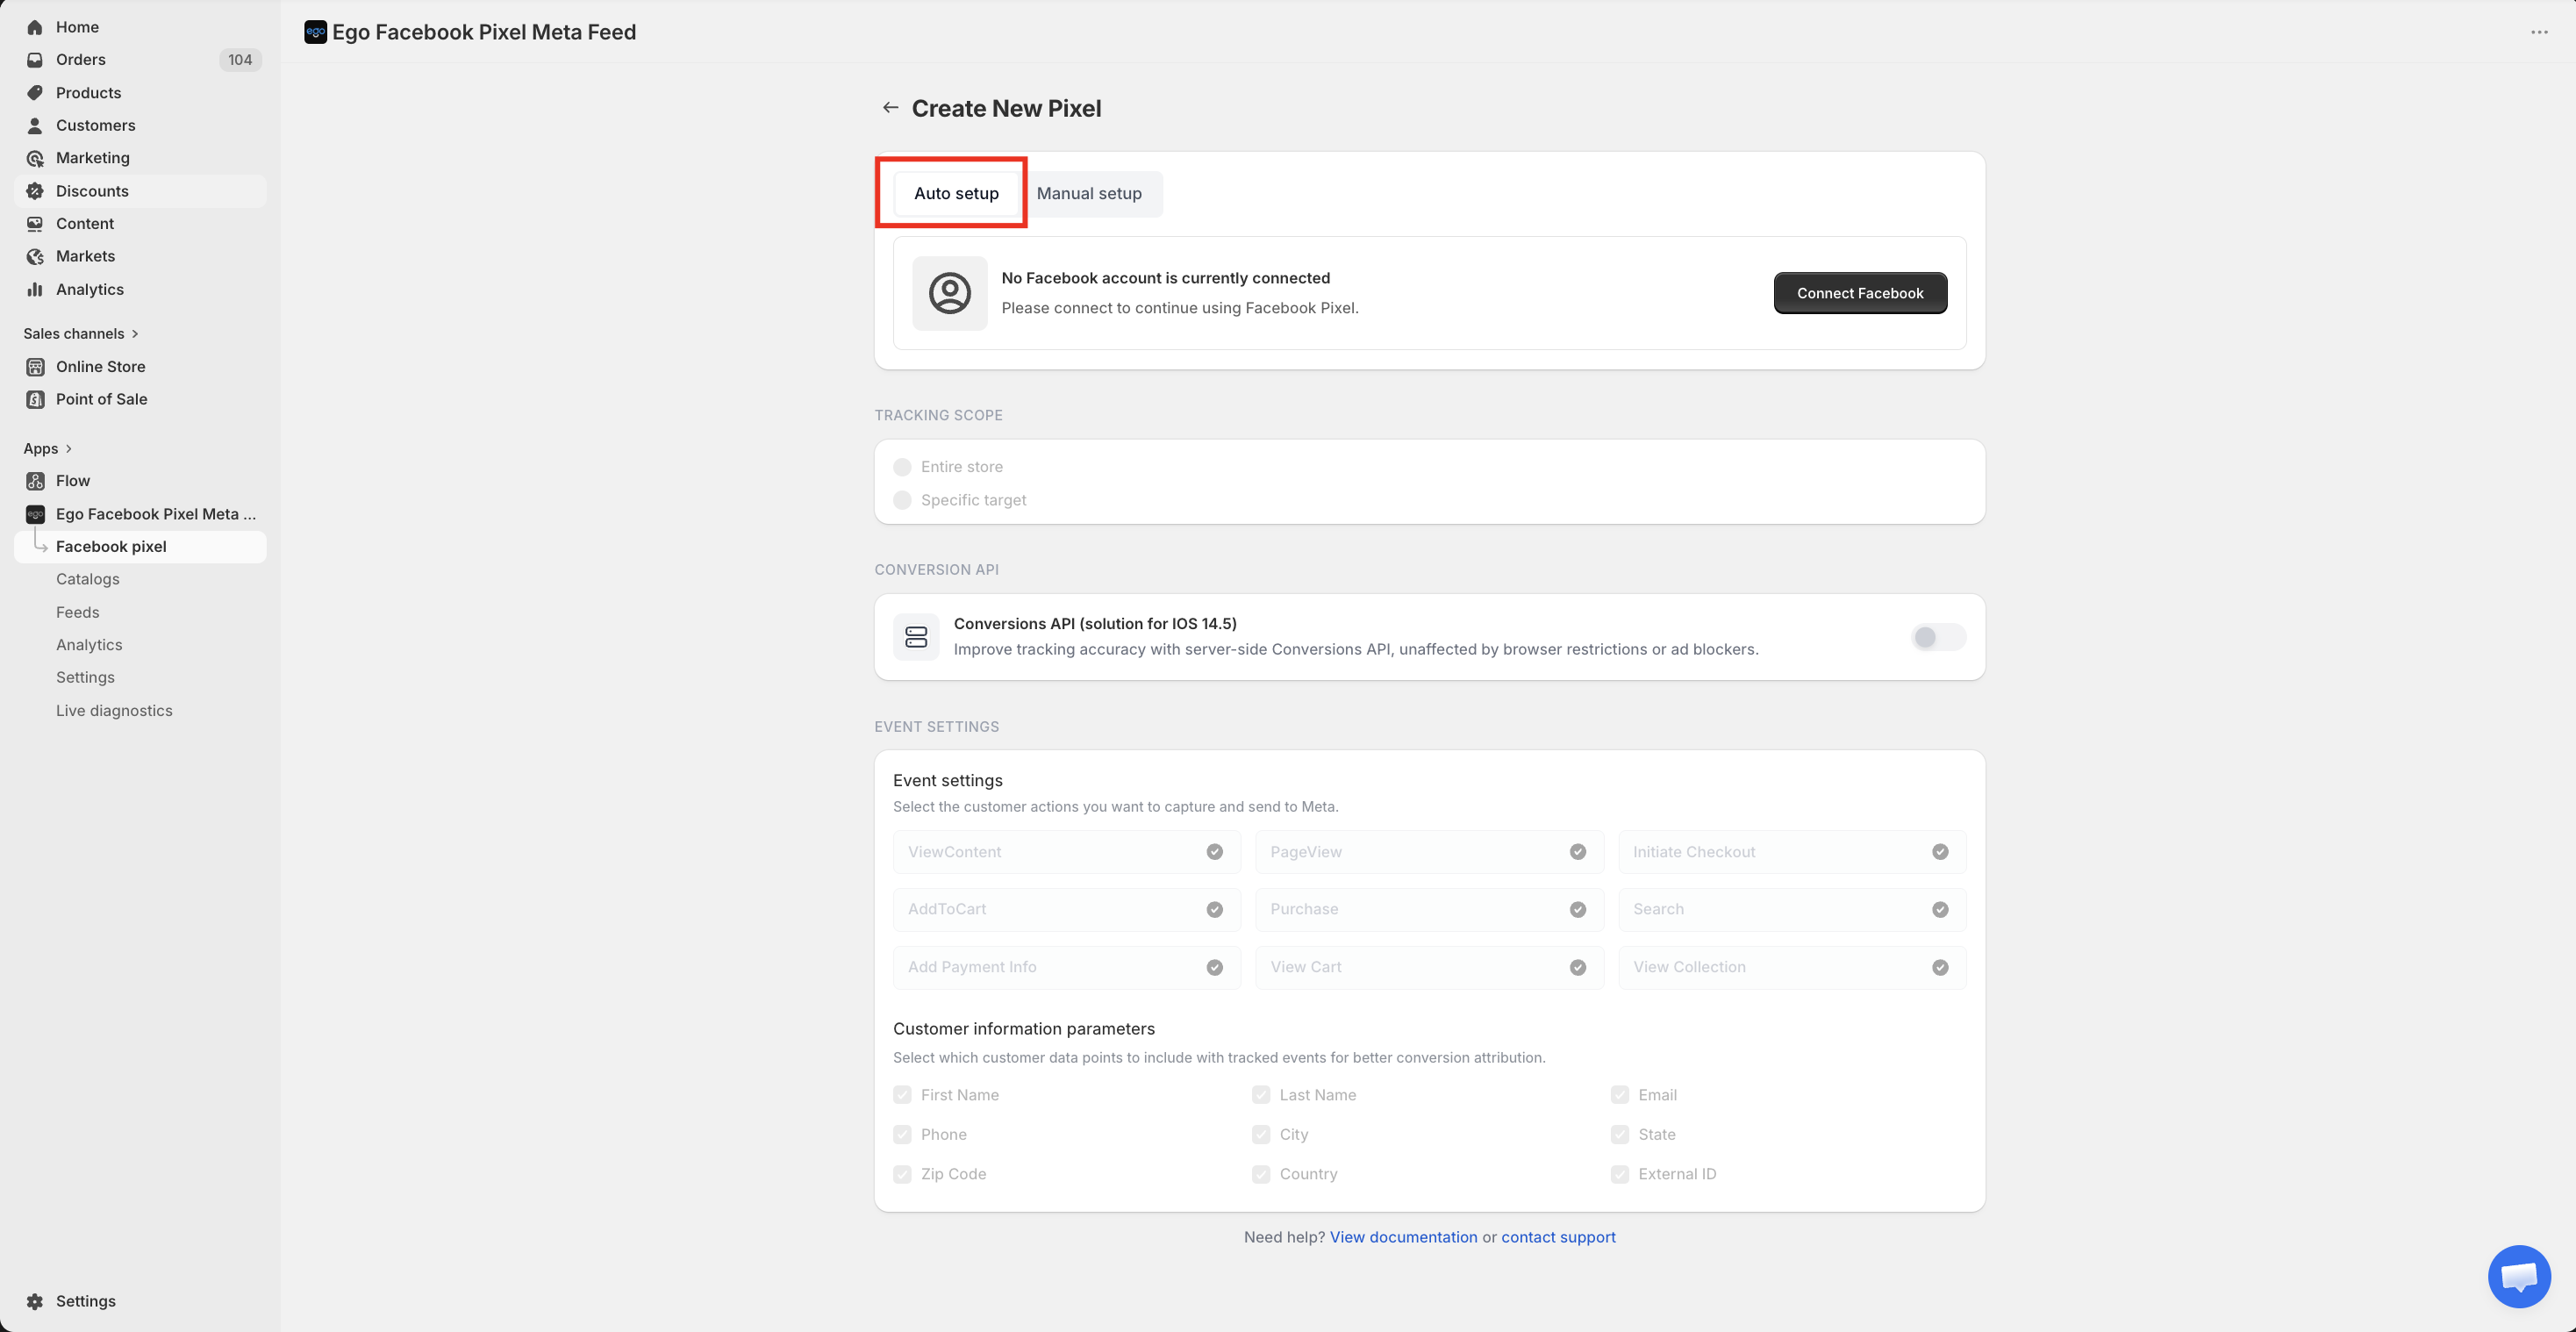
At the top of the setup screen:
Select Auto Connect Pixel (recommended option)
This method allows you to connect your Meta Pixel without manual input.
Step 3: Log in to Meta account
Click Connect Facebook.
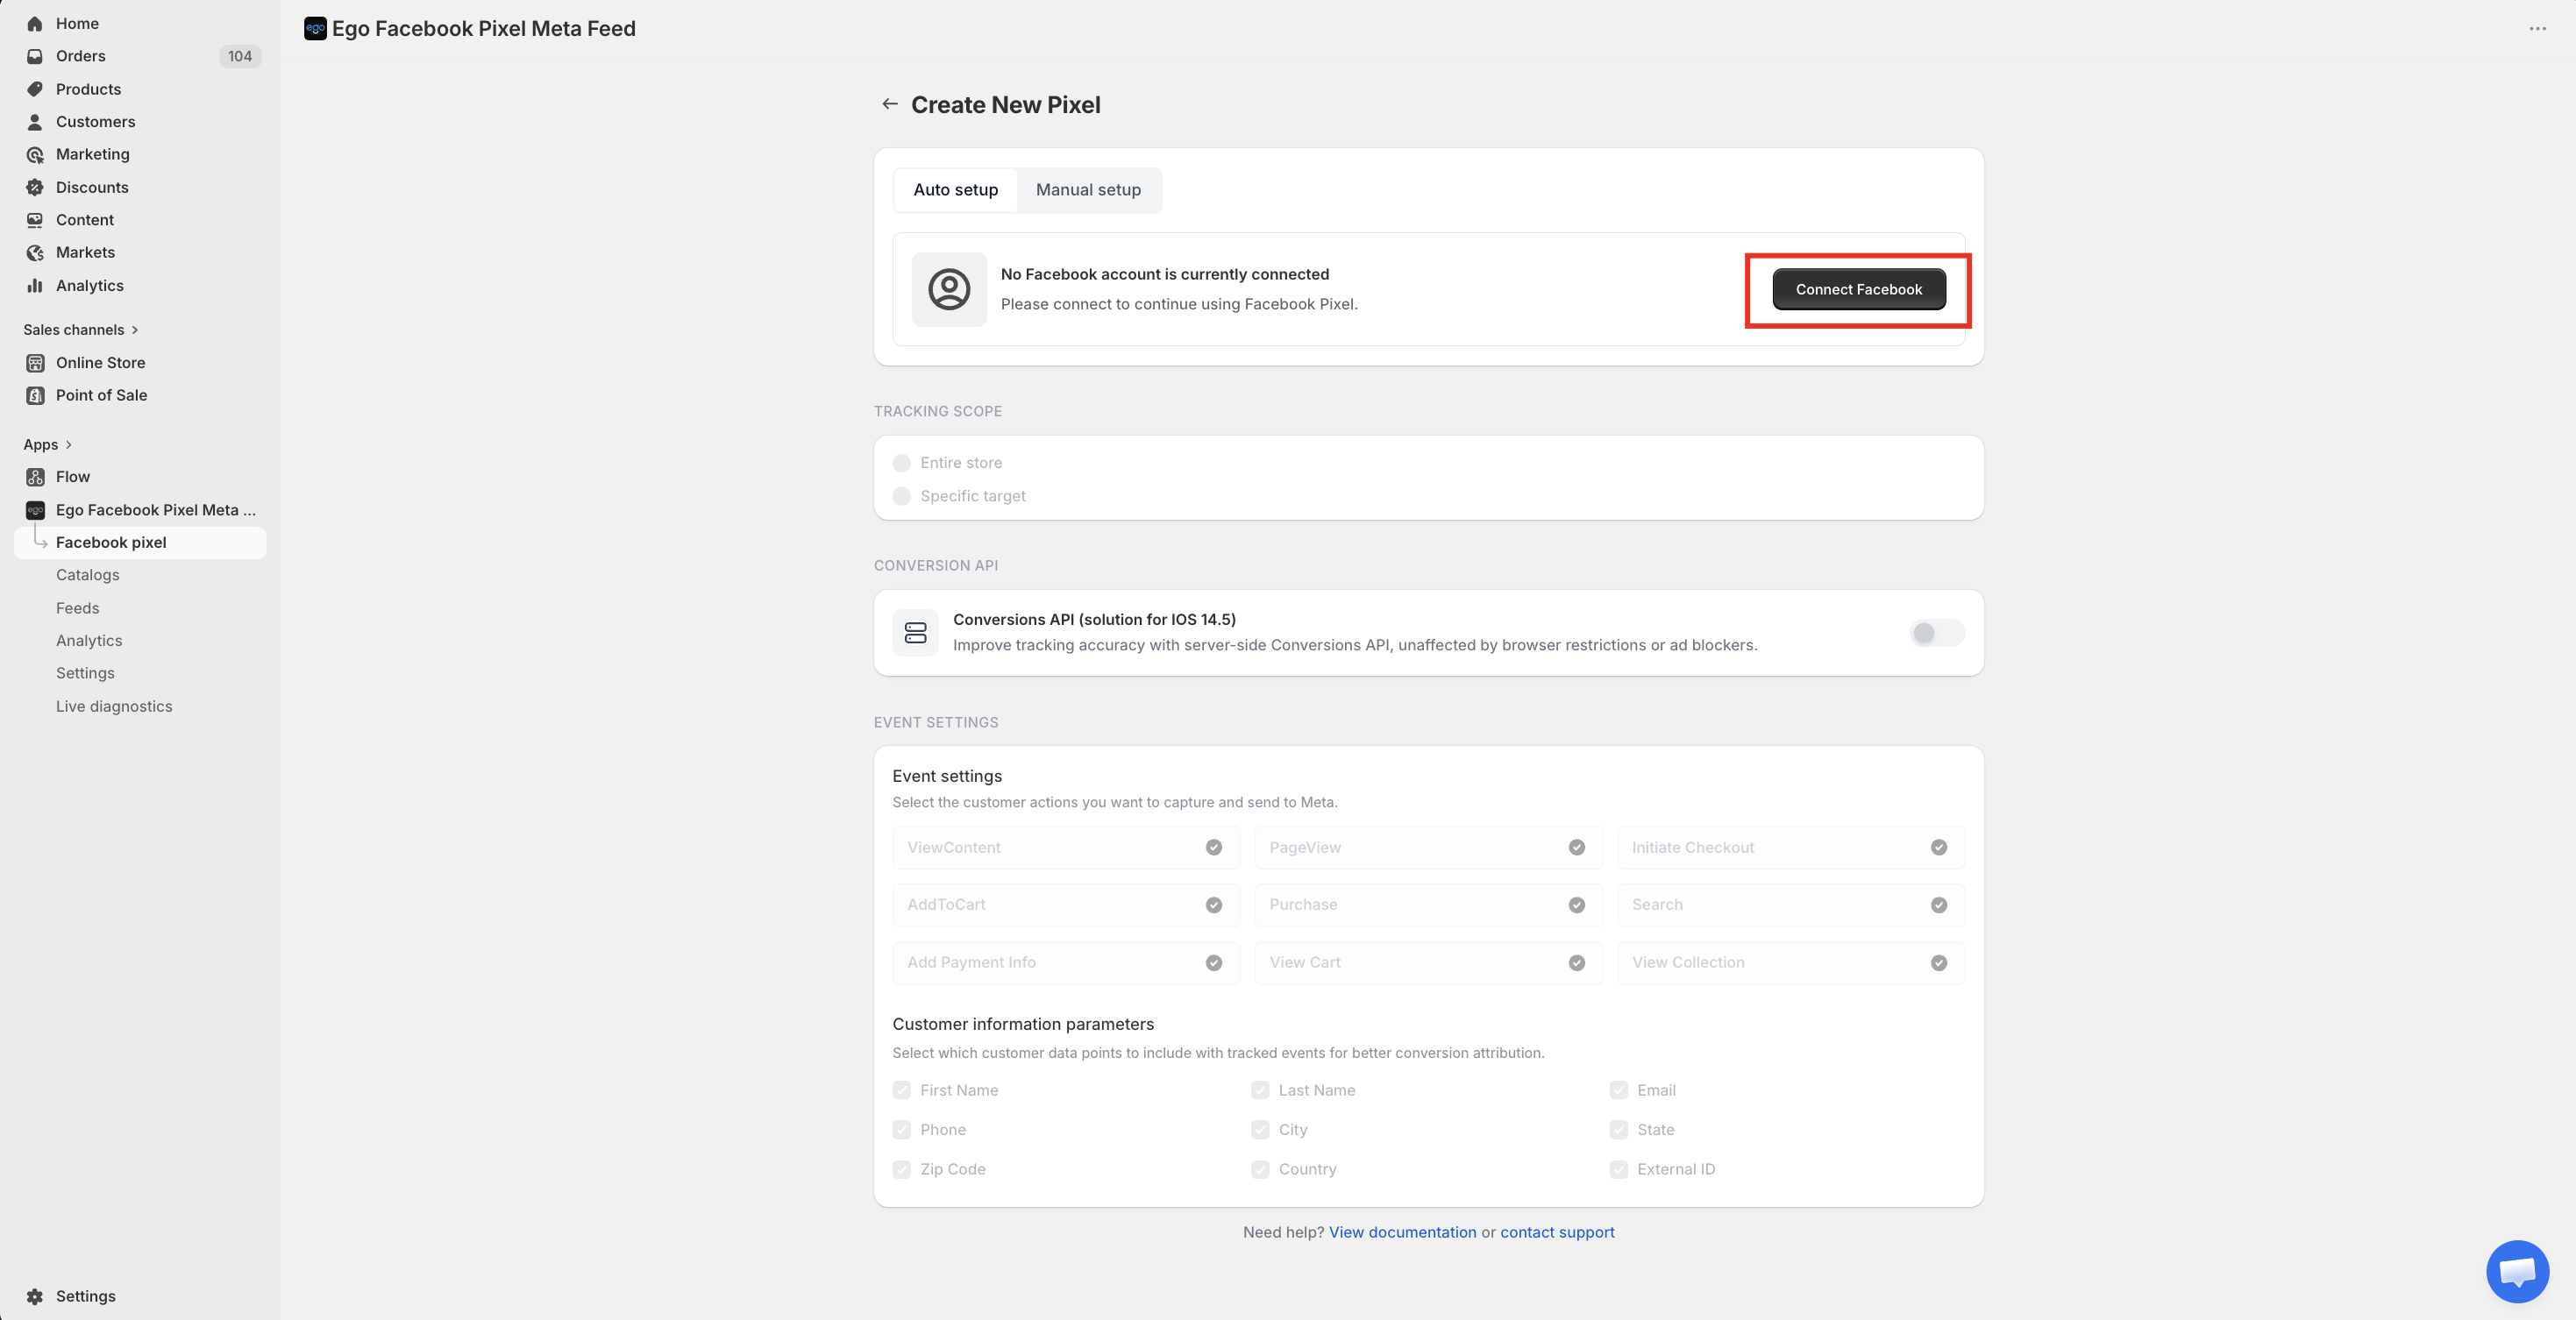
A Meta login popup will appear.
Log in to your Meta (Facebook) account.
➡ Make sure you use an account with access to your Business Manager.
Step 4: Grant permissions
Click Continue
Approve all required permissions
➡ This allows Ego to:
Access your Pixel
Send events via Conversions API
Sync tracking data

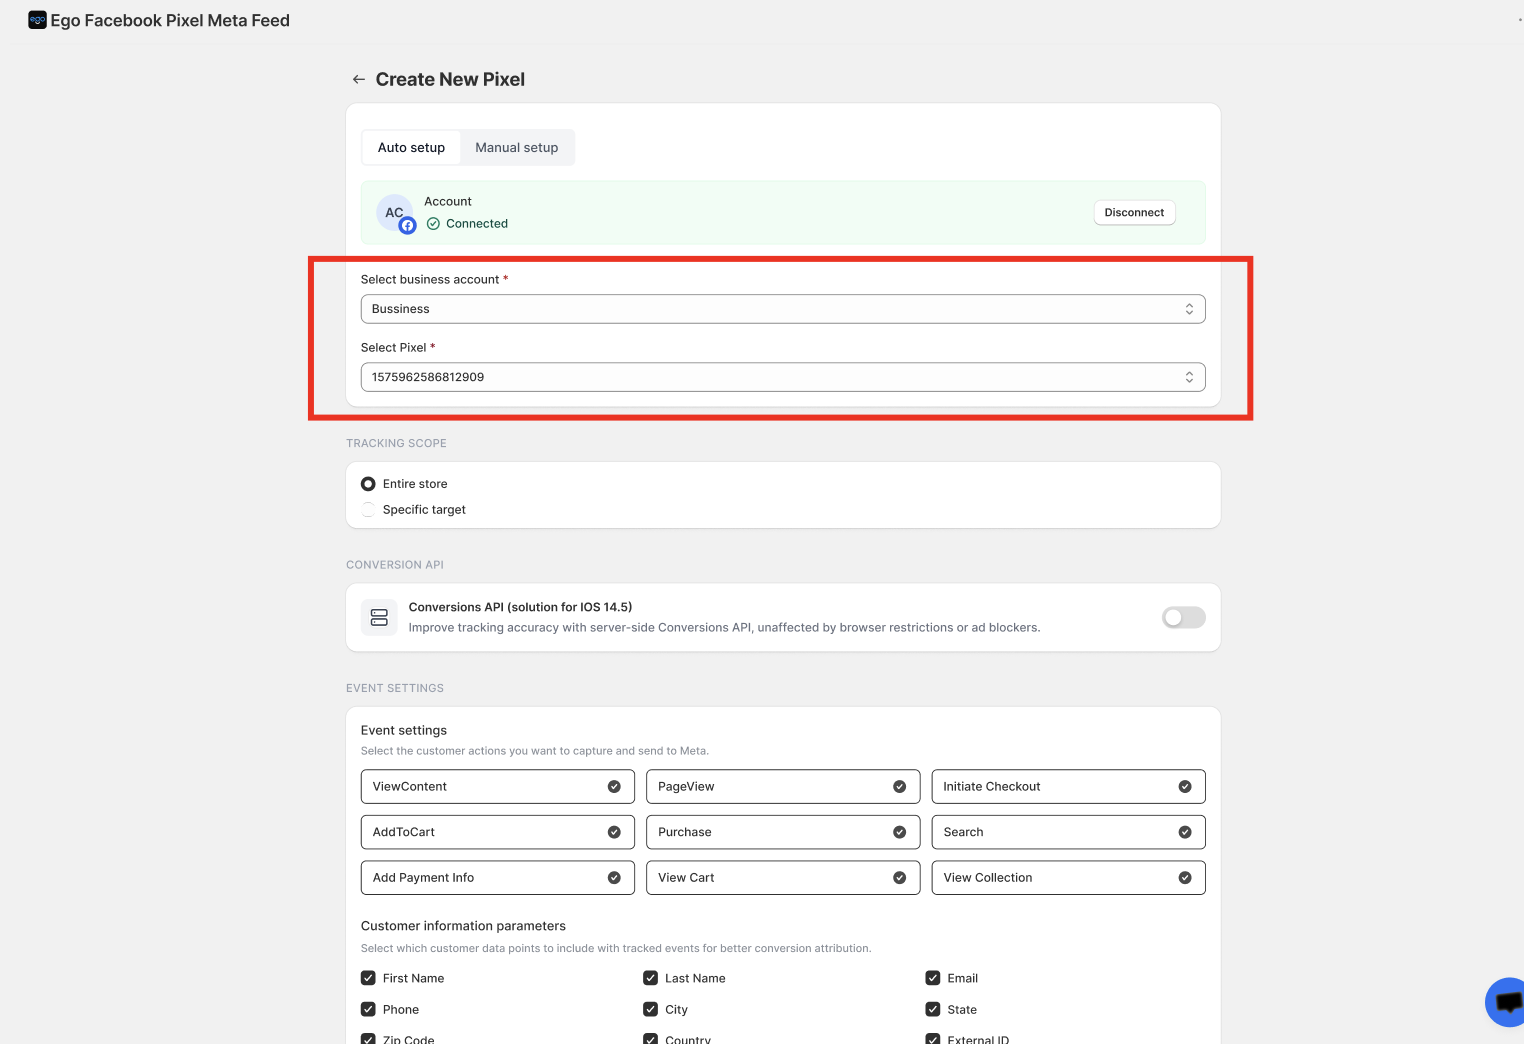
Step 5: Select your Pixel
After logging in:
Choose your Business Account
Select your Ad Account
Select your Meta Pixel (Dataset)
➡ Only Pixels you have permission for will be displayed.
Step 6: Choose Tracking Scope
In the Tracking Scope section, choose where the pixel will track events.
Entire store: Track events across your entire store.
Specific target: Track events only for selected items. If you choose this option, you can configure:
- Specific Products – select products to track
- Collection page – select specific collections
- Specific tags – track products with selected tags
Step 7: Enable Conversion API (Optional)
In the Conversion API section: Turn on Conversions API (solution for iOS 14.5)

=> This enables server-side tracking, which improves event accuracy and helps avoid browser restrictions or ad blockers.
Set up Conversions API (CAPI) token in your Ego Pixel
Step 8: Configure Event Settings
In the Event settings section, select the events you want to send to Meta.
Available events include:
PageView
ViewContent
AddToCart
ViewCart
InitiateCheckout
AddPaymentInfo
Purchase
Search
ViewCollection
=> Only enabled events will be sent to Meta.
Step 9: Select Customer Information Parameters
In Customer information parameters, choose the customer data to include with events for better matching in Meta.
Available parameters include:
First Name
Last Name
Email
Phone
City
State
Zip Code
Country
External ID
=> Providing more parameters can improve event matching quality.
Step 10: Save the Pixel
After finishing the configuration, Click Save in the top-right corner.
⇒ The pixel will start tracking events based on your settings.
Still need help?
Our support team is available 24/7. Contact support →