

Multi-Cart Setup
Also called multiple carts separated by display conditions and settings
1. Multi-Cart Definition
The Multi-Cart feature allows you to create multiple shopping carts with predefined conditions—such as device type, customer location, or time-specific events. This helps you deliver a personalized shopping experience and optimize conversions effortlessly.
Default Cart: The initial cart that appears when you first install the app. It serves as the base setup before additional carts are created.
2. Common used cases
Example: Merchants want to create a cart for
- Mobile devices only
- For specific countries
- For specific customer tags, etc.
3. Steps to set up multiple carts
Step 1: Create a new cart
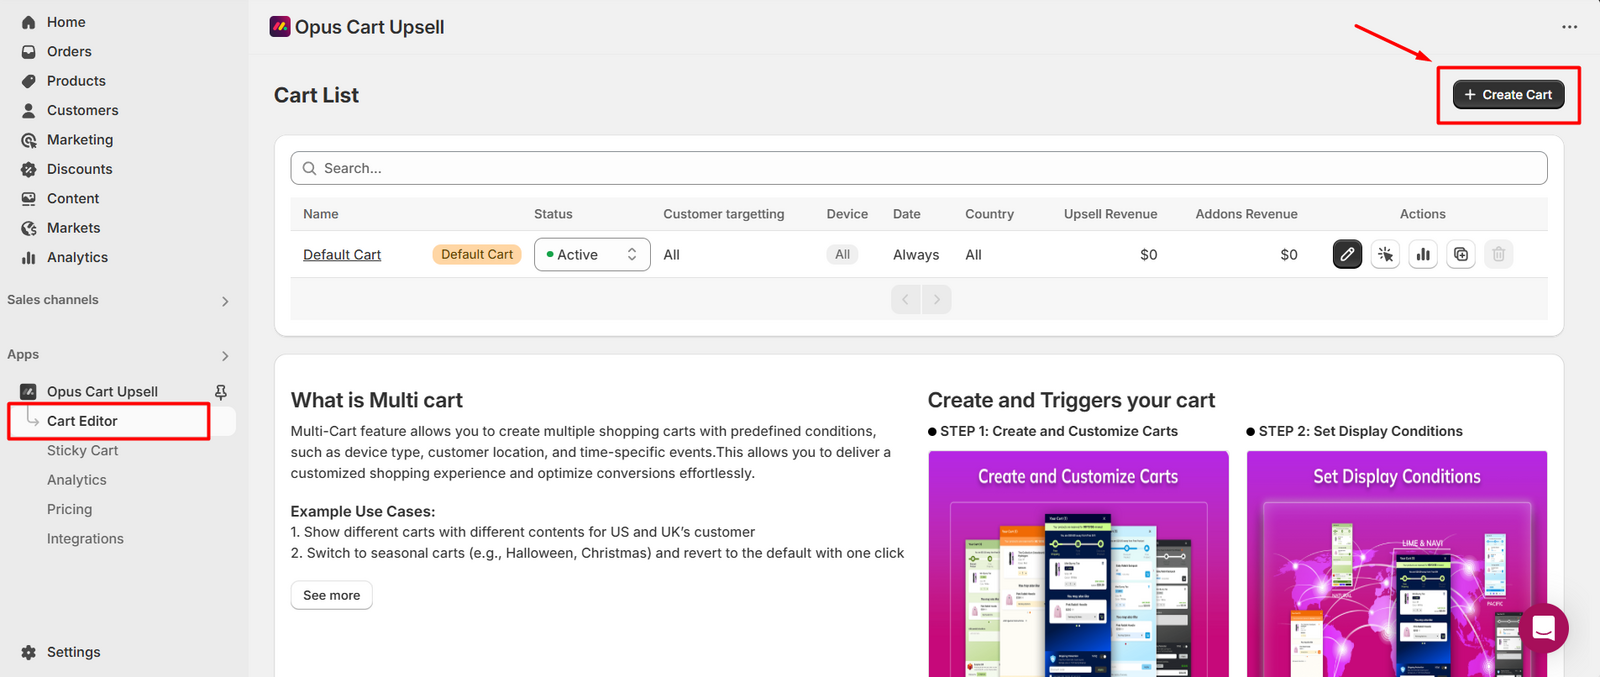
From the app’s navigation menu, go to the Cart Editor tab.
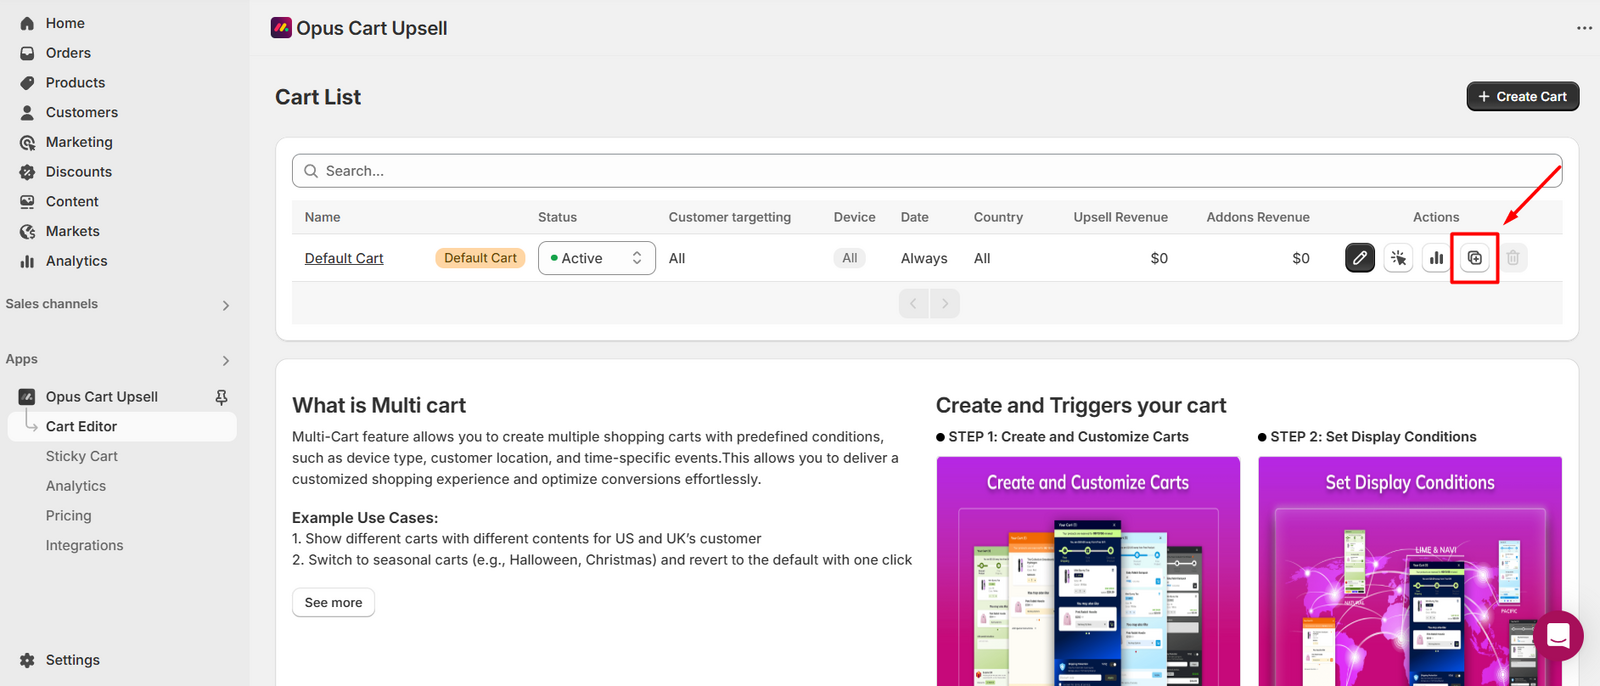
Click on duplicate icon if you want to keep the settings and change display conditions.
If you want to create a cart from scratch, click Create Cart.
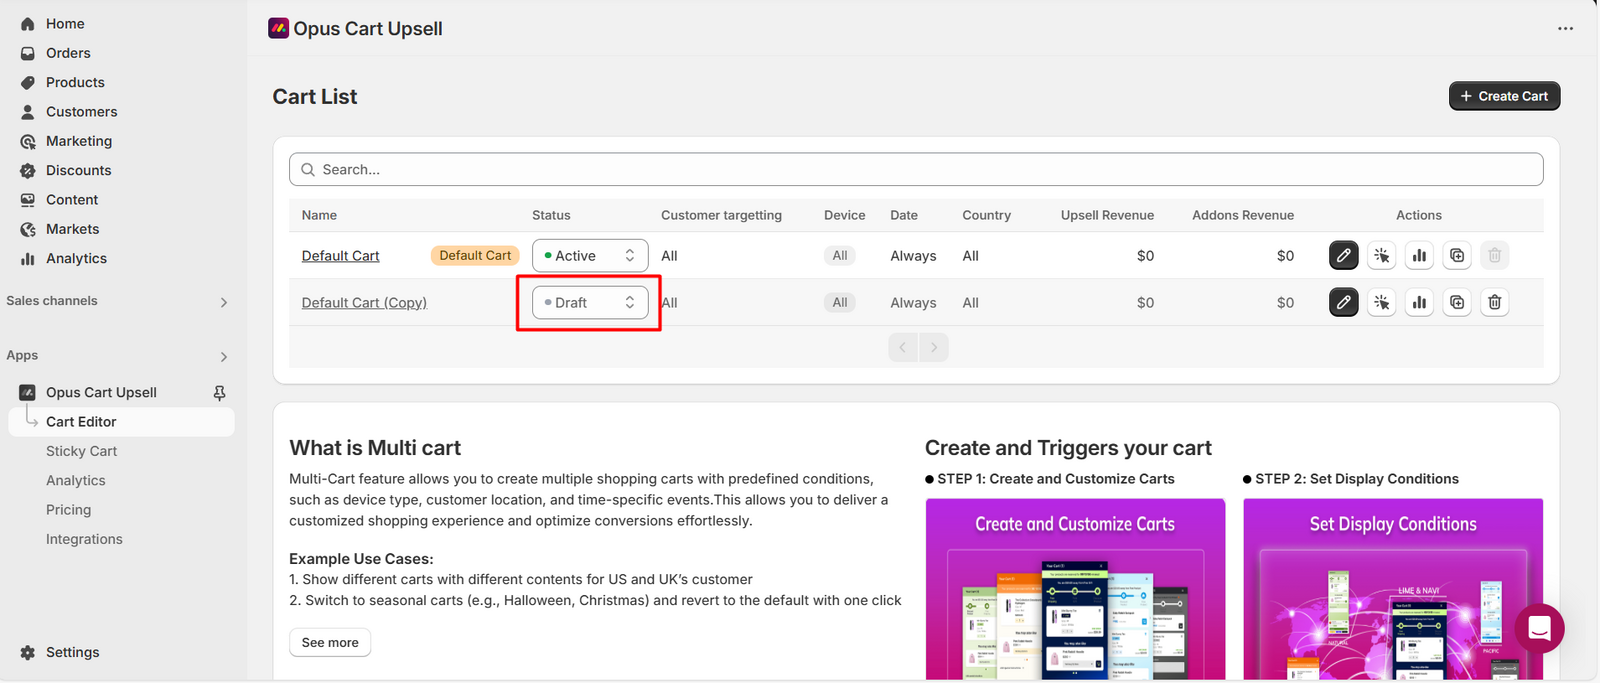
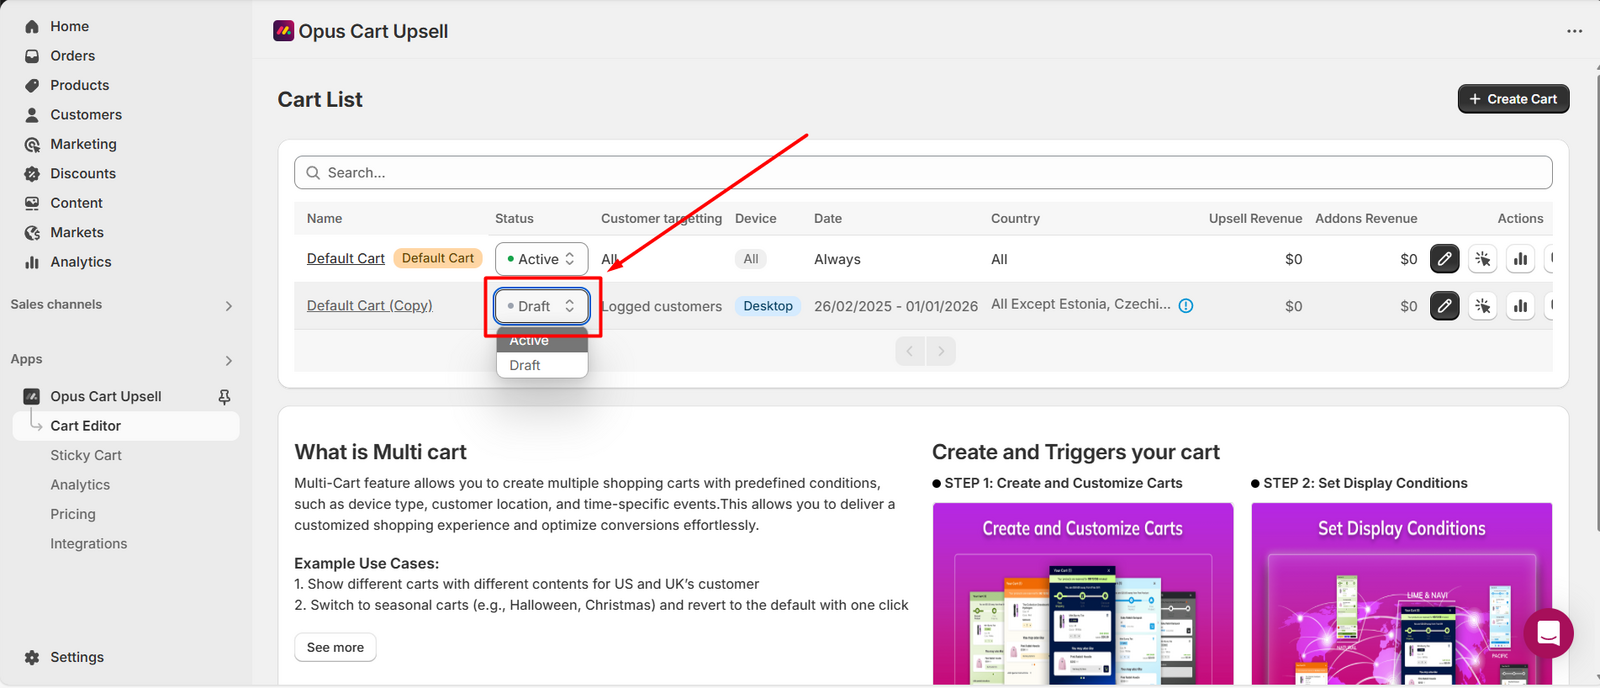
The new cart will be saved as a draft to prevent any conflicts. You can activate it once you’ve completed the settings.
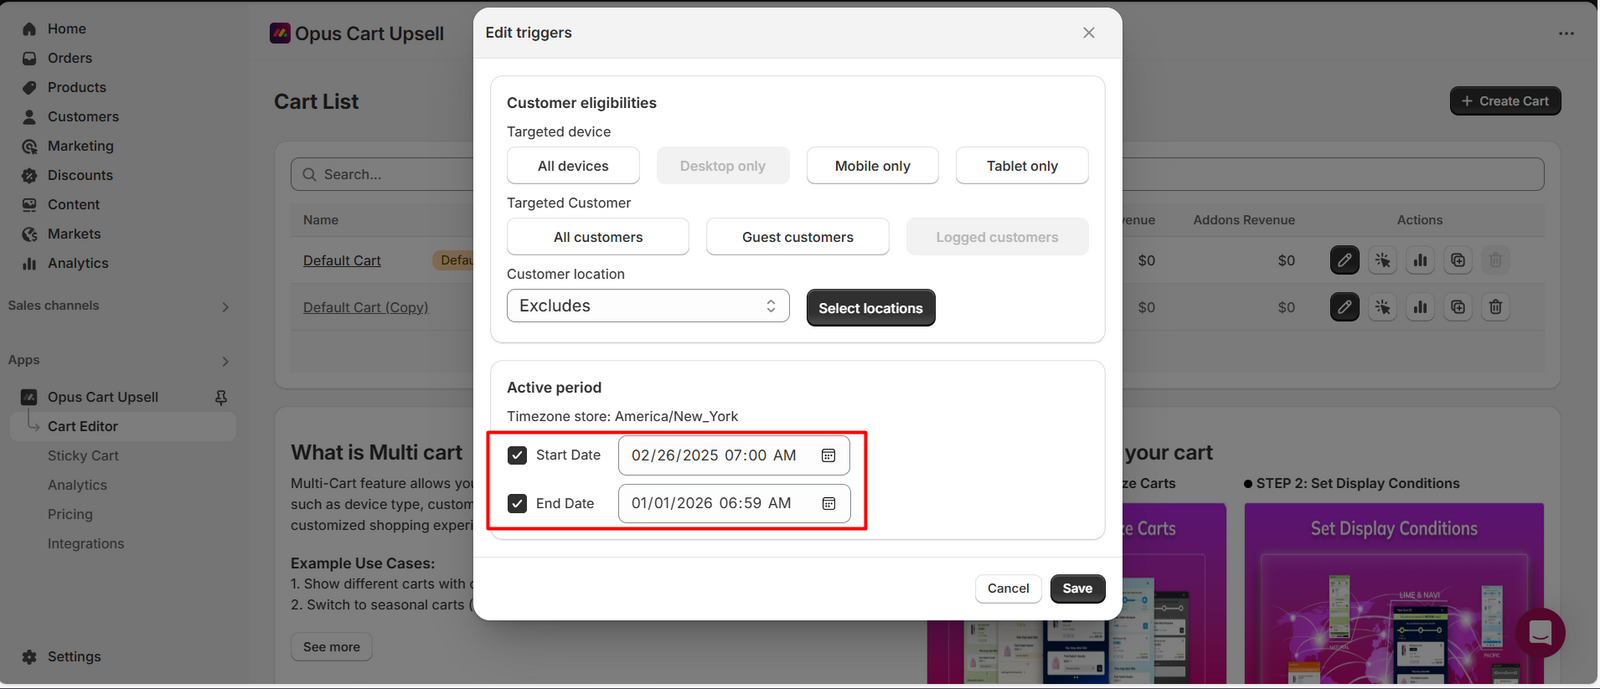
Step 2: Configure display condition
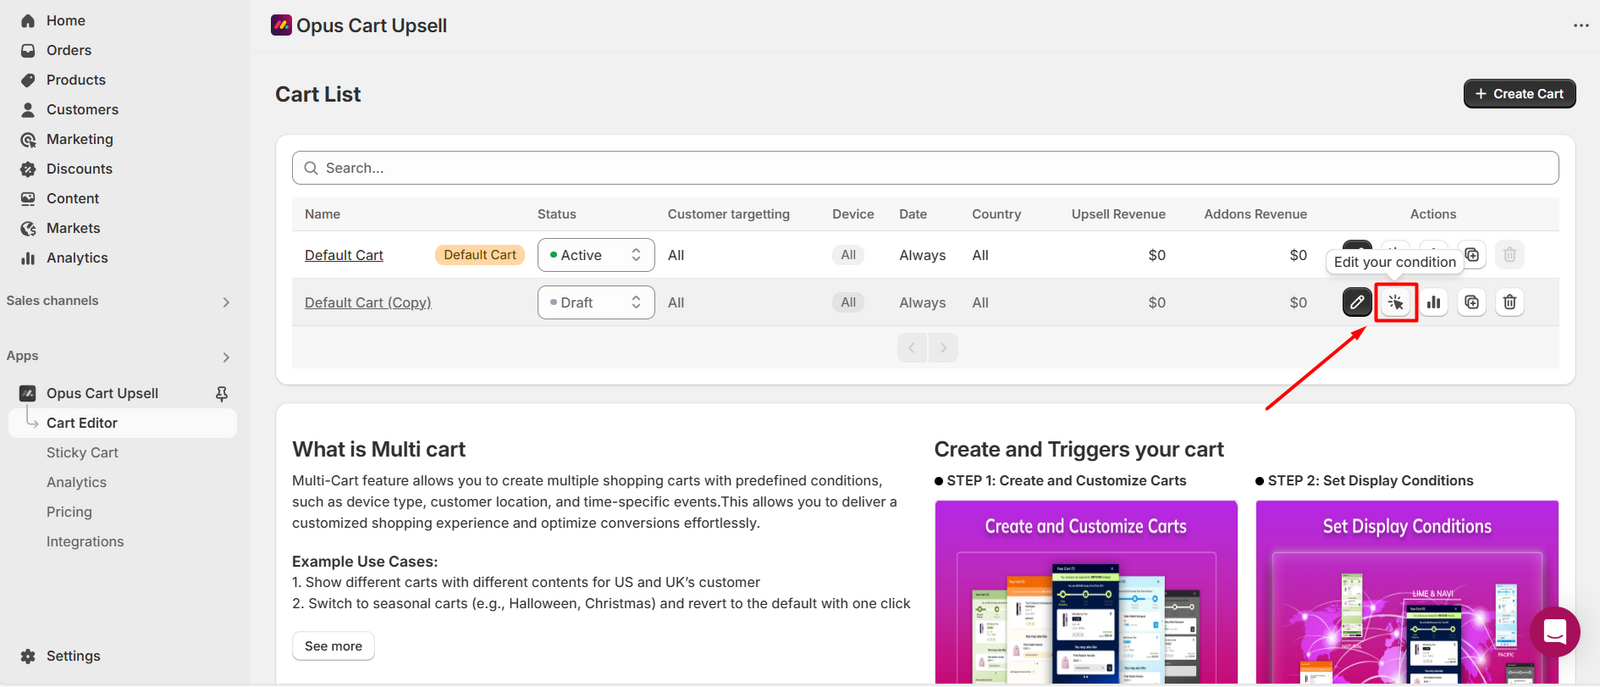
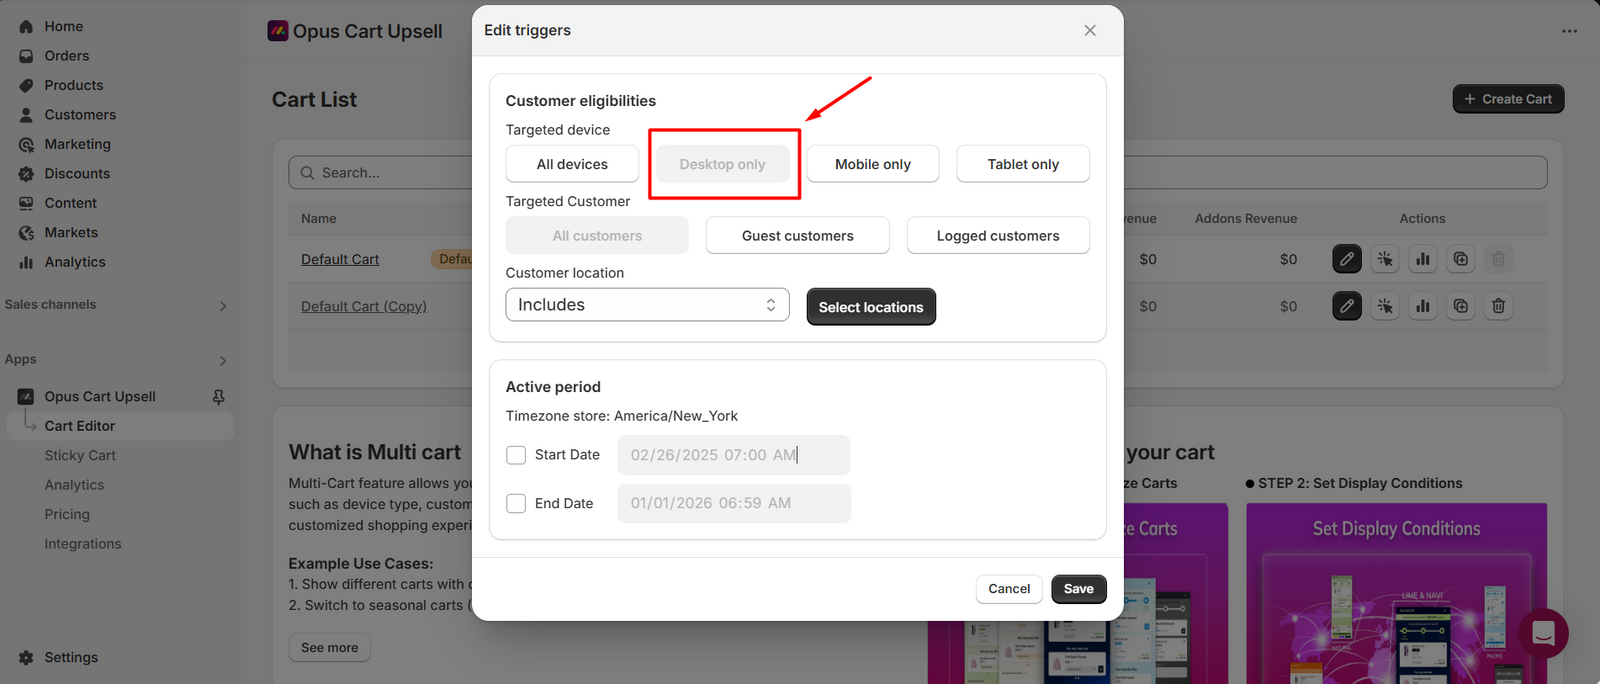
Click on arrow icon to open the trigger panel.
Choose the device on which you want the cart to be displayed. e.g., Desktop only
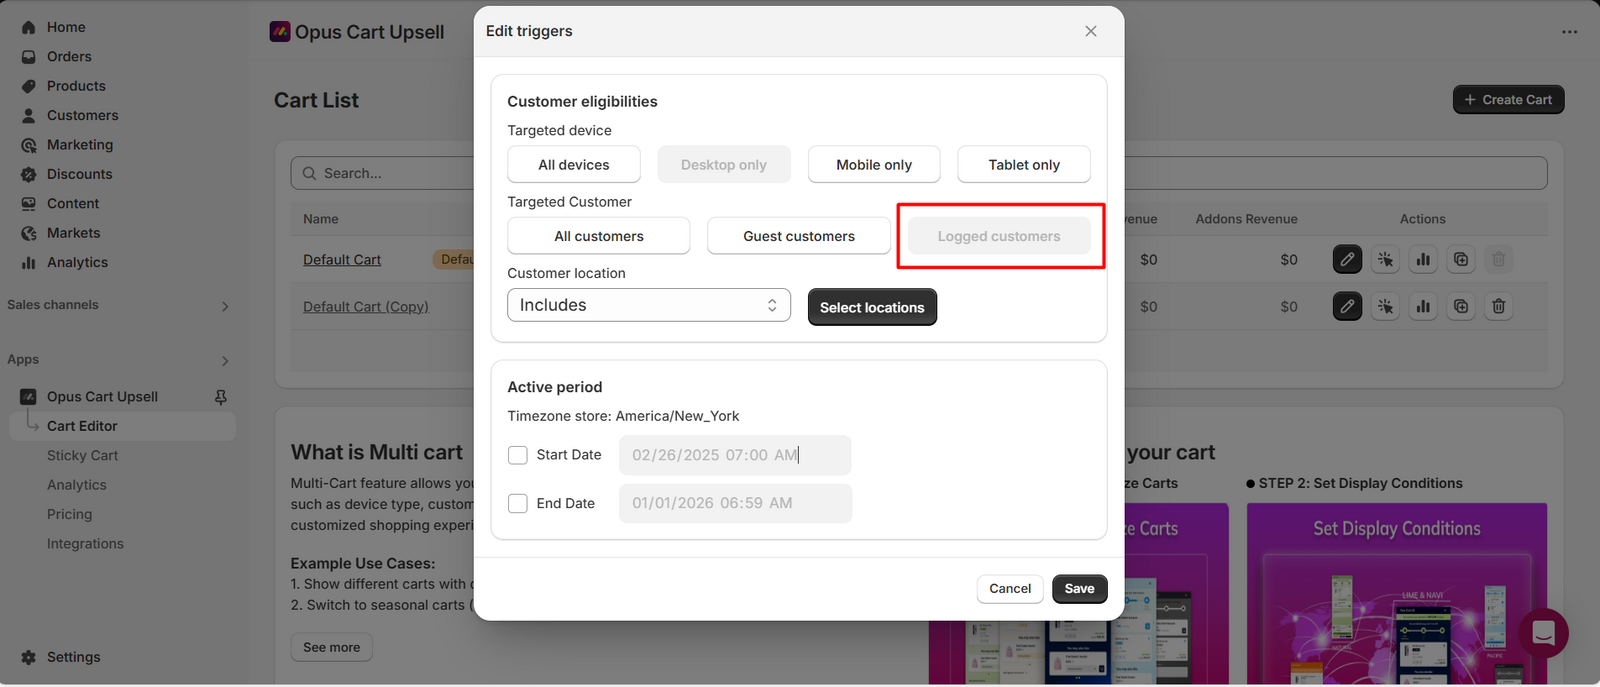
Choose the targeted customers you want the cart to be shown to. e.g., Logged-in customers.
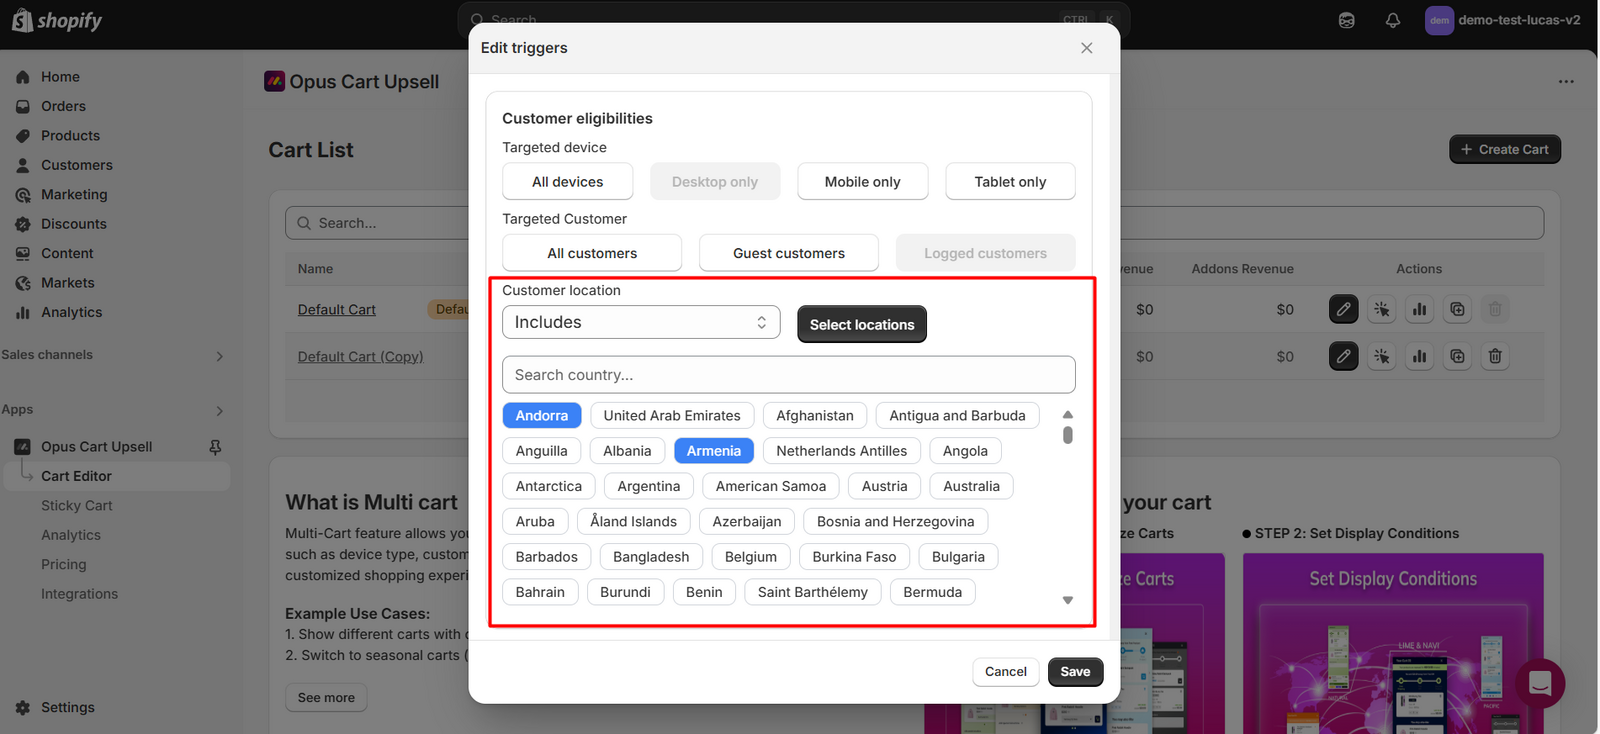
If you want the cart to be shown for all countries except one or some, choose Include > Select Locations.
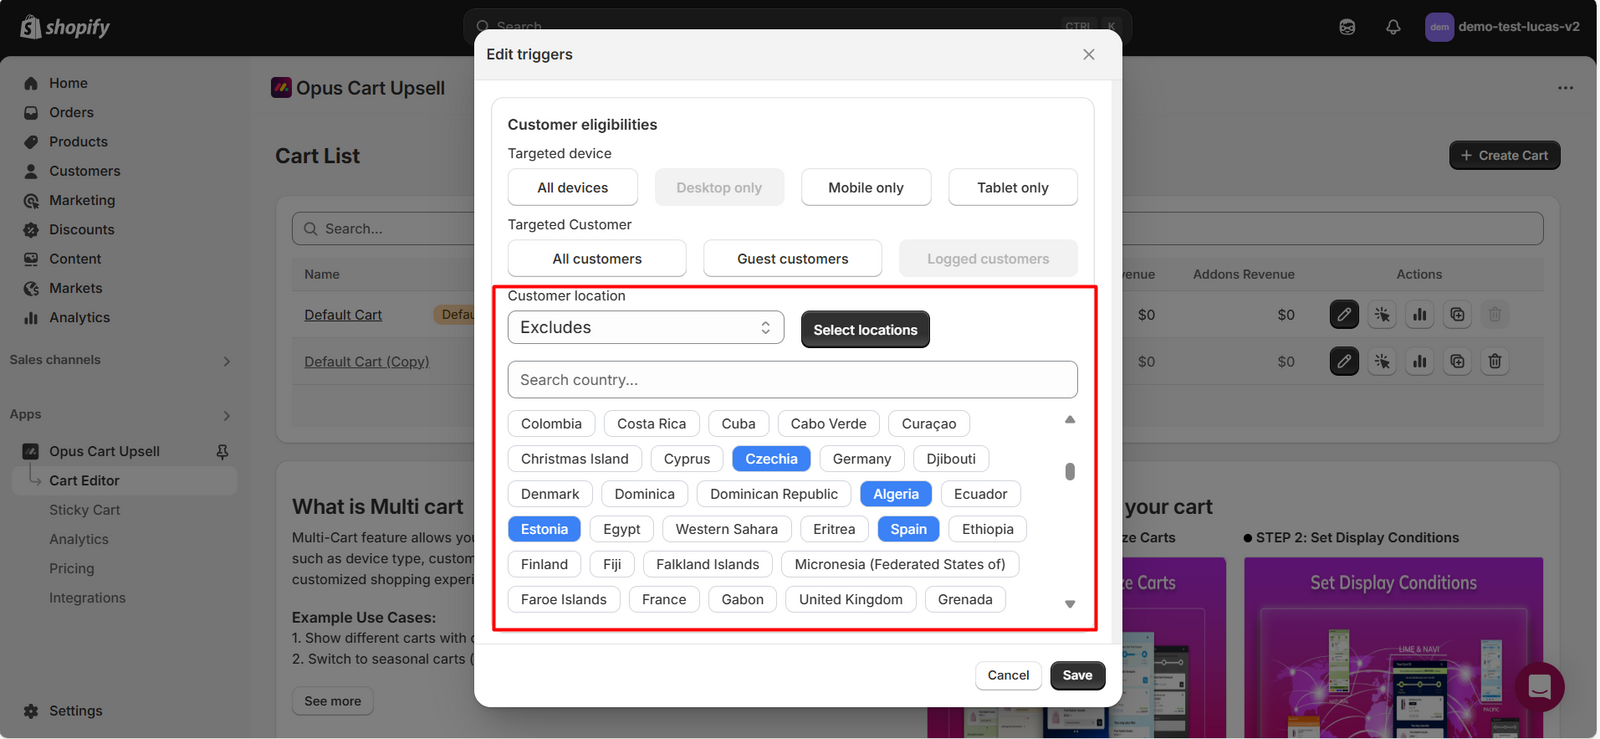
If you want the cart to be shown only for specific countries, choose Exclude > Select Locations.
Select your start date and end date.
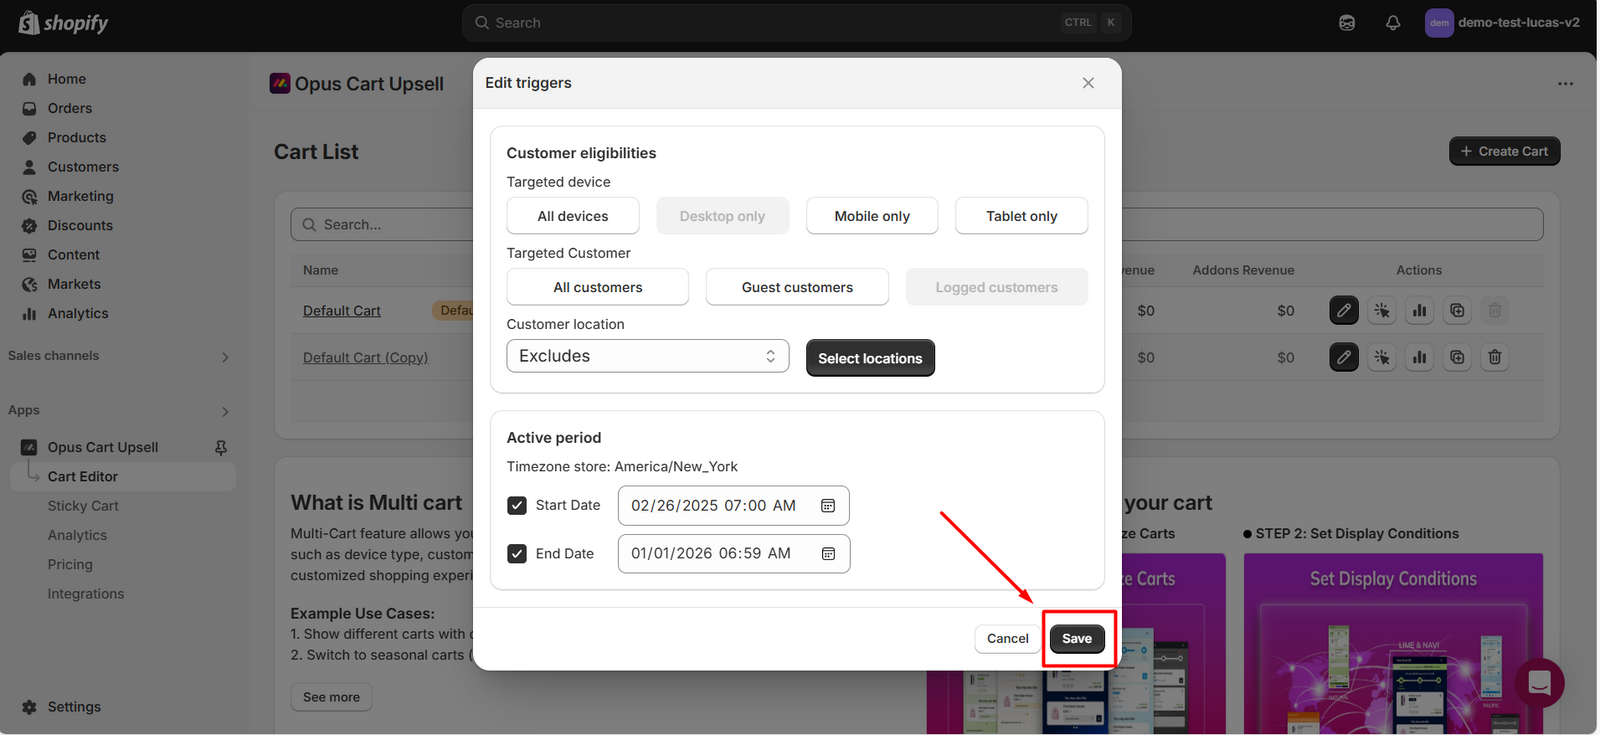
Click save.
Activate the cart.
Step 3: Check how the cart works on store front
Need help? Let us know via in-app live chat or email: help@opusecom.co🤩
Still need help?
Our support team is available 24/7. Contact support →