

Headless Configuration
Headless configuration allows your mobile app to connect directly with Shopify Customer Account API, enabling passwordless login (OTP / magic link). This…
1. Overview
Headless configuration allows your mobile app to connect directly with Shopify Customer Account API, enabling passwordless login (OTP / magic link). This helps reduce friction and improve conversion rates.
2. Prerequisites
Before getting started, make sure:
Your store is using Customer Accounts (New version)
You have Admin access to the Shopify store
You can access the Ego Mobile Builder Dashboard
3. Setup Instructions
Step 1: Enable Headless in Shopify
Go to Shopify App Store
Install Headless
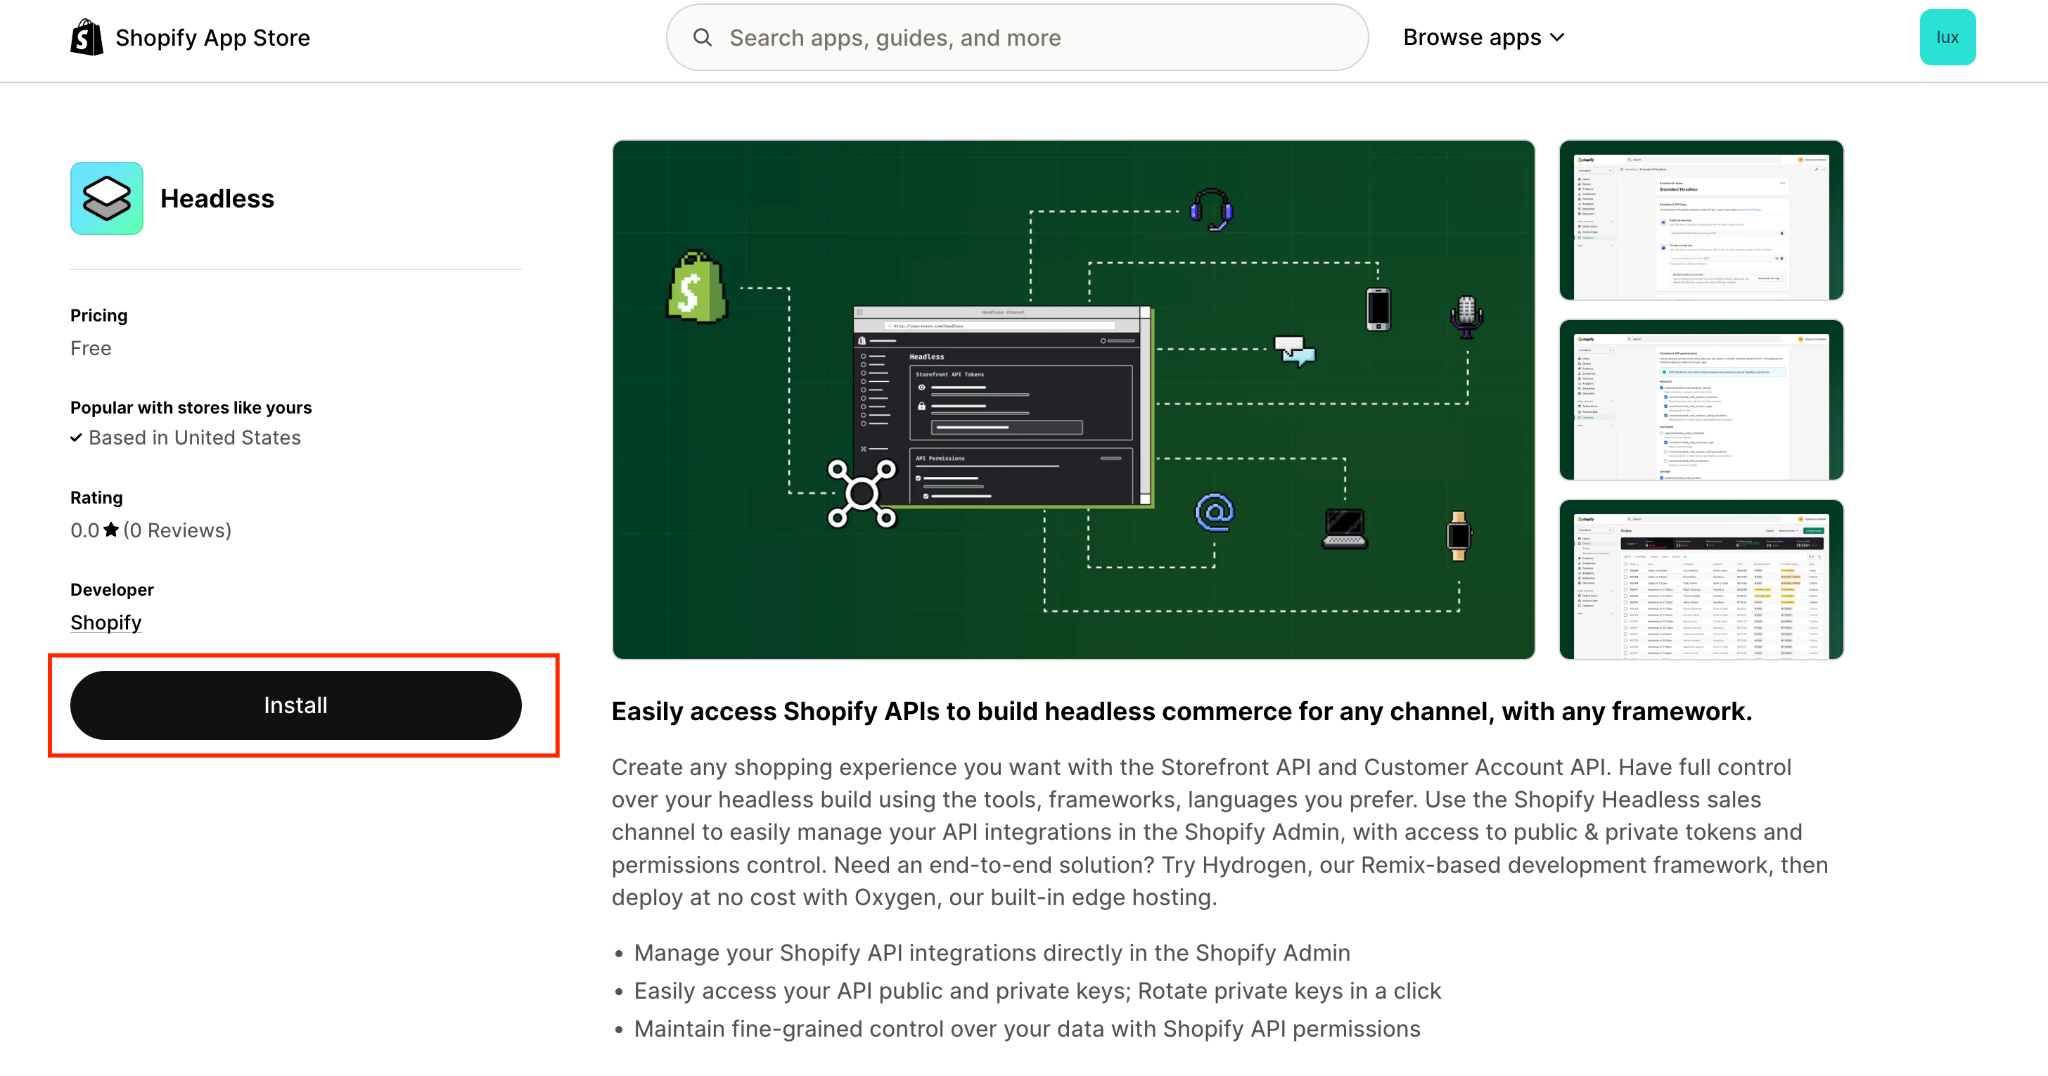
👉 If you don’t see this option, your store may not support it or Customer Accounts (new version) is not enabled.
Step 2: Create Storefront API
In the Headless page
Click Create Storefront
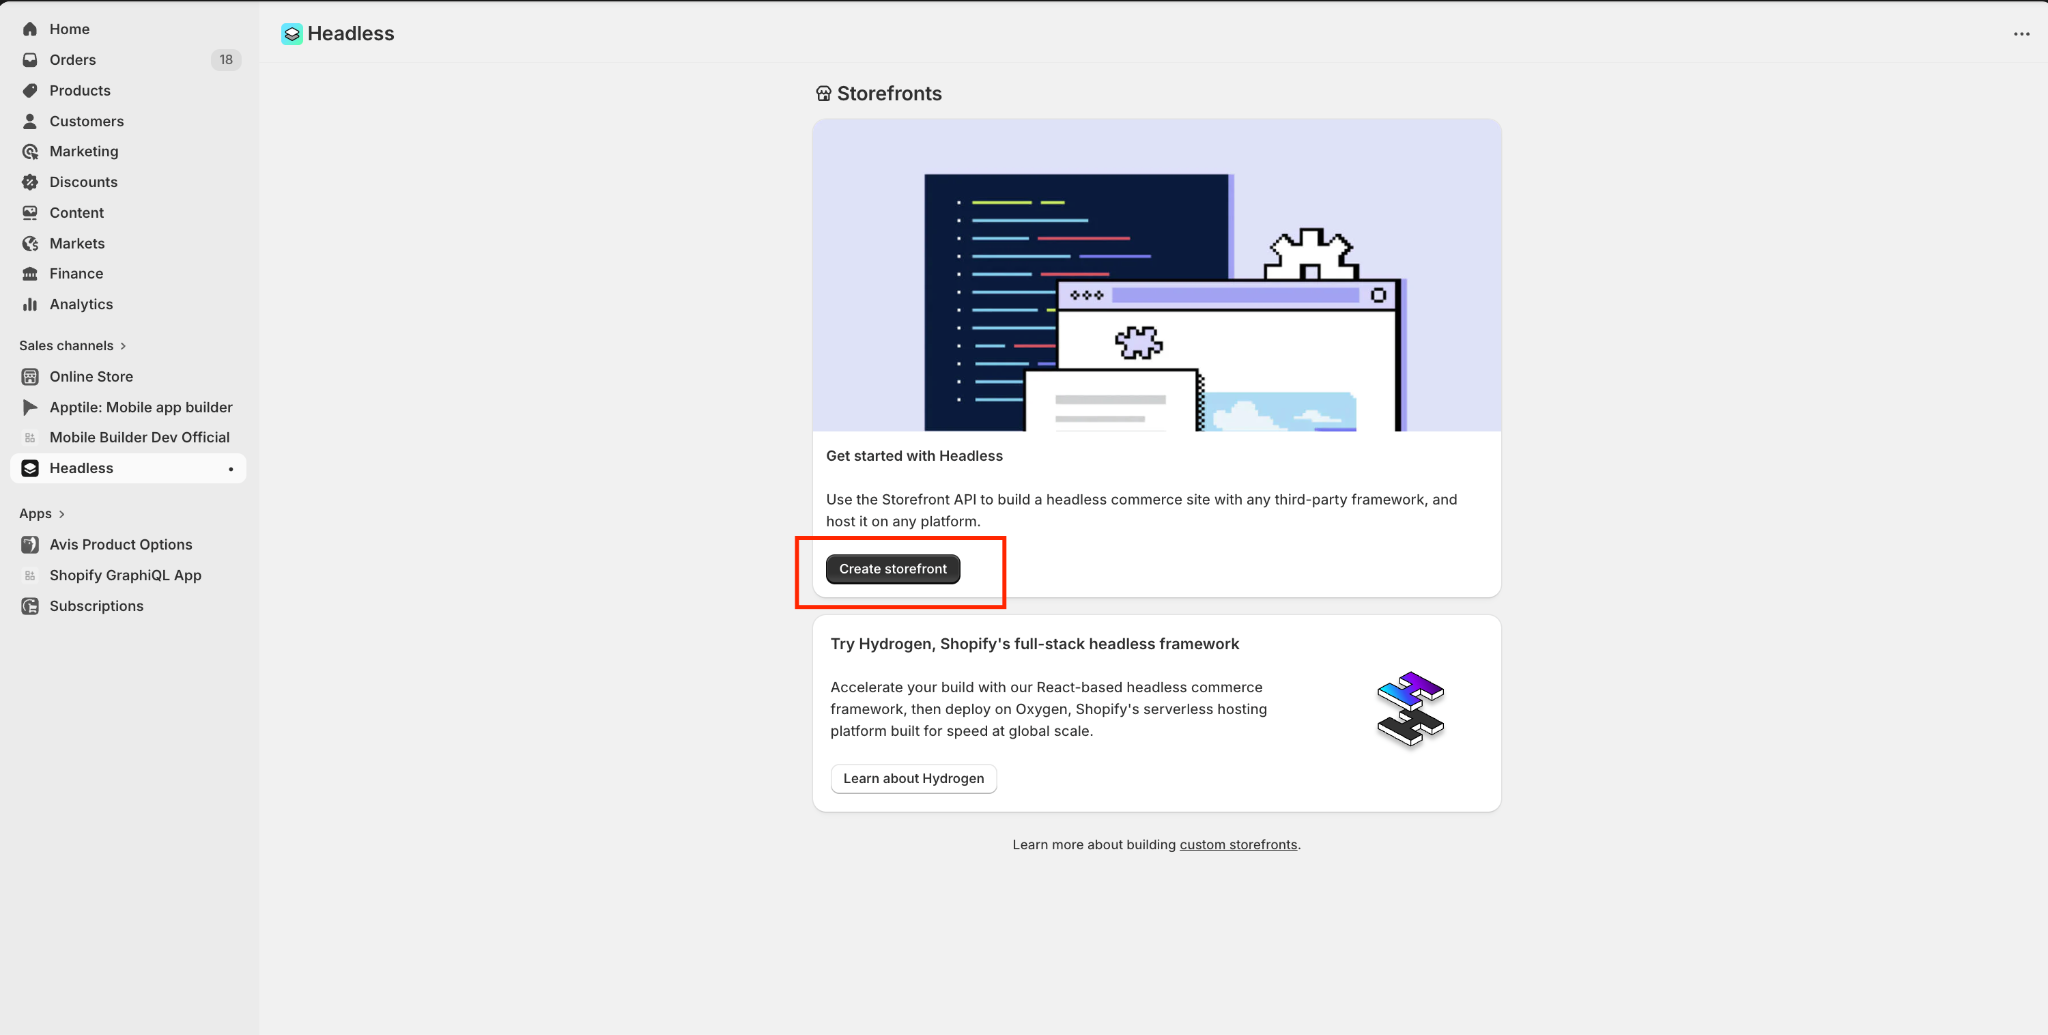
✅ Result:
A Storefront API is created for your mobile app connection
Step 3: Access Customer Account API
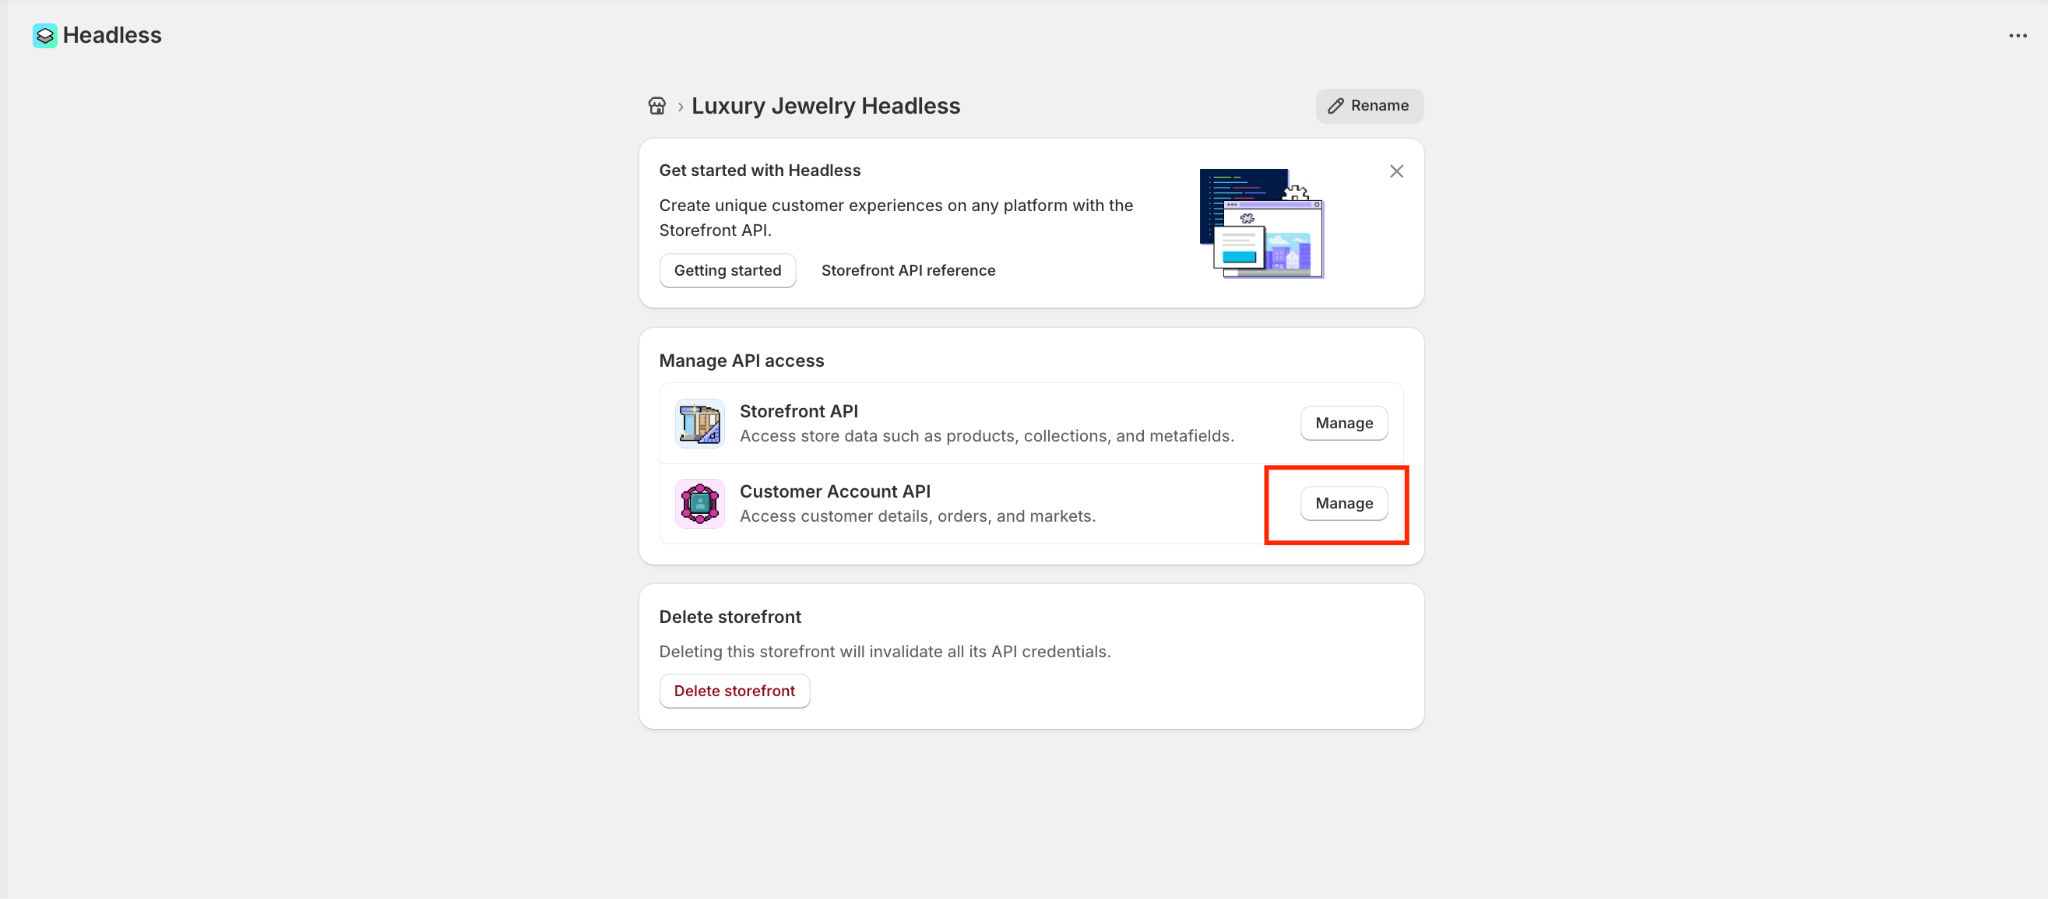
In the Headless page
Locate Customer Account API
Click Manage
Step 4: Configure Client Type
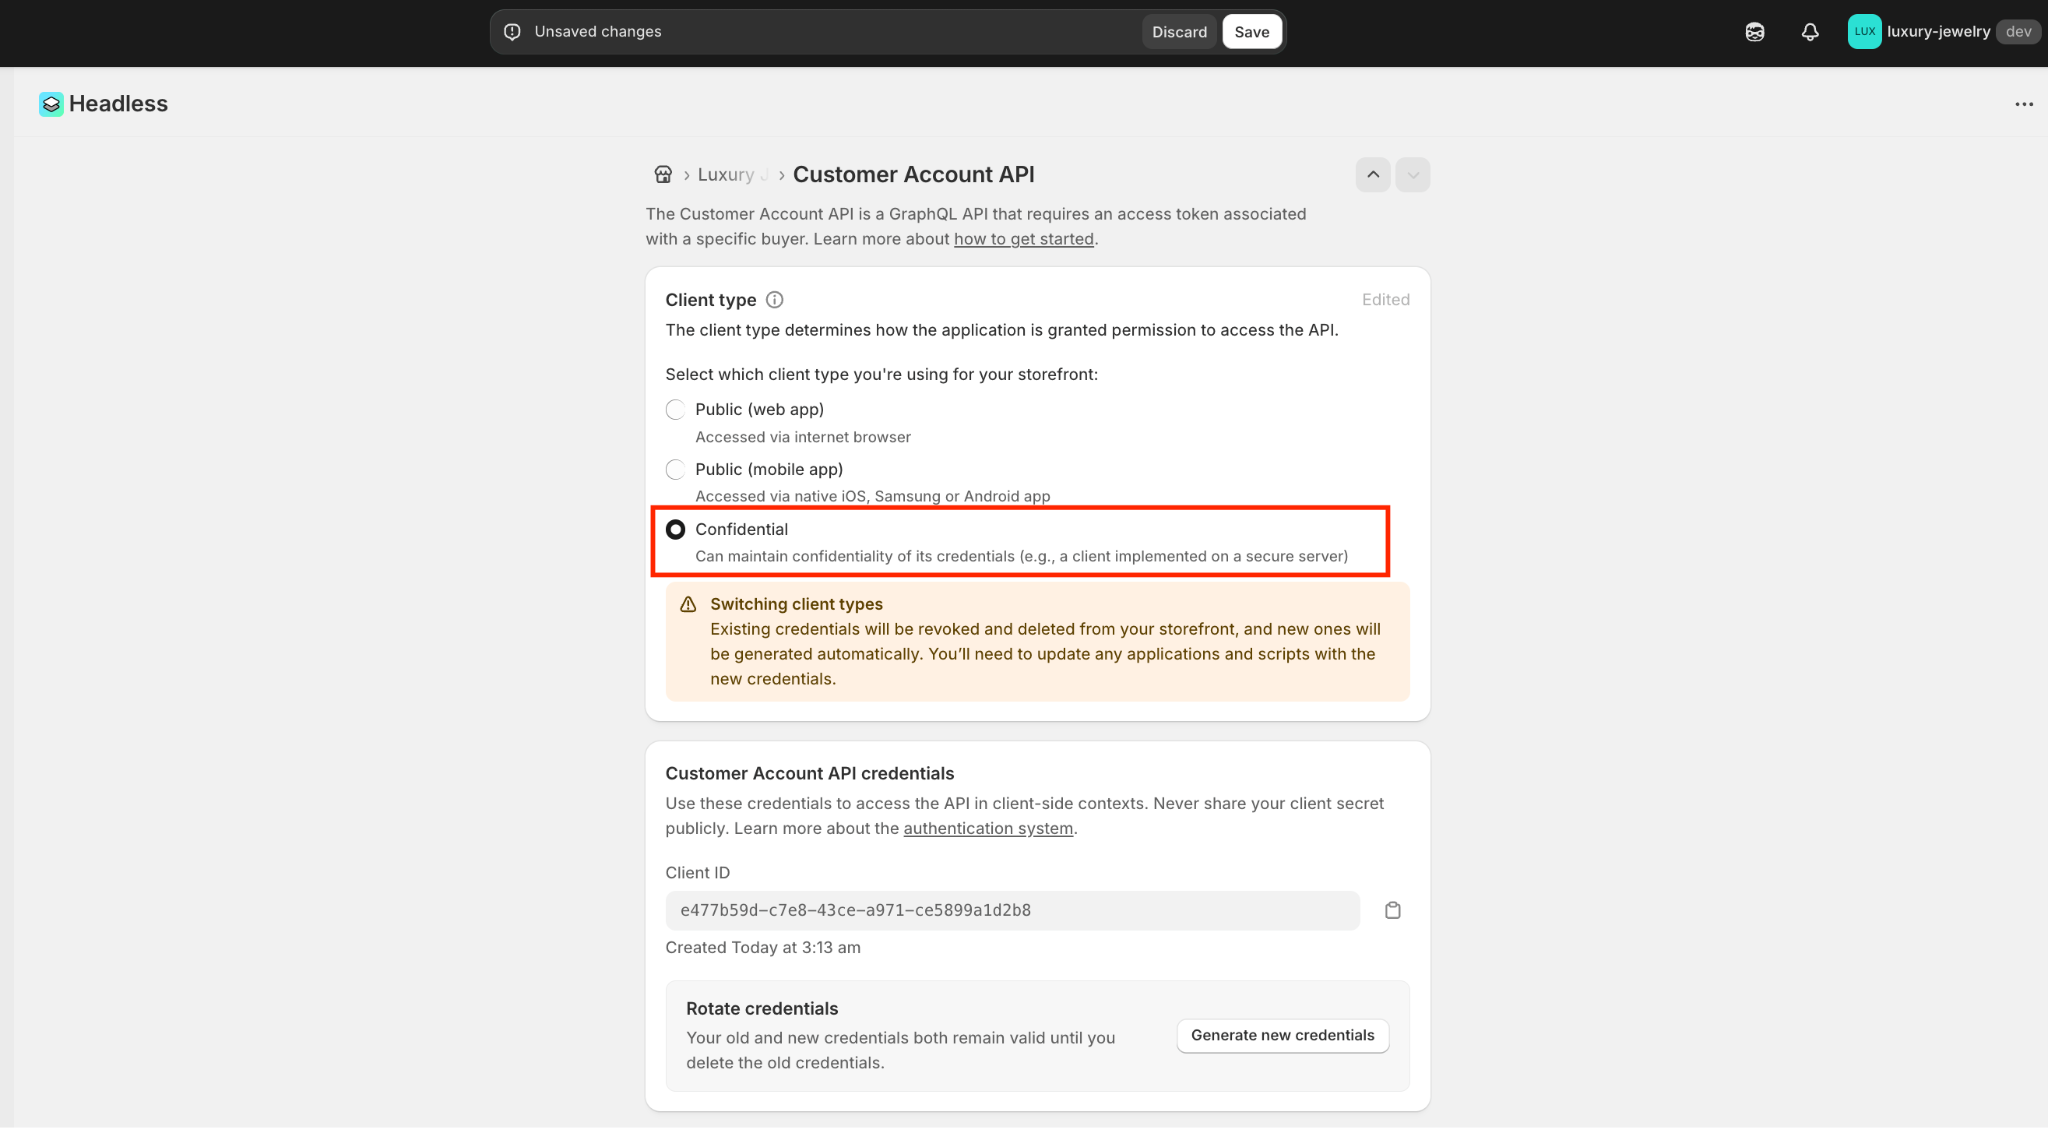
In the Customer Account API settings:
Select Client type = Confidential
In Application setup, locate Callback URI(s) (required)
Add the following URL:
https://mobile.opusecom.co/api/v1/auth-store/callback
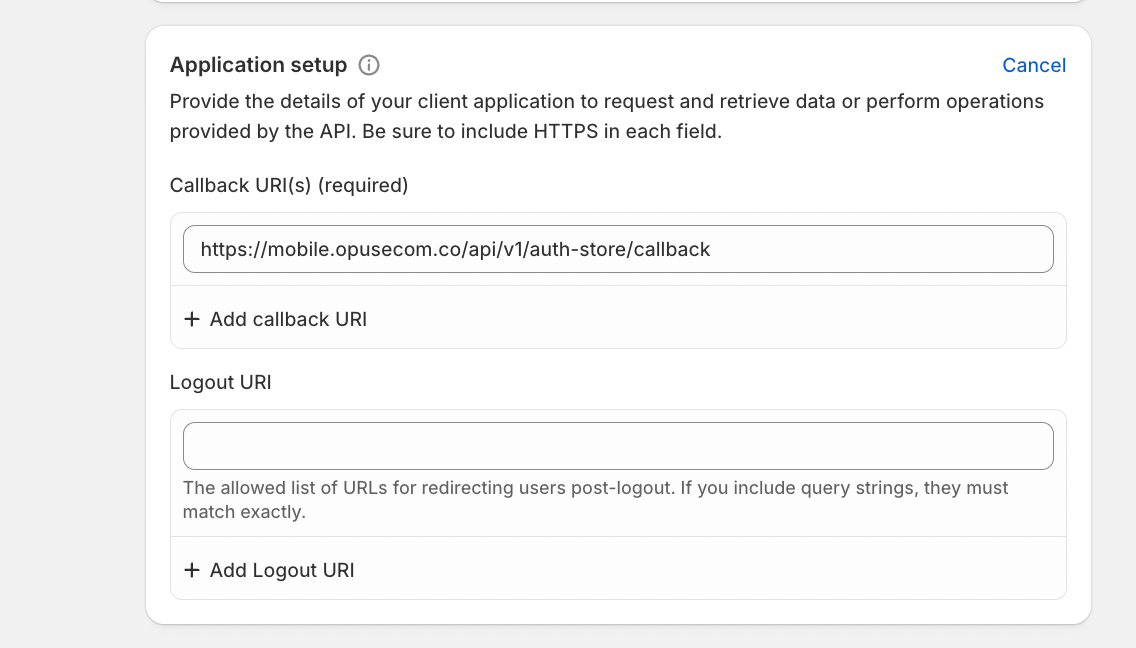
Ensure the URL is entered correctly (no extra spaces or typos)
📌 Explanation:
A Confidential client allows the use of a Client Secret, which is required for secure authentication in mobile apps
Step 5: Save & Retrieve Credentials
Click Save
The system will display:
Client ID
Client Secret
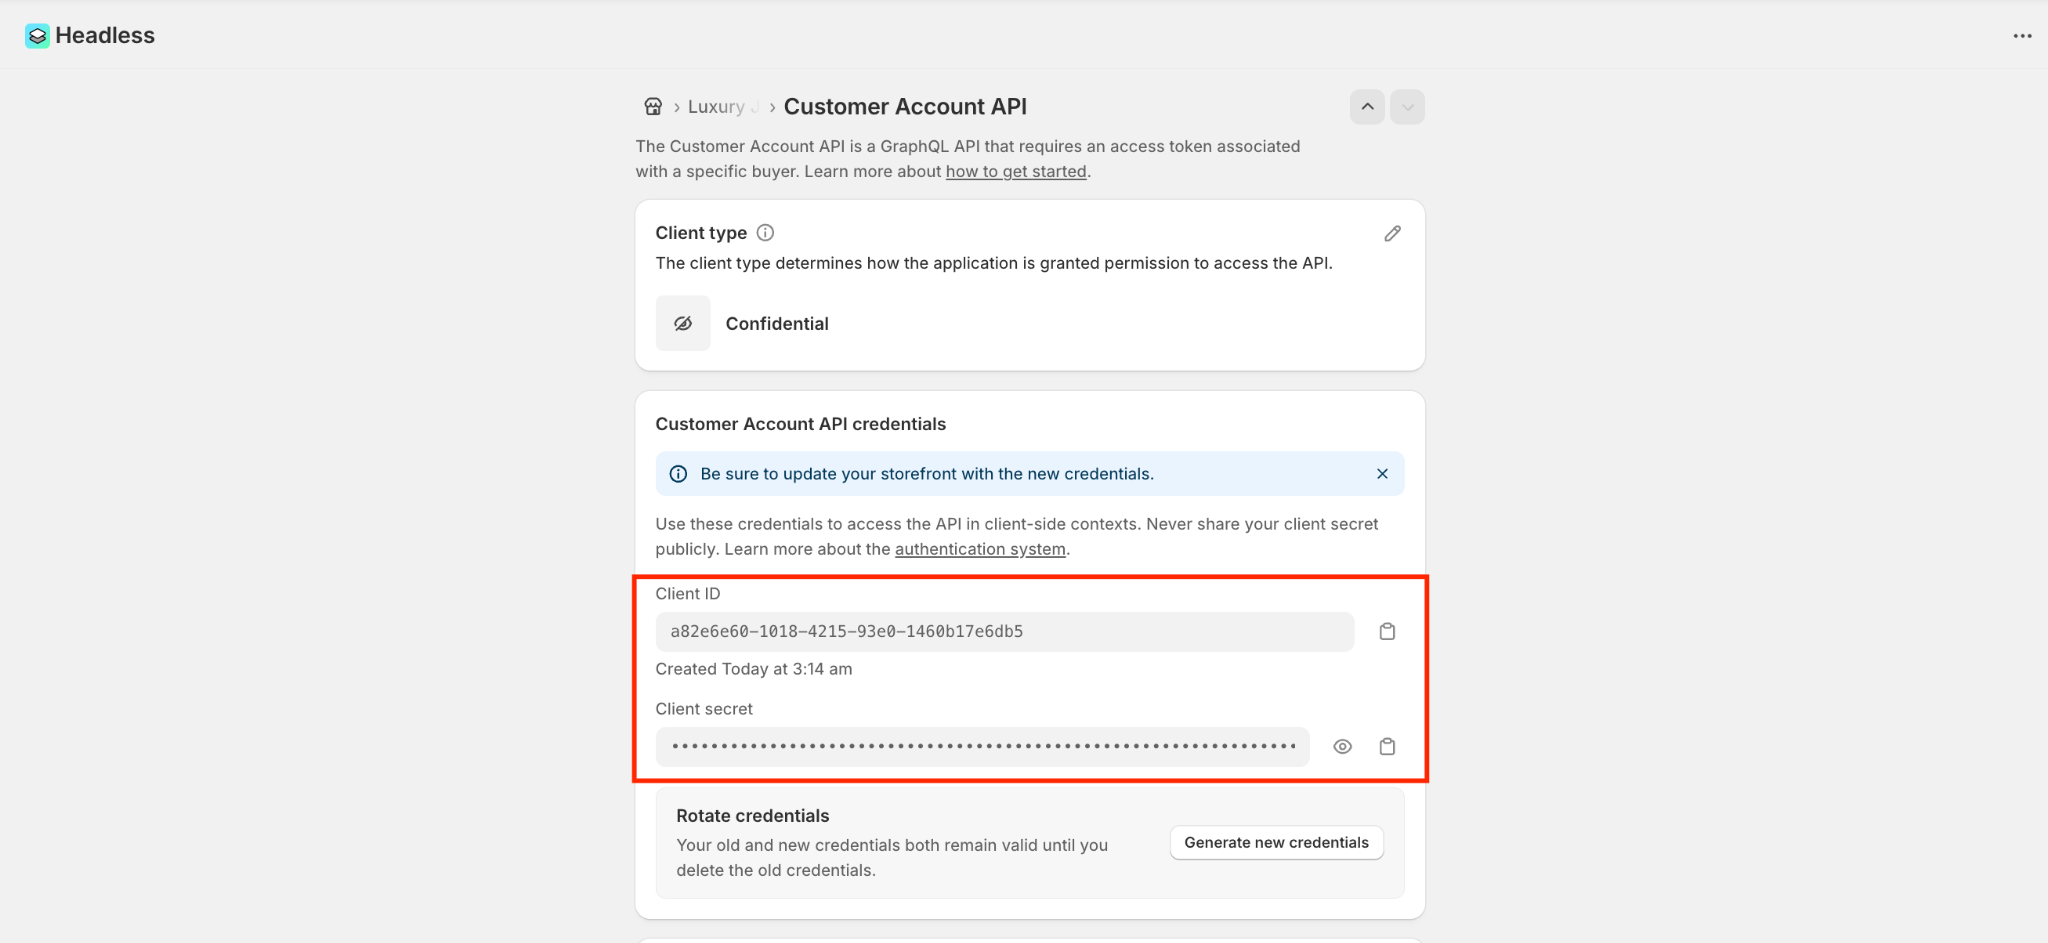
⚠️ Important:
The Client Secret is shown only once
Save it immediately (recommended: password manager or secure vault)
Step 6: Configure in Ego Mobile Builder
Go to Ego Mobile Builder Dashboard
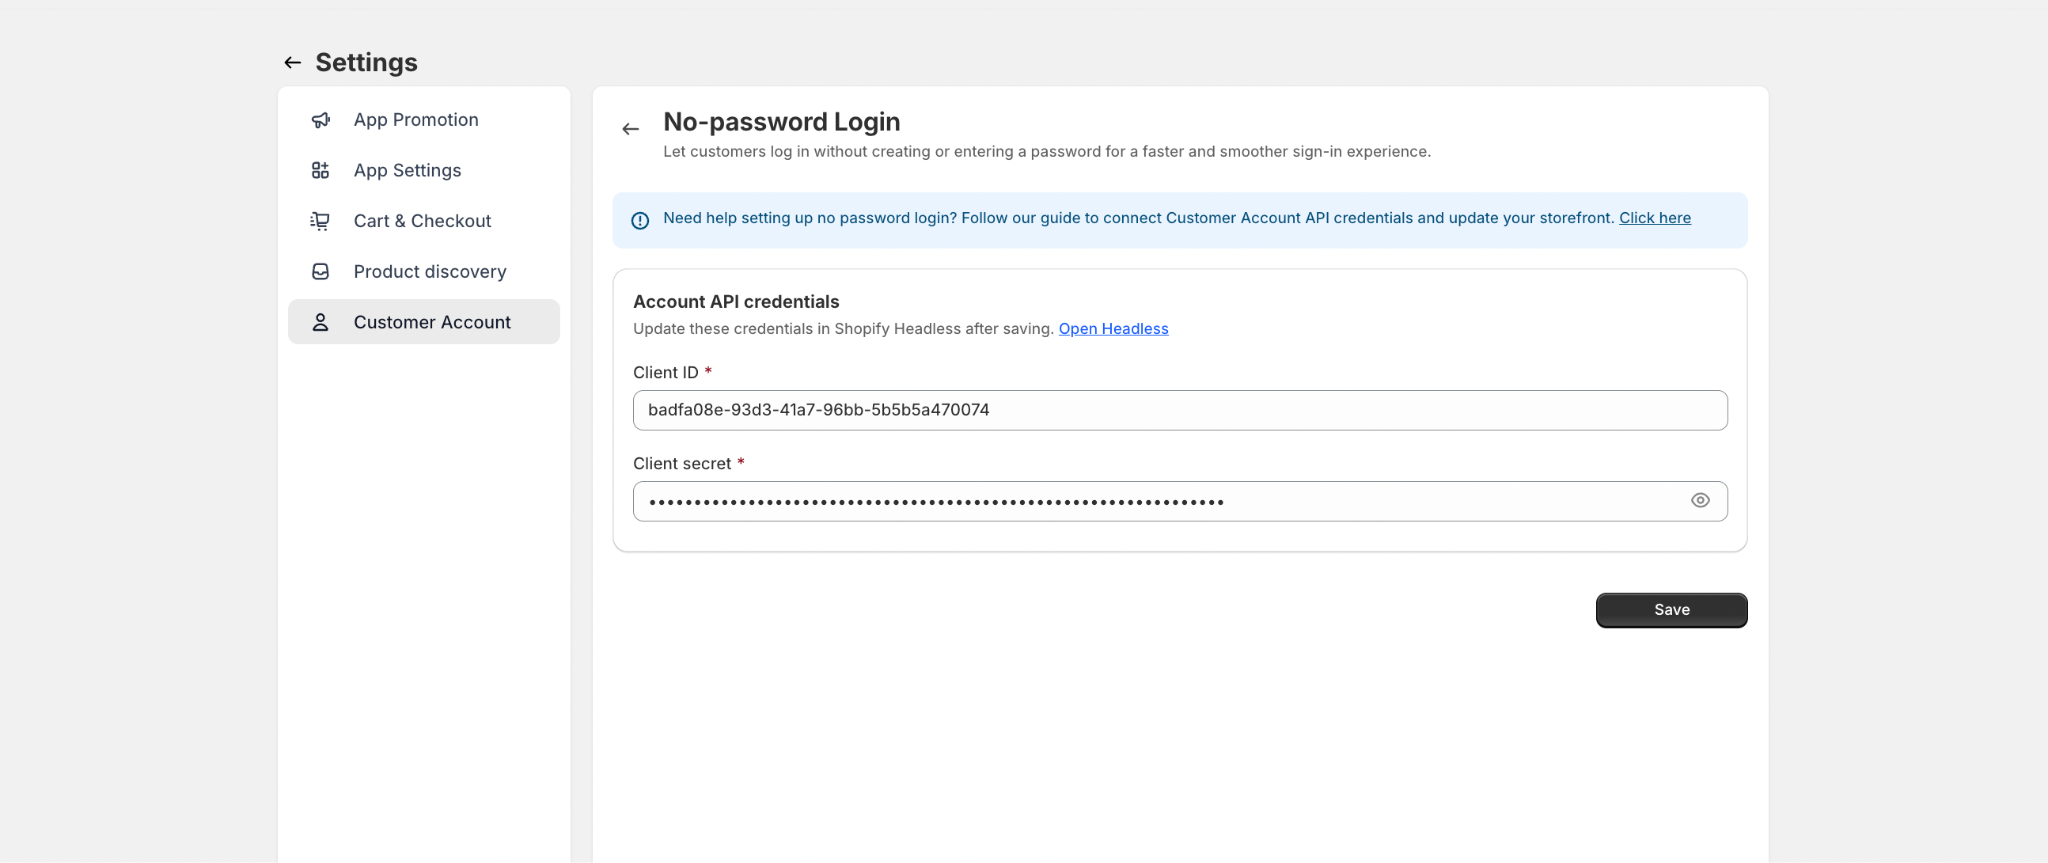
Navigate to Settings → Customer Account → No-password Login
Enter:
Client ID
Client Secret
Click Save
Frequently Asked Questions
1. What is Headless in Shopify?
Headless is a Shopify setup that allows external applications, such as your mobile app, to securely connect with Shopify APIs and customer account services.
2. How does Headless login work with Ego Mobile Builder?
Ego Mobile Builder connects to Shopify Customer Account API through Headless. When customers log in, Shopify verifies their identity through passwordless authentication, such as OTP or a magic link, and then securely returns the login result to the mobile app.
3. Why can’t I find or enable Headless in Shopify?
Your store may not support Headless yet, or the new version of Shopify Customer Accounts may not be enabled. Make sure your store meets the prerequisites before continuing.
4. Where can I find the Client ID and Client Secret?
After you save the Customer Account API configuration in Shopify, the Client ID and Client Secret will be generated. Save the Client Secret immediately because Shopify only displays it once.
5. Where do I enter the Client ID and Client Secret in Ego Mobile Builder?
Go to Settings → Customer Account → No-password Login, enter the Client ID and Client Secret, then click Save.
Still need help?
Our support team is available 24/7. Contact support →